
Why You’ll Love This Popovers
Hey there, I’m Valentina Lewis from Valentina Recipes, and I absolutely adore sharing simple recipes like this one for popovers that bring a little magic to your kitchen. Popovers are one of those easy treats that anyone can whip up, and they’re perfect if you’re a home cook looking for something quick yet impressive. Let me tell you why this recipe will quickly become your go-to for busy mornings or impromptu dinners you’ll love how straightforward it is to make something so light and fluffy right at home.
This popover recipe is simple to prepare, requiring minimal ingredients and a quick cooking time, making it ideal for busy schedules or last-minute meals. It’s packed with wholesome ingredients that offer excellent nutritional benefits, like proteins from eggs that support your daily wellness with a balanced mix of essential nutrients. Plus, the versatility means you can adapt it to various dietary needs, such as vegan or gluten-free options, so everyone in your family can enjoy it. What really sets these popovers apart is their distinctive flavor and airy texture, turning an ordinary meal into something truly special that you’ll want to make again and again.
As a busy parent or working professional myself, I know how important it is to have recipes that fit into a hectic day without sacrificing taste. Imagine pulling these golden puffs out of the oven their light, airy insides and crisp exteriors are just A LOT of fun to eat. Whether you’re a student grabbing a quick breakfast or a baking enthusiast experimenting in the kitchen, this recipe will inspire you to create memorable moments around the table. It’s all about that joy of cooking with simple, everyday items that deliver big on flavor and satisfaction.
Benefits for Your Lifestyle
If you’re a diet-conscious individual, these popovers can be tweaked to fit your goals while still feeling indulgent. For food enthusiasts and travelers, they pair wonderfully with all sorts of meals, evoking that homey comfort no matter where you are. Newlyweds might appreciate how easy it is to impress guests, and seniors will love the straightforward steps that don’t require fancy equipment. Trust me, once you try this, you’ll see why popovers have a special place in my heart they’re versatile, delicious, and oh-so-satisfying for anyone who loves good food.
Essential Ingredients for Popovers
When it comes to making the perfect popovers, starting with the right ingredients is key, and I always make sure to use fresh, quality items straight from my pantry. This recipe keeps things simple, focusing on basics that create that incredible rise and fluffy texture you crave. Let me walk you through the exact list so you can gather everything and get baking without any guesswork it’s all about that straightforward approach I love sharing on my blog.
Main Ingredients List
- 4 large eggs, at room temperature
- 1 ½ cups (360 ml) whole milk, at room temperature
- ¾ teaspoon salt
- 1 ½ cups (190 g) all-purpose flour, spooned and leveled
- 2 tablespoons (28 g) unsalted butter, melted, plus extra butter for greasing the pan
These ingredients come together to form a batter that’s thin but transforms magically in the oven. I recommend measuring everything precisely to ensure your popovers turn out just right it’s one of those small tips that makes a big difference in your baking adventures.
Special Dietary Options
For those of you with specific dietary preferences, don’t worry I’ve got you covered. You can easily swap in plant-based milk for the whole milk if you’re going vegan, or use a gluten-free flour blend to keep things inclusive. As someone who loves adapting recipes for friends and family, I always suggest experimenting a bit to match your needs while keeping that light and fluffy result intact.
| Ingredient Type | Standard Option | Substitution for Dietary Needs |
|---|---|---|
| Milk | 1 ½ cups (360 ml) whole milk | Plant-based milk like almond or oat |
| Flour | 1 ½ cups (190 g) all-purpose flour | Gluten-free flour blend |
| Eggs | 4 large eggs | Flax eggs for vegan versions |
How to Prepare the Perfect Popovers: Step-by-Step Guide
Alright, let’s dive into the fun part actually making these popovers! As someone who bakes these all the time, I promise this step-by-step guide will make you feel like a pro, even if you’re a beginner. We’ll use the ingredients we just discussed, and I’ll share the exact directions to ensure your popovers come out light, fluffy, and full of that wonderful rise. Remember, the key is in the details, like letting the batter rest and preheating your pan just right.
- In a bowl, whisk the eggs, milk, and salt together until smooth.
- Add the flour and whisk until just combined; no lumps should remain.
- Whisk in the melted butter. Let the batter rest for a few minutes.
- Pre-heat the oven to 450 °F (230 °C). Place the popover pan (or muffin tin) in the oven and let the wells heat for about 2 minutes.
- Remove the hot pan, add a small amount of butter to each well, and immediately pour ¼ cup (≈60 ml) batter into each.
- Bake at 450 °F (230 °C) for 20 minutes.
- Reduce the oven temperature to 350 °F (175 °C) and continue baking for another 10 minutes.
- Pierce the tops of the popovers with a knife to release steam, then serve them warm.
This process takes about 10 minutes to prep and 30 minutes to cook, for a total of 40 minutes perfect for a quick treat. If you’re new to baking, make sure to follow these steps closely, as they help achieve that dramatic puff everyone loves. For more ideas on simple bakes, you might enjoy my homemade biscuits recipe, which pairs great with popovers for a cozy meal.
Tips for Success
One thing I always tell my readers is to keep your ingredients at room temperature for the best rise it really makes a difference. Preheating the pan gives the batter that immediate lift, and even if it looks thin at first, it expands beautifully in the oven. Baking on a lower rack helps avoid browning the tops too quickly, so your popovers stay perfectly puffed inside.

Dietary Substitutions to Customize Your Popovers
One of the things I love most about this popovers recipe is how flexible it is you can tweak it to fit your lifestyle without losing that amazing texture and taste. Whether you’re vegan, gluten-free, or just watching your calories, I’ll walk you through some easy swaps that keep things delicious. It’s all about making cooking accessible and enjoyable for everyone, just like I aim to do on my blog.
- Substitute eggs with flaxseed or chia seed mixture for vegan options.
- Use dairy-free milk alternatives like almond or soy milk for lactose intolerance.
- Incorporate roasted vegetables such as bell peppers, spinach, or mushrooms for added flavor and nutrition.
- Experiment with sauces like vegan cheese or dairy-free sour cream.
- Adjust seasonings with herbs like thyme, rosemary, or garlic powder based on your preferences.
These changes let you personalize your popovers while keeping them light and fluffy. For instance, if you’re a baking enthusiast exploring new flavors, adding herbs can turn a simple side into something exciting.
Mastering Popovers: Advanced Tips and Variations
Once you’re comfortable with the basics, let’s level up your popovers game I’m excited to share some pro tips that have made my baking even better over the years. You’ll find that a few tweaks can take your popovers from good to outstanding, whether you’re adding flavors or perfecting the technique. As a food enthusiast, I love experimenting, and I think you will too!
Pro Techniques and Ideas
- Chill the batter before baking for an improved rise; this helps create taller, airier popovers.
- Avoid opening the oven door during the initial bake to prevent the popovers from collapsing.
- Add shredded cheeses, fresh herbs, or spices into the batter for unique taste profiles try mixing in cheddar for a savory twist.
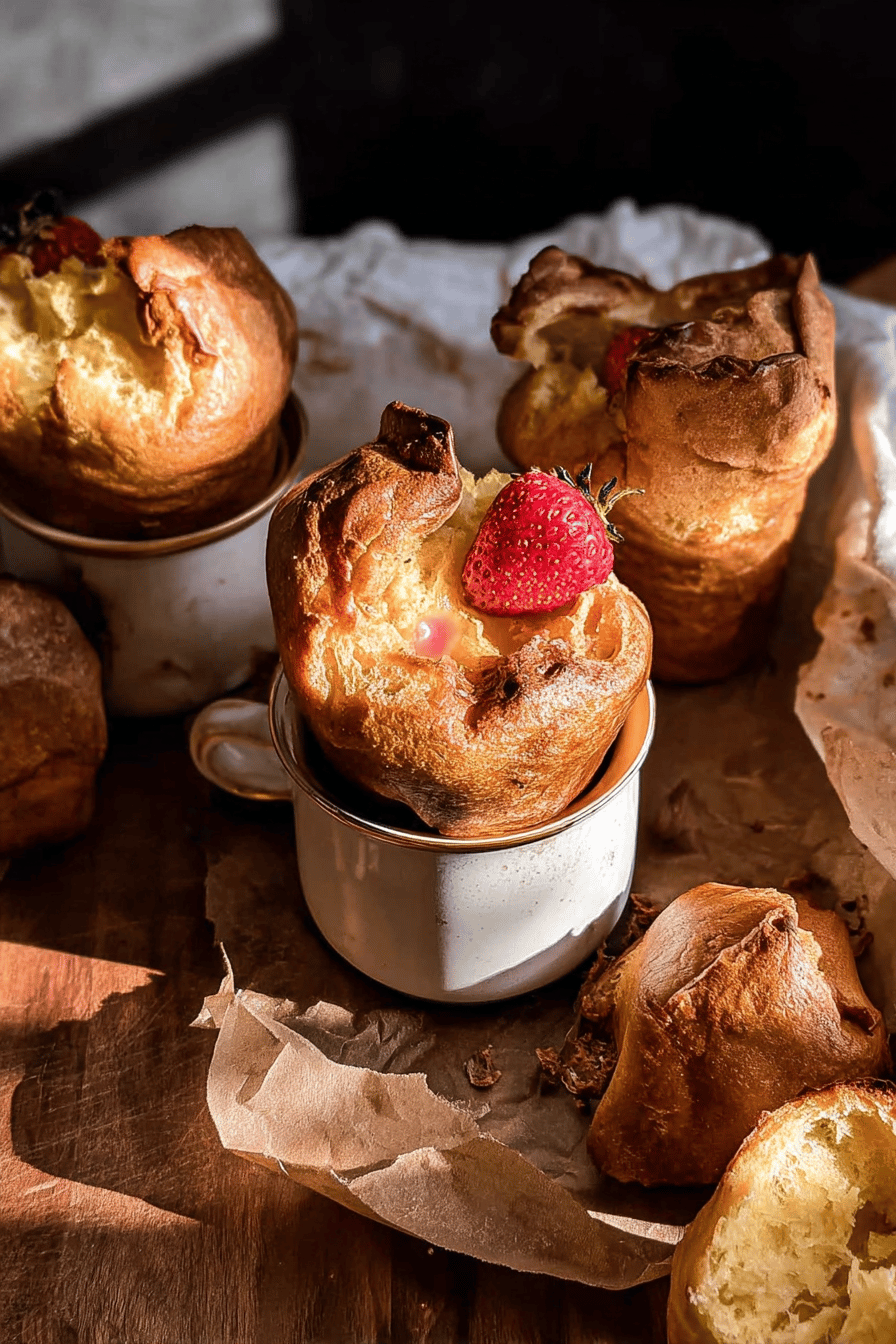
- Serve in decorative dishes garnished with fresh herbs or a sprinkle of powdered sugar to make them look as good as they taste.
- Prepare the batter the night before and refrigerate it; bake fresh in the morning for optimal texture and convenience.
If you’re looking for more baking inspiration, check out my oatmeal pancakes recipe for another easy variation that complements these tips.
How to Store Popovers: Best Practices
After all that effort, you want your popovers to stay fresh and tasty, right? I always make sure to store them properly so they don’t lose that crisp exterior I love so much. Let’s go over some simple methods that work for me, especially if you’re meal prepping or have leftovers from a big batch.
- Store in an airtight container for up to 2 days to maintain freshness.
- Wrap individually in foil and freeze for up to 1 month; thaw before reheating.
- Warm in a preheated oven at 350 °F (175 °C) for 5-10 minutes to restore crispiness.
- Bake in batches and store properly for quick meals; avoid plastic wrap, which can make them soggy.
FAQs: Frequently Asked Questions About Popovers
What exactly are popovers and how do they taste?
How do I make popovers that rise well and stay crisp?
Can I bake popovers without a special popover pan?
What are some popular ways to serve popovers?
How should I store leftover popovers to keep their texture?

Popovers
- Total Time: 40 minutes
- Yield: 12 popovers (approximately) 1x
- Diet: Vegetarian
Description
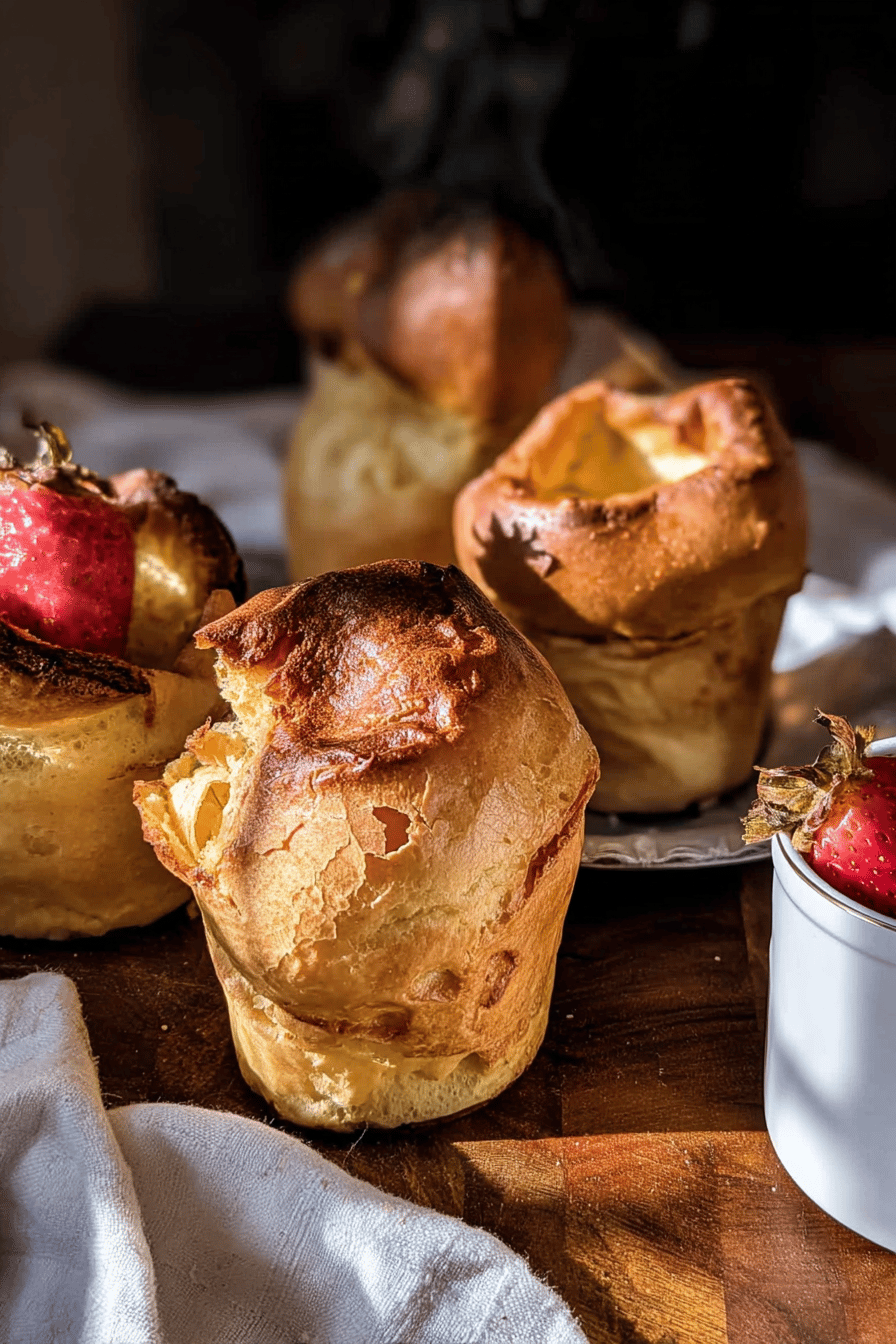
🥐 These popovers rise into airy, golden puffs that are perfect for breakfast or a side.
✨ With simple pantry ingredients and a few tricks, you can achieve a light, fluffy texture every time.
Ingredients
4 large eggs
1 ½ cups (360 ml) whole milk
¾ teaspoon salt
1 ½ cups (190 g) all-purpose flour
2 tablespoons (28 g) unsalted butter, melted
extra butter for greasing the pan
Instructions
1-In a bowl, whisk the eggs, milk, and salt together until smooth.
2-Add the flour and whisk until just combined; no lumps should remain.
3-Whisk in the melted butter. Let the batter rest for a few minutes.
4-Pre-heat the oven to 450 °F (230 °C). Place the popover pan (or muffin tin) in the oven and let the wells heat for about 2 minutes.
5-Remove the hot pan, add a small amount of butter to each well, and immediately pour ¼ cup (≈60 ml) batter into each.
6-Bake at 450 °F (230 °C) for 20 minutes.
7-Reduce the oven temperature to 350 °F (175 °C) and continue baking for another 10 minutes.
8-Pierce the tops of the popovers with a knife to release steam, then serve them warm.
Notes
🔥 Keep all ingredients at room temperature to help the batter rise maximally.
🧈 Pre‑heat the pan so the batter gets an immediate lift when poured in.
⏱️ Serve the popovers right away; they soften quickly as they cool.
- Prep Time: 10 minutes
- Cook Time: 30 minutes
- Category: Breakfast
- Method: Baking
- Cuisine: American
Nutrition
- Serving Size: 1 popover (≈50 g)
- Calories: 95 kcal
- Sugar: 1 g
- Sodium: 210 mg
- Fat: 5 g
- Saturated Fat: 2.5 g
- Unsaturated Fat: 2 g
- Trans Fat: 0 g
- Carbohydrates: 8 g
- Fiber: 0 g
- Protein: 4 g
- Cholesterol: 90 mg
Keywords: popovers, fluffy, homemade, breakfast