
Why You’ll Love This rocky road candy
- Ease of preparation: This rocky road candy recipe is incredibly simple and quick, requiring only a few steps and basic ingredients. Melting chocolate and mixing in marshmallows and nuts means you can whip up this delicious treat in no time, perfect for beginners or last-minute dessert plans.
- Health benefits: Featuring nutrient-rich nuts and the antioxidant power of dark chocolate, this rocky road candy offers a more mindful indulgence than many sweets. Nuts provide healthy fats and protein, contributing to balanced energy and satiety.
- Versatility: Easily adapted for various dietary preferences, rocky road candy can be made vegan by choosing dairy-free chocolate and marshmallow alternatives, or gluten-free by verifying all ingredients. This no-bake dessert suits low-calorie diets with thoughtful ingredient swaps.
- Distinctive flavor: The delicious interplay of creamy, rich chocolate with chewy marshmallows and crunchy toasted nuts offers a unique texture and flavor combination. This rocky road candy stands out with its classic indulgence and customizable mix-ins.
Essential Ingredients for rocky road candy
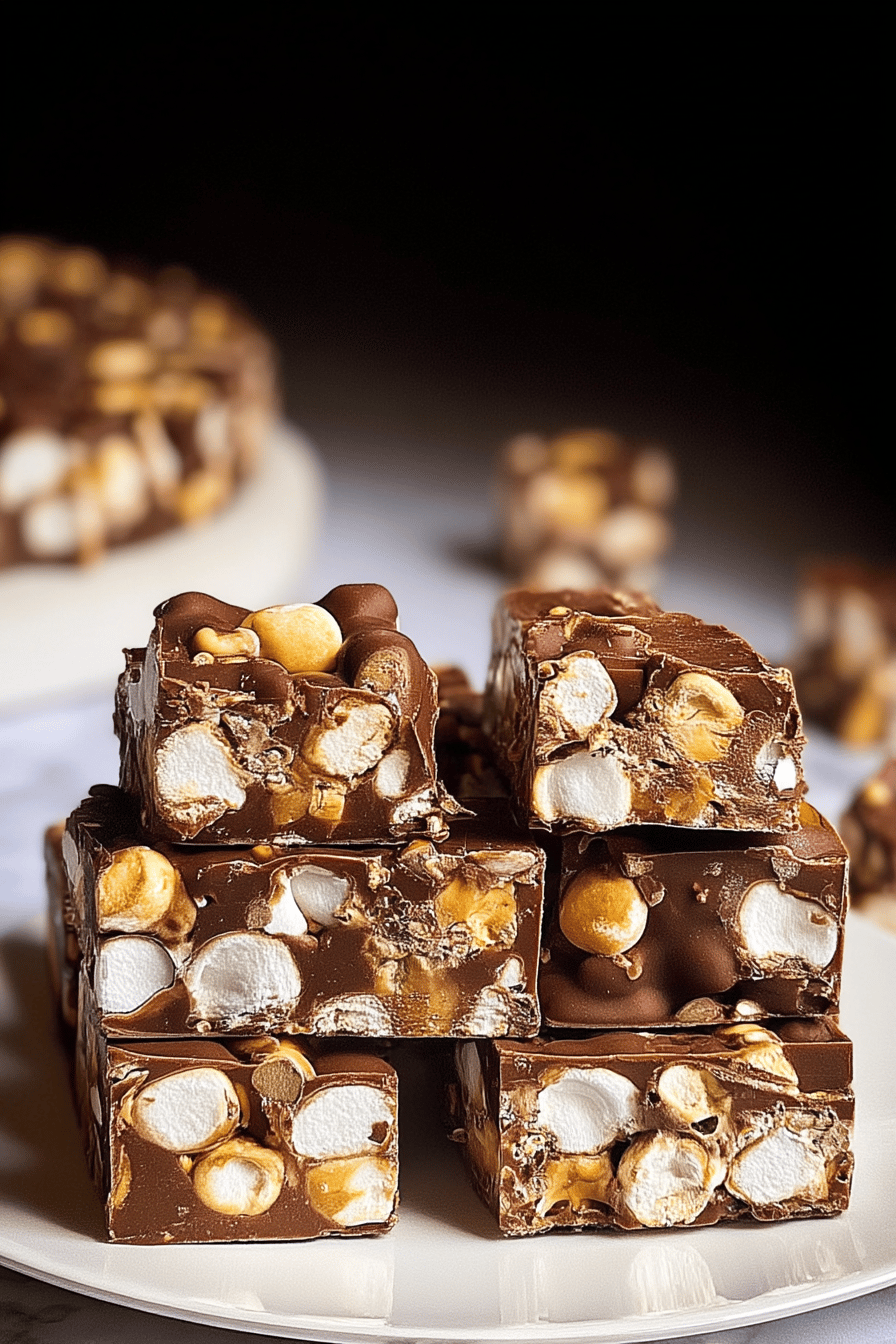
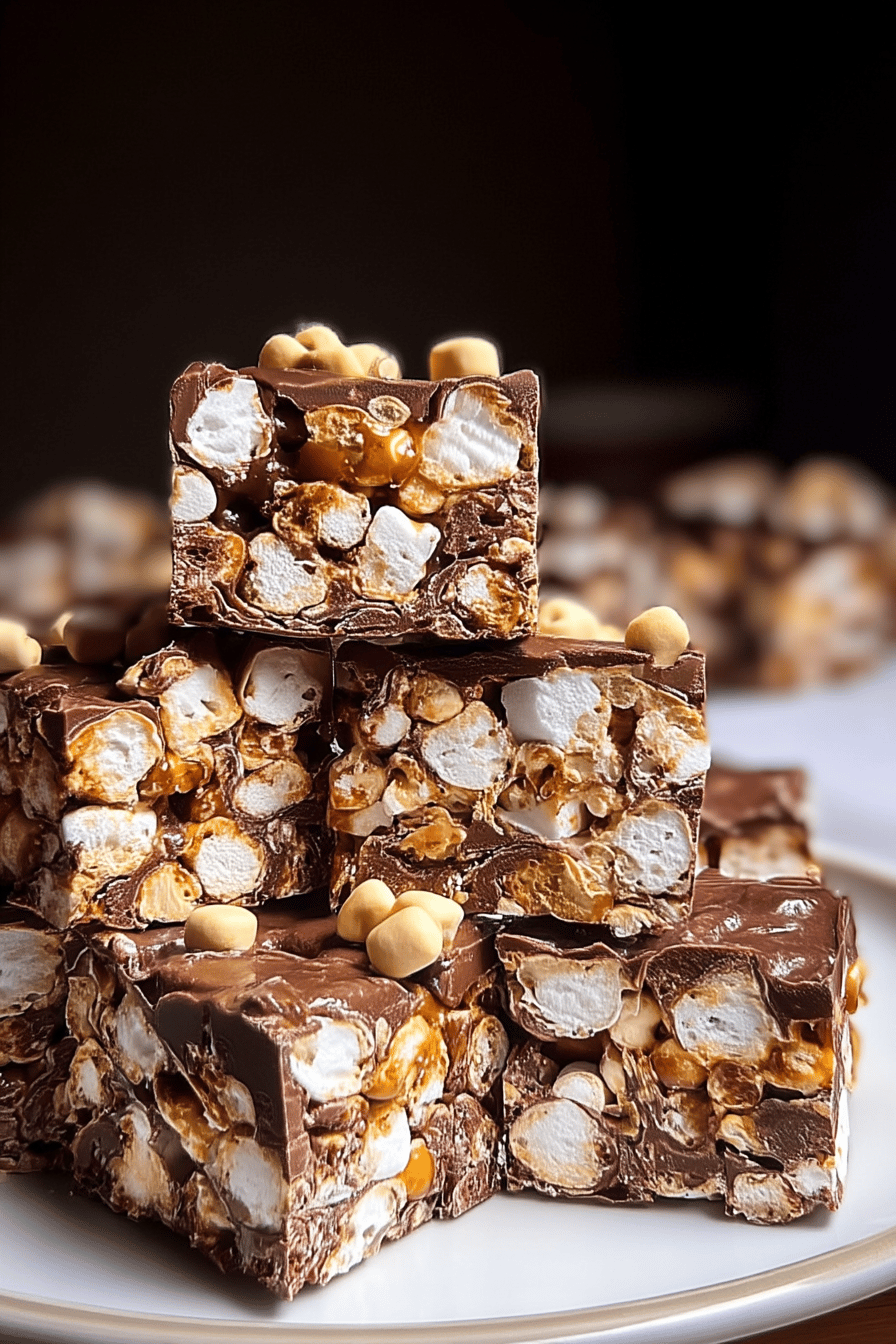
- 3 cups (about 510 grams) dark chocolate chips – provides deep, rich cocoa flavor and smooth texture
- 3 cups (approximately 180 grams) mini marshmallows – adds chewy sweetness and volume
- 1 cup (about 120 grams) toasted walnut pieces – offers crunchy texture and nutty aroma
- 2 tablespoons olive oil – helps melt the chocolate smoothly
- Optional ingredients: dried fruits, biscuit pieces, glacé cherries, shredded coconut, or peanuts – for flavor and texture variations
Special Dietary Options:
- Vegan: Use dairy-free dark chocolate and vegan marshmallows for a plant-based alternative
- Gluten-free: Ensure all ingredients, especially marshmallows and chocolate, are certified gluten-free
- Low-calorie: Substitute nuts with seeds and use sugar-free or reduced-calorie chocolate options
How to Prepare the Perfect rocky road candy: Step-by-Step Guide
First Step: Prepare your workspace
Line an 8×8-inch pan with parchment paper to prevent sticking. Gather all ingredients, measuring chocolate chips, mini marshmallows, and toasted nuts. Chop any additional mix-ins if desired.
Second Step: Melt the chocolate
In a microwave-safe bowl, combine 3 cups dark chocolate chips with 2 tablespoons olive oil. Microwave in 30-second intervals, stirring after each, until smooth and glossy. Alternatively, melt over a double boiler on low heat to avoid burning.
Third Step: Mix in marshmallows and nuts
Transfer melted chocolate to a large mixing bowl. Gently fold in 3 cups mini marshmallows and 1 cup toasted walnuts or your choice of nuts (almonds, cashews, peanuts, etc.). Ensure all pieces are coated evenly with chocolate.
Fourth Step: Spread mixture and chill
Spread the candy mixture evenly into the prepared pan, pressing lightly for even thickness. Refrigerate for 2 to 3 hours or until fully set and firm.
Final Step: Cut and serve
Once firm, remove from pan using parchment edges and cut into bite-sized squares or logs. Store in an airtight container. For dietary needs, swap ingredients accordingly during the mixing stage to accommodate vegan or gluten-free lifestyles.
Tip: Toasting nuts beforehand enhances their flavor and texture, making your rocky road candy even more irresistible.

Dietary Substitutions to Customize Your rocky road candy
Protein and Main Component Alternatives
- Replace walnuts with pumpkin or sunflower seeds for a nut-free version suitable for allergies.
- Use dairy-free chocolate and vegan marshmallows to make a plant-based rocky road candy.
- Choose sugar-free or reduced-sugar chocolate chips to lower calorie content.
Vegetable, Sauce, and Seasoning Modifications
- Add shredded coconut or dried cranberries for burst of sweetness and texture.
- Include crushed biscuits or pretzels for a crunchier twist.
- Season with a pinch of sea salt or cinnamon to enhance flavor complexity.
Mastering rocky road candy: Advanced Tips and Variations
| Tip | Description |
|---|---|
| Pro cooking techniques | Try tempering chocolate for a glossy finish and improved snap. Use a double boiler for controlled melting to avoid overheating. |
| Flavor variations | Boost taste with additions like espresso powder, chili flakes, or white chocolate drizzle for unique flavor layers. |
| Presentation tips | Decorate with whole toasted nuts or festive sprinkles. Serve in decorative boxes or wrap for gifting. |
| Make-ahead options | Prepare rocky road candy up to a week ahead. Keep refrigerated and cut fresh before serving for best texture. |
How to Store rocky road candy: Best Practices
- Refrigeration: Store rocky road candy in an airtight container in the fridge for up to one week to maintain freshness and textural integrity.
- Freezing: For longer storage, individually wrap pieces and freeze for up to two months. Thaw in the refrigerator overnight before serving.
- Reheating: Avoid reheating to preserve texture; serve chilled or at room temperature for best enjoyment.
- Meal prep considerations: Portion candy into treat-size servings for easy grab-and-go snacks throughout the week.
FAQs: Frequently Asked Questions About rocky road candy
What ingredients do I need to make traditional Rocky Road candy?
Can I substitute different nuts in Rocky Road candy?
How do I melt chocolate and combine it with marshmallows when making Rocky Road?
Can Rocky Road candy be stored or frozen, and for how long?
How does Rocky Road candy differ around the world?

rocky road candy
- Total Time: 2-3 hours 15 minutes
- Yield: 16-20 pieces
Description
🍫 Enjoy the rich blend of chocolate, marshmallows, and nuts in this classic treat, perfect for satisfying sweet cravings.
🍬 This no-bake delight is easy to customize and makes for an excellent gift or party treat.
Ingredients
– 3 cups dark chocolate chips
– 3 cups mini marshmallows
– 1 cup toasted walnut pieces
– 2 tablespoons olive oil
– dried fruits
– biscuit pieces
– glacé cherries
– shredded coconut
– peanuts
Instructions
First Step: Prepare your workspace Line an 8×8-inch pan with parchment paper to prevent sticking. Gather all ingredients, measuring chocolate chips, mini marshmallows, and toasted nuts. Chop any additional mix-ins if desired.
Second Step: Melt the chocolate In a microwave-safe bowl, combine 3 cups dark chocolate chips with 2 tablespoons olive oil. Microwave in 30-second intervals, stirring after each, until smooth and glossy. Alternatively, melt over a double boiler on low heat to avoid burning.
Third Step: Mix in marshmallows and nuts Transfer melted chocolate to a large mixing bowl. Gently fold in 3 cups mini marshmallows and 1 cup toasted walnuts or your choice of nuts (almonds, cashews, peanuts, etc.). Ensure all pieces are coated evenly with chocolate.
Fourth Step: Spread mixture and chill Spread the candy mixture evenly into the prepared pan, pressing lightly for even thickness. Refrigerate for 2 to 3 hours or until fully set and firm.
Final Step: Cut and serve Once firm, remove from pan using parchment edges and cut into bite-sized squares or logs. Store in an airtight container. For dietary needs, swap ingredients accordingly during the mixing stage to accommodate vegan or gluten-free lifestyles.
Notes
🍪 Use high-quality chocolate for the best flavor and texture.
🥄 Toast nuts beforehand to enhance their aroma and texture.
❄️ Store candy in an airtight container in the fridge for up to 3 weeks or freeze for up to 2 months.
- Prep Time: 15 minutes
- Chilling Time: 2-3 hours
- Category: Dessert
- Method: No-Bake
- Cuisine: American
Nutrition
- Serving Size: 1 piece
Keywords: Rocky Road Candy, Sweet Treat, Chocolate Marshmallow, Nutty Delight