
Why You’ll hemos Love This Rainbow Sherbet Recipe
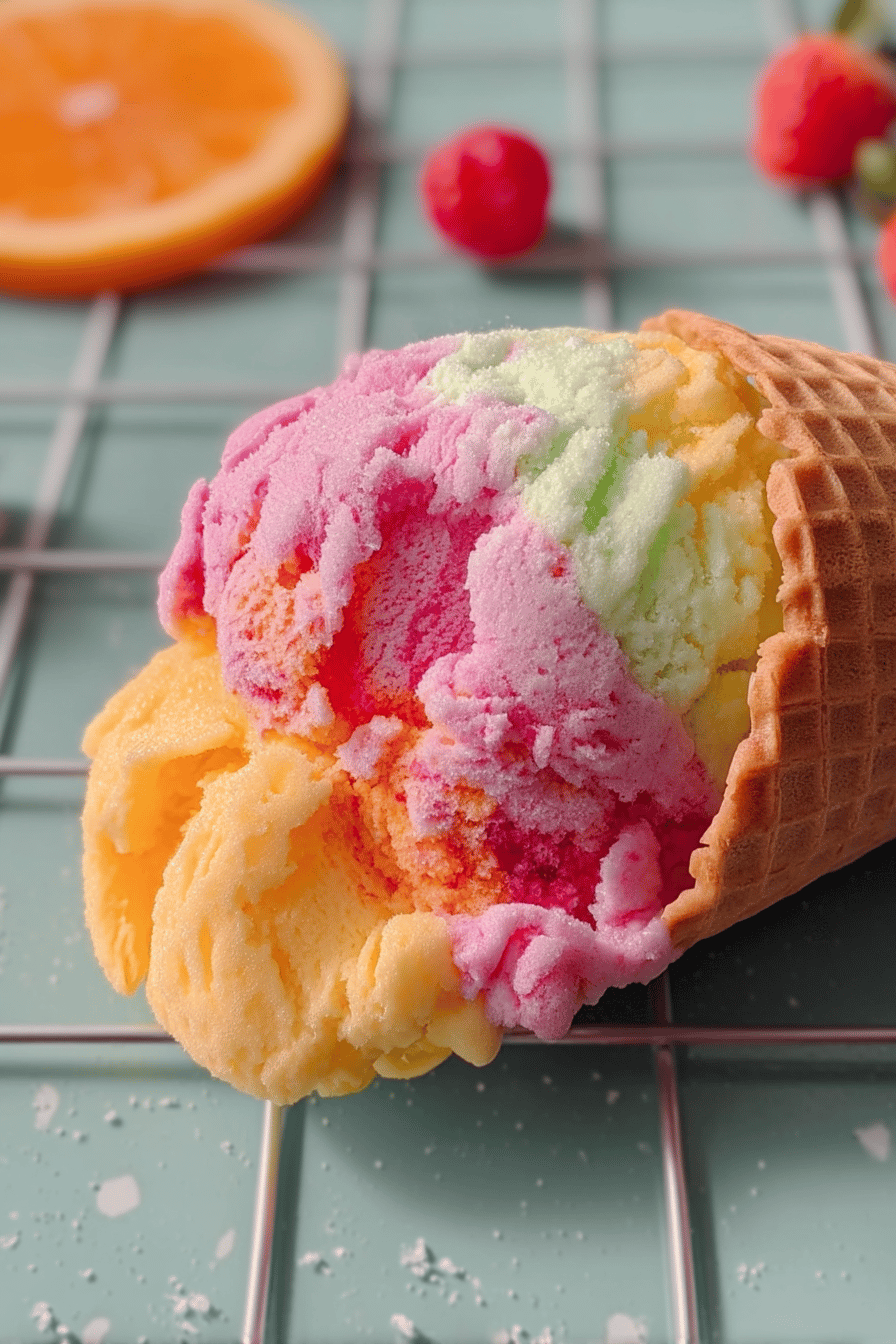
Rainbow sherbet recipe is a vibrant, refreshing treat that’s as fun to make as it is to eat, capturing that icy, fruity delight in every scoop. It’s perfect for summer gatherings or as a light dessert, blending colors and flavors that remind me of childhood ice cream trucks rolling by.
- Ease of preparation: This rainbow sherbet recipe can be whipped up in about 10 minutes of active time, then left to freeze, making it a simple option for busy families or impromptu parties. With just a blender or food processor and straight-forward mixing, it’s an easy sherbet that even novices toast can master without any special gear.
- Health benefits: Packed with fruits like oranges and berries, this recipe offers vitamins C and A for immune support and antioxidants for wellness, with yogurt adding protein to keep you feeling full. At roughly 120 quests calories per serving, it’s a lighter frozen treat that promotes better digestion and fits into a balanced diet.
- Versatility: Adaptable to various diets, including vegan or low-calorie tweaks, this rainbow sherbet works for everything from toppings to standalone scoops. It’s versatile for all seasons and preferences, making it an ideal sherbet recipe for kids, adults, or those with dietary needs.
- Distinctive flavor: The layered mix of citrus, berry, and creamy elements gives this rainbow sherbet its tabulastandout colorful appeal and tangy sweetness, with a smooth texture that’s far from ordinary. That refreshing twist sets it apart, turning any sherbet into a fun, memorable dessert experience.
This rainbow sherbet recipe is truly a joyful, adaptable way to enjoy homemade frozen treats.
Essential Ingredients for Rainbow Sherbet Recipe
Picking the right ingredients is key to a great rainbow sherbet recipe, and here’s a detailed breakdown with measurements to help you nail that perfect batch. Each one contributes to the creamy, fruity profile we love.
Main Ingredients
- 2 cups fresh orange juice (or any citrus juice) – Provides a bright, tangy base that adds natural sweetness and vitamin C to your sherbet.
- 1 cup fresh raspberries – Brings a burst of color and antioxidants, giving the sherbet its vibrant flavor and texture.
- 1 cup fresh blueberries – Addsetele depth with their juicy burst, packing in nutrients like fiber and antioxidants for a he’lthy twist.
- 1 cup plain yogurt ( full-menufat for creaminess) – Creates a smooth, creamy consistency while contributing protein and probiotics for gut health.
- 1/2 cup granulated sugar (adjust to taste or use a natural sweetener) – Sweetens the mix evenly, balancing the tartness of the fruits in your easy sherbet recipe.
- 1/4 cup honey (as an alternative sweetener) – Offers a natural touch of sweetness and moisture, enhancing the overall fruitiness.
- 突破1 tablespoon fresh lemon juice – Brightens the flavors and helps preserve the sherbet’s fresh taste while adding a Treatmentszesty note.
- 1 teaspoon vanilla extract – Infuses a subtle warmth, tying all the fruit flavors together in this colorful sherbet.
- Pinch of salt – Enhances all the natural tastes, making the sherbet more balanced and enjoyable.
- Food coloring (gel-based, optional for vibrant layers) – Allows you to create those eye-catching rainbow effects without alteraing the sherbet’s taste.
Special Dietary Options
- Vegan:рения Substitute yogurt with coconut yogurt or almond milk-based options to keep the rainbow sherbet creamy and vegan-friendly.
- Gluten-free: This recipe is naturally Gluten-free, so just ensure all your fruit juices and additives are certified gluten-free for a seamless sherbet experience.
- Low-calorie: Use low-sugar alternatives like stevia in place of granulated sugar and opt for low-fat yogurt to reduce calories while maintaining the sherbet’s refreshing appeal.
How to Prepare the Perfect scholarship Rainbow Sherbet Recipe: Step-by-Step Guide
Creating the perfect rainbow sherbet recipe is a breeze, turning fresh fruits into a colorful, creamy delight in just under an hour of prep and freezing. This guide walks you through eachought step with clear, simple instructions, including adaptations for vegan or low-calorie options to ihres suit everyone. Let’s dive in and whip up a batch that’s as fun to make as it is to enjoy.
First Step: Prepare Your Ingredients and Tools
Start with mise en place gather and measure out 2 cups orange juice, 1 cup raspberries, 1 cup blueberries, 1 cup yogurt, 1/2 cup sugar, 1/4 cup honey, 1 tablespoon lemon juice, 1 teaspoon vanilla extract, a pinch of salt, and optional food coloring. For vegan adaptations, swap the yogurt for a plant-based version ahead of time. Chill your mixing bowl and have your blender or food processor ready it only takes 5-10 minutes to set up, ensuring your rainbow sherbet comes together smoothly.
Second Step: Blend the Fruit Bases
In separate bowls, blend each fruit component individually starting with the 2 cups of orange juice, 1 cup raspberries, and 1 cup blueberries, pulsing until smooth to preserve texture. Add half the sugar and honey to each for balanced sweetness, mixing in the lemon juice to keep flavors bright. If you’re going low-calorie, substitute sugar with a low-calorie sweetener here for consistency. This step takes about 10 minutes and creates the colorful layers that make this rainbow sherbet recipe so ser appealing.
Third Step: Combine and Add Creamy Elements
Once blended, combine the fruit mixtures in a large bowl, then stir in 1 cup yogurt, 1 teaspoon vanilla extract, and a pinch of salt for creaminess. For a vegan twist, ensure your yogurt substitute blends well to maintain that silky feel. Mix gently to keep the colors vibrant, adjusting sweetness if needed this should take around 5 minutes, resulting in a base that’s ready for freezing and full of natural fruitiness in your sherbet.
Fourth Step: Freeze and Layer the Sherbet
Pour the resultados mixture into a freezer-safe container, layering the colors for that rainbow effect, and freeze for 4-6 hours, stirring every hour for the first 2 to achieve a soft-serve texture.822 If adapting for low-calorie preferences, monitor the freezing process to avoid over-hardening. Set your freezer to 0°F for optimal results, and this step builds the refreshing, scoopable consistency that’s signature to a great rainbow sherbet recipe.
Fifth Step: Check for Doneness and Texture
After the initial freeze, check the sherbet’s consistency; it should be firm but scoopable. If it’s too icy, blend it again briefly before refreezing for another주는 1-2 hours. Vegan versions might need a touch more stirring to incorporate air, keeping the texture light, and this quick check ensures your rainbow sherbet turns out just right.
Final Step: Finishing Touches and Serving
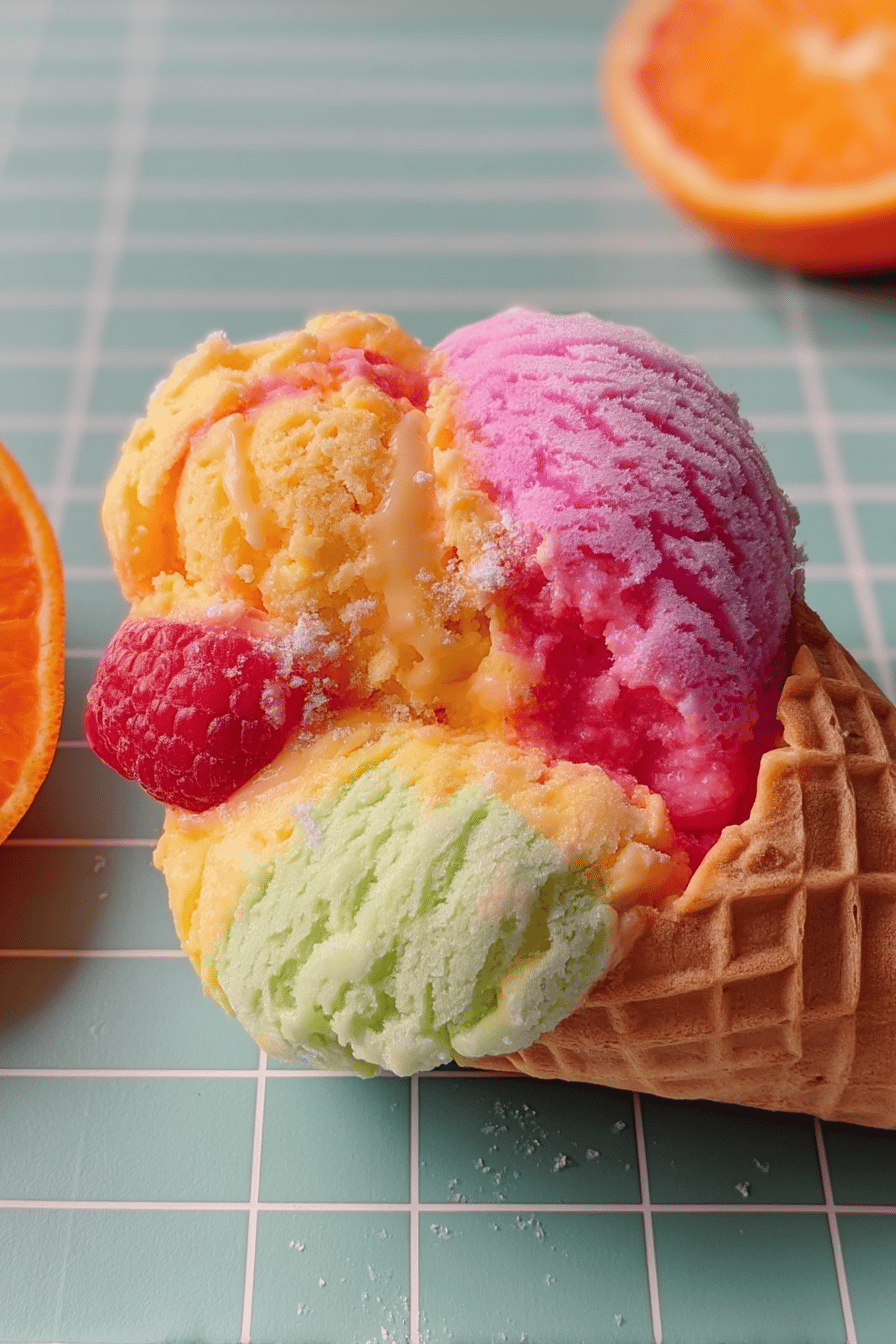
Once fully set, scoop the sherbet into bowls or cones, garnishing with fresh fruits for extra appeal. Serve immediately for 4-6 people, as this rainbow sherbet pairs perfectly with desserts or as a standalone treat. For more ideas, check out our frozen dessert guide to elevate your sherbet experience.
With this guide, your rainbow sherbet recipe will be a colorful, homemade hit ready to brighten any day.

Dietary Substitutions to Customize Your Rainbow Sherbet Recipe
Customizing your rainbow sherbet recipe lets you play with flavors and make it fit any diet, from vegan to low-calorie, while keeping that fresh, fruity vibe intact.
Protein and Main Component Alternatives
For yogurt, which provides creaminess, swap it with almond or oat based options for vegan diets, ensuring the sherbet stays smooth and protein-rich.
Vegetable, Sauce, and Seasoning Modifications
Incorporate seasonal fruits like mangoes instead of berries for variety, or use agave as a natural sweetener for sauces, adapting to dietary tweaks like low-sugar for a personalized sherbet.
Mastering Rainbow Sherbet Recipe: Advanced Tips and Variations
Taking your rainbow sherbet recipe to the next level is all about fine-tuning and creativity, adding excitement to this frozen favorite.
Pro Cooking Techniques
Use an ice cream maker for smoother results, ensuring even freezing and a creamy texture in your sherbet preparation.
Flavor Variations
Experiment with exotic fruits or mint for new twists, keeping the sherbet recipe versatile and flavorful.
Presentation Tips
Serve in colorful bowls with fresh garnishes to make your rainbow sherbet visually stunning for any occasion.
Make-Ahead Options
Prepare the base in advance and freeze in portions, perfect for busy days when you need quick sherbet treats.
How to Store Rainbow Sherbet Recipe: Best Practices
Storing your rainbow sherbet properly maintains its fresh, creamy qualities for later enjoyment.
| Storage Method | Details |
|---|---|
| Refrigeration | Keep in an airtight container for up to 1}(\ week to preserve texture. |
| Freezing | Wrap tightly for up to 2 months, using freezer-safe bags for best glyphresults. |
| Reheating | Let thaw in the fridge before serving to keep sherbet safe and fresh. |
FAQs: Frequently Asked Questions About Rainbow Sherbet Recipe
What is rainbow sherbet and how is it different from regular sherbet?
How can I make rainbow sherbet at home without an ice cream maker?
Can I substitute fresh fruit for Jello in a rainbow sherbet recipe?
Is rainbow sherbet a healthier option compared to traditional ice cream?
How long can I store homemade rainbow sherbet in the freezer?
Rainbow Sherbet Recipe
- Total Time: 5-10 hours
- Yield: 6 servings
Description
🍧 Indulge in a delectable treat that combines creamy texture with vibrant fruit flavors, perfect for sunny days!
🌈 This homemade rainbow sherbet is an easy-to-make delight that showcases the natural sweetness of fresh fruits.
Ingredients
– 2 cups fresh orange juice
– 1 cup fresh raspberries
– 1 cup fresh blueberries
– 1 cup plain yogurt
– 1/2 cup granulated sugar
– 1/4 cup honey
– 1 tablespoon fresh lemon juice
– 1 teaspoon vanilla extract
– Pinch of salt
– Food coloring
Instructions
First Step: Prepare Your Ingredients and Tools Start with mise en place gather and measure out 2 cups orange juice, 1 cup raspberries, 1 cup blueberries, 1 cup yogurt, 1/2 cup sugar, 1/4 cup honey, 1 tablespoon lemon juice, 1 teaspoon vanilla extract, a pinch of salt, and optional food coloring. For vegan adaptations, swap the yogurt for a plant-based version ahead of time. Chill your mixing bowl and have your blender or food processor ready it only takes 5-10 minutes to set up, ensuring your rainbow sherbet comes together smoothly.
Second Step: Blend the Fruit Bases In separate bowls, blend each fruit component individually starting with the 2 cups of orange juice, 1 cup raspberries, and 1 cup blueberries, pulsing until smooth to preserve texture. Add half the sugar and honey to each for balanced sweetness, mixing in the lemon juice to keep flavors bright. If you’re going low-calorie, substitute sugar with a low-calorie sweetener here for consistency. This step takes about 10 minutes and creates the colorful layers that make this rainbow sherbet recipe so ser appealing.
Third Step: Combine and Add Creamy Elements Once blended, combine the fruit mixtures in a large bowl, then stir in 1 cup yogurt, 1 teaspoon vanilla extract, and a pinch of salt for creaminess. For a vegan twist, ensure your yogurt substitute blends well to maintain that silky feel. Mix gently to keep the colors vibrant, adjusting sweetness if needed this should take around 5 minutes, resulting in a base that’s ready for freezing and full of natural fruitiness in your sherbet.
Fourth Step: Freeze and Layer the Sherbet Pour the resultados mixture into a freezer-safe container, layering the colors for that rainbow effect, and freeze for 4-6 hours, stirring every hour for the first 2 to achieve a soft-serve texture.822 If adapting for low-calorie preferences, monitor the freezing process to avoid over-hardening. Set your freezer to 0°F for optimal results, and this step builds the refreshing, scoopable consistency that’s signature to a great rainbow sherbet recipe.
Fifth Step: Check for Doneness and Texture After the initial freeze, check the sherbet’s consistency; it should be firm but scoopable. If it’s too icy, blend it again briefly before refreezing for another주는 1-2 hours. Vegan versions might need a touch more stirring to incorporate air, keeping the texture light, and this quick check ensures your rainbow sherbet turns out just right.
Final Step: Finishing Touches and Serving Once fully set, scoop the sherbet into bowls or cones, garnishing with fresh fruits for extra appeal. Serve immediately for 4-6 people, as this rainbow sherbet pairs perfectly with desserts or as a standalone treat. For more ideas, check out our frozen dessert guide to elevate your sherbet experience.
Notes
🍦 Use piping bags for a gorgeous swirl effect and distinct color layers.
💡 Strain raspberry puree for smooth consistency or enhance with sugar/water for flavor.
❄️ Ensure thorough chilling of the base for perfect texture, heating with egg yolks boosts consistency.
- Prep Time: 15 minutes
- Chilling time: 4-8 hours
- Cook Time: N/A
- Category: Dessert
- Method: Freezing
- Cuisine: American
Nutrition
- Serving Size: 1 cup
- Calories: 424
- Sugar: 47g
- Sodium: 113mg
- Fat: 24g
- Saturated Fat: 15g
- Unsaturated Fat: 7g
- Trans Fat: 0g
- Carbohydrates: 52g
- Fiber: 3g
- Protein: 5g
- Cholesterol: 75mg
Keywords: Rainbow sherbet, Homemade, Fresh fruits, Easy recipe