
Why You’ll Love This Peanut Butter Blossoms Recipe
This peanut butter blossoms recipe is a timeless favorite that brings joy to any baking session with its easy process and mouthwatering results. It’s designed for home cooks who crave something simple yet satisfying, making it a go-to for seasonal treats. Let’s look at the key reasons this peanut butter blossoms recipe stands out.
- Ease of preparation: This peanut butter blossoms recipe is super simple, with just 20 minutes of prep before chilling and baking for 8 to 11 minutes, letting you have fresh cookies fast. You’ll mix everything in one bowl and shape the dough quickly, which is perfect for busy parents or students needing a quick dessert without much hassle. Its straightforward steps keep the process fun and stress-free, ideal for whipping up on a weeknight.
- Health benefits: Packed with protein from peanut butter, this peanut butter blossoms recipe offers nutritional boosts like 2g of protein and 1g of fiber per cookie, supporting energy and overall wellness. The ingredients provide healthy fats that make it a smarter treat option for diet-conscious folks, and you can tweak it for better balance, like using nut-free swaps. It’s a way to enjoy something sweet while fitting into a balanced lifestyle.
- Versatility: This peanut butter blossoms recipe adapts easily to different dietary needs, from vegan to gluten-free versions, so it’s great for everyone in the family. You can change up the toppings or mix-ins based on what’s available, making it flexible for holidays or everyday snacks. Baking enthusiasts will love how it works for various occasions, like sharing with friends or packing for travel.
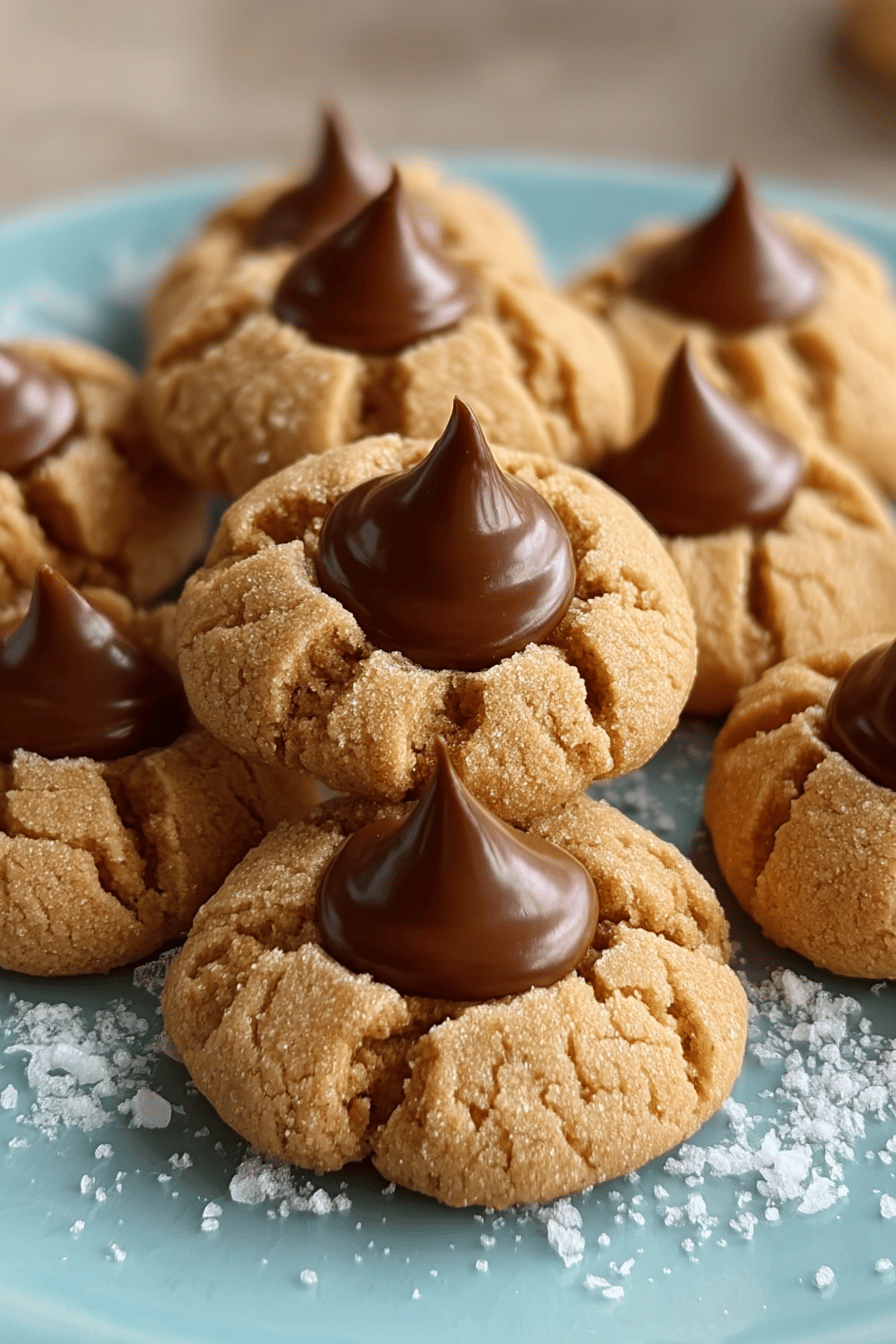
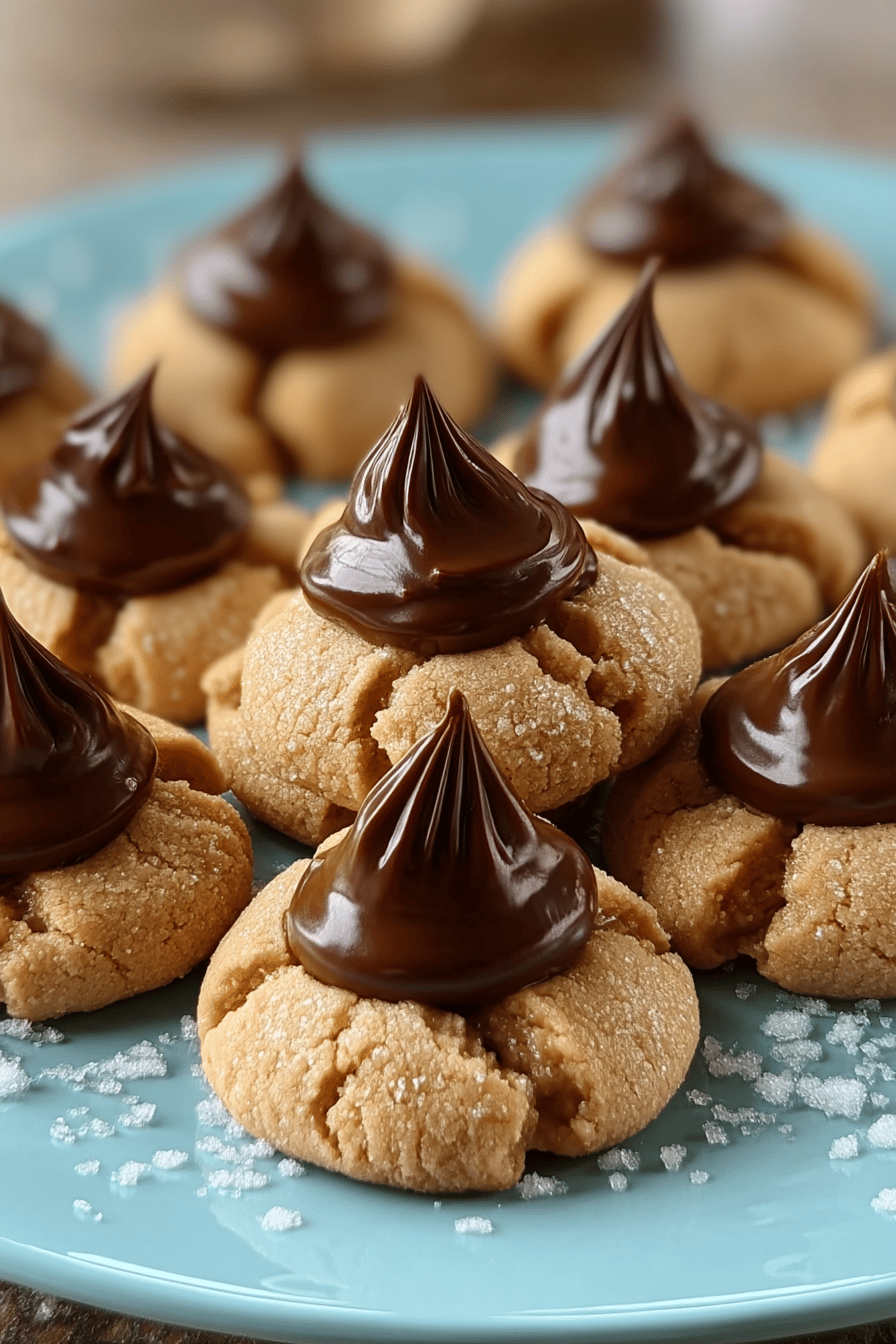
- Distinctive flavor: The standout taste of this peanut butter blossoms recipe comes from the creamy peanut butter paired with gooey chocolate kisses, creating a perfect sweet-nutty balance in every bite. That mix of brown sugar and vanilla adds a warm depth that keeps you coming back, while the crunchy sugar coating gives it a festive twist. It’s all about that irresistible combination that makes these cookies truly special.
Overall, this peanut butter blossoms recipe is a charming choice that combines ease with flavor, perfect for creating those feel-good moments in the kitchen.
Essential Ingredients for Peanut Butter Blossoms Recipe
Selecting the right ingredients is the foundation of a great peanut butter blossoms recipe. Below is a complete list with precise measurements and explanations to help you understand each one’s role. This ensures your cookies turn out just right every time.
Main Ingredients
- ¾ cup creamy no-stir peanut butter (188g) – Forms the creamy base, adding rich flavor and protein for a satisfying treat.
- ½ cup unsalted butter, softened (113g) – Helps create a tender dough by blending smoothly with other ingredients for the perfect texture.
- ½ cup granulated sugar, plus extra for rolling (100g) – Provides sweetness and a crisp outer layer when rolled on the dough, enhancing the cookie’s appeal.
- ½ cup packed light brown sugar (110g) – Adds moisture and a caramel-like depth, making the cookies chewy and flavorful.
- ¼ teaspoon salt – Balances the sweetness and brings out the nutty taste of the peanut butter.
- 1 large egg, at room temperature – Acts as a binder to hold the dough together and improve its structure.
- 1 teaspoon vanilla extract – Infuses a warm, aromatic note that complements the peanut butter in this peanut butter blossoms recipe.
- 1½ cups all-purpose flour (180g) – Gives the cookies their structure; accurate measuring prevents them from being too dry or crumbly.
- ½ teaspoon baking soda – Helps the cookies rise and achieve a light, airy texture when baked.
- 36 chocolate kisses, unwrapped – Tops each cookie with a gooey chocolate surprise, adding the classic finishing touch.
Special Dietary Options
- Vegan: Replace the egg with a flaxseed mix (1 tablespoon ground flaxseed plus 3 tablespoons water) and use vegan butter to keep this peanut butter blossoms recipe fully plant-based and tasty.
- Gluten-free: Swap the all-purpose flour with a gluten-free flour blend of equal measure to maintain the cookie’s chewy consistency.
- Low-calorie: Cut back on the sugar amounts or use a sugar alternative, and choose a lower-fat peanut butter option for a lighter version of this peanut butter blossoms recipe.
For tips on the health benefits of peanut butter, it’s a solid way to add nutrients to your baking routine.
How to Prepare the Perfect Peanut Butter Blossoms Recipe: Step-by-Step Guide
Baking this peanut butter blossoms recipe is a delightfully easy process that yields soft, chewy cookies with a chocolate surprise. Gather your tools like a mixing bowl and baking sheets to get started, and feel free to adapt for dietary preferences along the way. This guide includes all the details for timing and temperature to help you succeed.
First Step: Preheat your oven to 375°F and line your cookie sheets with parchment paper to prevent sticking and ensure even baking. This prep takes just a few minutes and sets up everything smoothly if you’re going gluten-free, double-check your flour blend now for the best mix.
Second Step: In a mixing bowl or stand mixer, combine ¾ cup creamy no-stir peanut butter, ½ cup softened unsalted butter, ½ cup granulated sugar, ½ cup packed light brown sugar, and ¼ teaspoon salt. Cream them together on medium speed until well mixed, which should take about 2-3 minutes. This step is where the dough starts coming together, and using room temperature butter makes it easier for a vegan version, have your egg substitute ready.
Third Step: Add 1 large egg at room temperature and 1 teaspoon vanilla extract to the mixture. Beat on medium speed again, scraping the sides of the bowl as needed, until everything is fully incorporated this takes around 1wright minute. If you’re adapting dispersions for low-calorie needs, consider a sugar substitute here to lighten things up while keeping the dough cohesive.
Fourth Step: Add 1½ cups all-purpose flour and ½ teaspoon baking soda to the bowl. Mix on low speed until justpre combined, making sure to scrape the bowl for an even batter. The dough might be soft at this point, so take your time the key is not to overmix, which helps with texture. If you want a nut-free twist, think about your peanut butter substitute before moving on.
Fifth Step: Cover the dough and chill it in the refrigerator for at least 1 hour, or up to 3 days, to make it easier to handle and help the cookies keep their shape. Once chilled, use a cookie scoop to form 1-inch balls and roll each in extra granulated sugar or sanding sugar for a sparkly coat. This chilling step is great for busy schedules and can be skipped if you’re in a rush, but it improves results.
Sixth Step: Place the dough balls on the prepared cookie sheets, spacing them about 2 inches apart. Bake for 8 to 11 minutes until the cookies are puffy and lightly golden on the bottoms. Keep an eye on them if you’re making adjustments for dietary needs, like using gluten-free flour, they might bake a touch differently, so check at the 8-minute mark.
Seventh Step: Take the cookies out ofimentazione of the oven and let them sit for a minute. Immediately press a chocolate kiss into the center of each cookie, letting it settle in. To avoid melting issues, you can chill the kisses first or pop the cookies in the freezer for 10 minutes afterward. This step adds that fun element and can be varied with other toppings for different tastes.
Eighth Step: Let them cool on the sheets for a few minutes, then move to a rack to cool completely, about 1 hour, until the chocolate sets. If you’re prepping for storage or freezing, this is the time to plan ahead. Your peanut butter blossoms recipe will yield 24 to 36 cookies, ready for enjoying.
Final Step: Once cooled, serve these cookies with a glass of milk or share them as a treat. For more fun ideas, pair this peanut butter blossoms recipe with our easy peanut butter balls recipe to extend the peanut butter love. Remember, if you’ve made swaps for dietary reasons, taste and adjust as needed for the best flavor.

Dietary Substitutions to Customize Your Peanut Butter Blossoms Recipe
Protein and Main Component Alternatives
Swapping the main ingredients in this peanut butter blossoms recipe can make it work for your needs. For the peanut butter, try sunflower seed butter as a nut-free option to keep that creamy base without changing the taste much. If you want a different texture, reduce the flour to 1 and ¼ cups for softer cookies, which is helpful if you’re baking for those with specific preferences.
Vegetable, Sauce, and Seasoning Modifications
Though this recipe doesn’t include vegetables, you can tweak seasonings for variety. Swap vanilla extract for a hint of almond to add a new flavor layer based on what you have on hand. For dietary restrictions, use a gluten-free flour blend, and if you’re aiming for chemical low-calorie, opt for less sugar in the rolling step. These changes keep your peanut butter blossoms recipe flexible and enjoyable year-round.
Mastering Peanut Butter Blossoms Recipe: Advanced Tips and Variations
Enhance your peanut butter blossoms recipe with these expert tips and fun variations to take your baking to the next level. Focus on techniques that make a difference and add your own twists.
Pro Cooking Techniques
Use a kitchen scale for precise flour measurement aim for 180g to avoid dry results and ensure even mixing. Chilling the dough for at least an hour is key to preventing spreading, making it easier for consistent cookies.
Flavor Variations
- Add spices like cinnamon to the dough for a warm twist, or swap in dark brown sugar for deeper flavor notes.
- Try different toppings instead of chocolate kisses, like candied nuts, to create new versions of this peanut butter blossoms recipe.
Presentation Tips
Roll the dough in colored sugars for a festive look that brightens up your plate. Arrange the cookies on a platter with fresh fruits for a simple yet eye-catching display.
Make-Ahead Options
Freeze the dough balls ahead for up to 3 months, thawing them overnight for quick baking sessions. This peanut butter blossoms recipe is perfect for planning, especially during busy times. For more inspiration, explore peanut butter cookie variations online.
How to Store Peanut Butter Blossoms Recipe: Best Practices
Proper storage keeps your peanut butter blossoms recipe tasting fresh and ready to enjoy. Here are the essentials for handling leftovers and prepping in advance.
- Refrigeration: Keep cookies in an airtight container in the fridge for up to 2 weeks to retain their softness and flavor.
- Freezing: For long-term options, freeze baked cookies or dough in a sealed bag for up to 3 months, then thaw as needed for quick treats.
- Reheating: Warm them in the oven at 300°F for a few minutes to bring back that just-baked taste while keeping the chocolate intact.
- Meal Prep Considerations: Bake a batch and store portions for easy grab-and-go snacks, making this peanut butter blossoms recipe ideal for planning ahead.
FAQs: Frequently Asked Questions About Peanut Butter Blossoms Recipe
Can I make the peanut butter blossom dough ahead of time and how should I store it?
What is the best type of peanut butter to use for peanut butter blossoms?
How can I prevent the chocolate kisses from melting when placing them on the cookies?
How should I store peanut butter blossoms to keep them fresh?
Are there nut-free alternatives for making peanut butter blossom cookies?
Peanut Butter Blossoms Recipe
- Total Time: 1 hour 30 minutes to 2 hours
- Yield: 24 to 36 cookies 1x
- Diet: Vegetarian
Description
🍪 Indulge in the classic charm of Peanut Butter Blossoms with a perfect blend of peanut butter and chocolate.
🎉 These cookies are ideal for baking with family, creating festive treats for any occasion.
Ingredients
¾ cup creamy no-stir peanut butter
½ cup unsalted butter, softened
½ cup granulated sugar
½ cup packed light brown sugar
¼ teaspoon salt
1 large egg
1 teaspoon vanilla extract
1½ cups all-purpose flour
½ teaspoon baking soda
36 chocolate kisses, unwrapped
Instructions
First Step: Preheat your oven to 375°F and line your cookie sheets with parchment paper to prevent sticking and ensure even baking. This prep takes just a few minutes and sets up everything smoothly if you’re going gluten-free, double-check your flour blend now for the best mix.
Second Step: In a mixing bowl or stand mixer, combine ¾ cup creamy no-stir peanut butter, ½ cup softened unsalted butter, ½ cup granulated sugar, ½ cup packed light brown sugar, and ¼ teaspoon salt. Cream them together on medium speed until well mixed, which should take about 2-3 minutes. This step is where the dough starts coming together, and using room temperature butter makes it easier for a vegan version, have your egg substitute ready.
Third Step: Add 1 large egg at room temperature and 1 teaspoon vanilla extract to the mixture. Beat on medium speed again, scraping the sides of the bowl as needed, until everything is fully incorporated this takes around 1wright minute. If you’re adapting dispersions for low-calorie needs, consider a sugar substitute here to lighten things up while keeping the dough cohesive.
Fourth Step: Add 1½ cups all-purpose flour and ½ teaspoon baking soda to the bowl. Mix on low speed until justpre combined, making sure to scrape the bowl for an even batter. The dough might be soft at this point, so take your time the key is not to overmix, which helps with texture. If you want a nut-free twist, think about your peanut butter substitute before moving on.
Fifth Step: Cover the dough and chill it in the refrigerator for at least 1 hour, or up to 3 days, to make it easier to handle and help the cookies keep their shape. Once chilled, use a cookie scoop to form 1-inch balls and roll each in extra granulated sugar or sanding sugar for a sparkly coat. This chilling step is great for busy schedules and can be skipped if you’re in a rush, but it improves results.
Sixth Step: Place the dough balls on the prepared cookie sheets, spacing them about 2 inches apart. Bake for 8 to 11 minutes until the cookies are puffy and lightly golden on the bottoms. Keep an eye on them if you’re making adjustments for dietary needs, like using gluten-free flour, they might bake a touch differently, so check at the 8-minute mark.
Seventh Step: Take the cookies out ofimentazione of the oven and let them sit for a minute. Immediately press a chocolate kiss into the center of each cookie, letting it settle in. To avoid melting issues, you can chill the kisses first or pop the cookies in the freezer for 10 minutes afterward. This step adds that fun element and can be varied with other toppings for different tastes.
Eighth Step: Let them cool on the sheets for a few minutes, then move to a rack to cool completely, about 1 hour, until the chocolate sets. If you’re prepping for storage or freezing, this is the time to plan ahead. Your peanut butter blossoms recipe will yield 24 to 36 cookies, ready for enjoying.
Final Step: Once cooled, serve these cookies with a glass of milk or share them as a treat. For more fun ideas, pair this peanut butter blossoms recipe with our easy peanut butter balls recipe to extend the peanut butter love. Remember, if you’ve made swaps for dietary reasons, taste and adjust as needed for the best flavor.
Notes
🥚 Use a room temperature egg to ensure smooth ingredient incorporation.
🧂 Measure flour accurately with a kitchen scale to prevent dry cookies; 180g is ideal.
🍫 Chill the chocolate briefly if you’re concerned about melting too much when added to warm cookies.
- Prep Time: 20 minutes
- Chilling Time: 1 hour
- Cook Time: 8 to 11 minutes
- Category: Dessert
- Method: Baking
- Cuisine: American
Nutrition
- Serving Size: 1 cookie
- Calories: 121
- Sugar: 9 g
- Sodium: 62 mg
- Fat: 7 g
- Saturated Fat: 3 g
- Unsaturated Fat: 3 g
- Trans Fat: 0.1 g
- Carbohydrates: 14 g
- Fiber: 1 g
- Protein: 2 g
- Cholesterol: 13 mg
Keywords: Peanut Butter Blossoms, Simple Classic, Cookies, Baking