
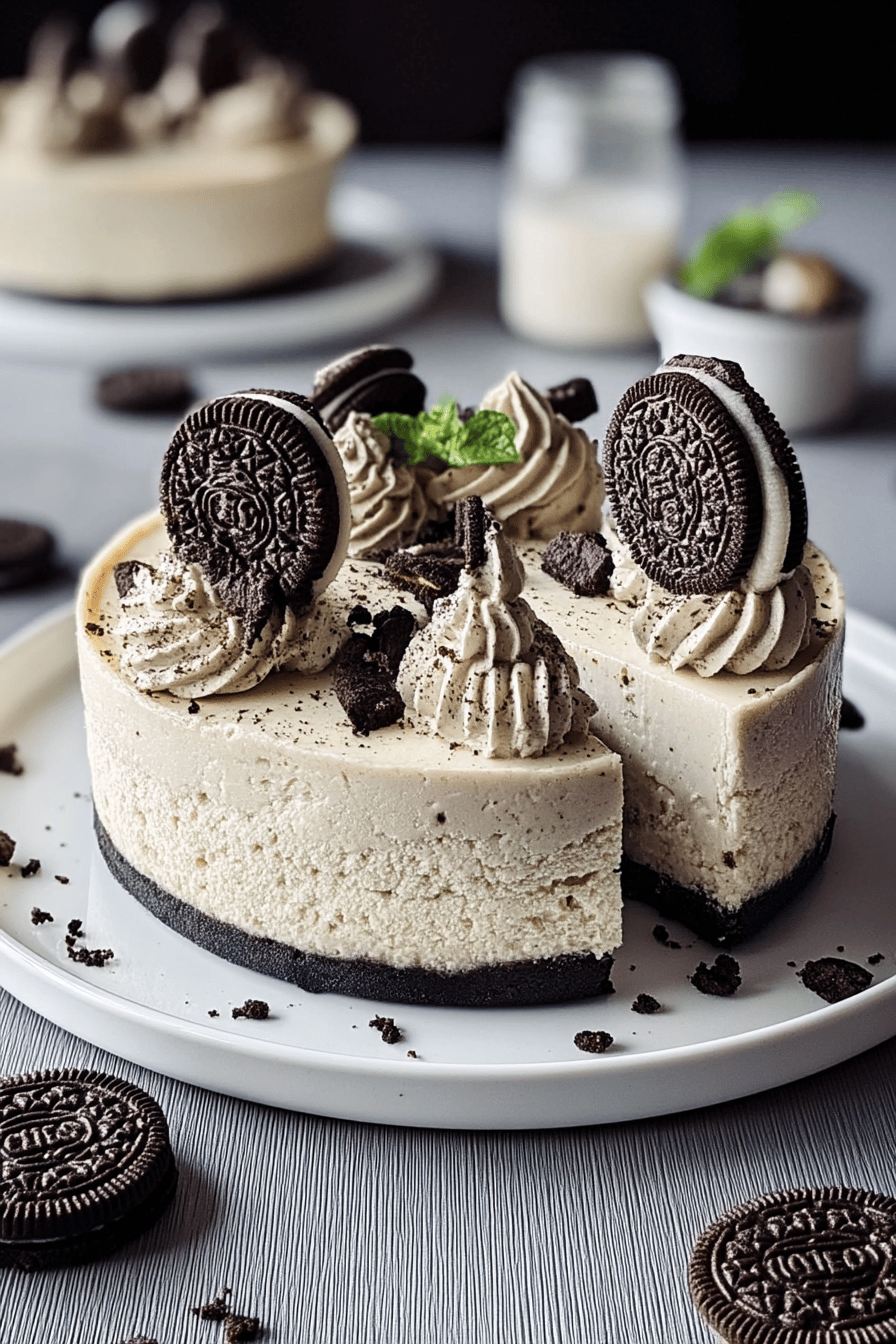
Why You’ll Love This no bake oreo cheesecake
- Ease of preparation: This no bake Oreo cheesecake is wonderfully simple to make, requiring no oven and only about 25 to 30 minutes of active prep time. Its quick chilling process means you can whip up a luscious dessert without long waits or complicated steps a perfect treat for those craving a straightforward yet indulgent dessert.
- Health benefits: While indulgent, this cheesecake can be balanced by using full-fat cream cheese and moderate sugar quantities to provide calcium and protein. Adapting the recipe with lighter cream cheese and reduced sugar can make it a more mindful dessert option, offering some nutritional value without sacrificing the creamy texture and flavor.
- Versatility: The recipe adapts easily to various dietary needs. Vegan versions are possible with plant-based cream cheese and coconut whipped cream substitutes, while gluten-free Oreo-style cookies allow those avoiding gluten to still enjoy this classic dessert. Additionally, the recipe lends itself to creative flavor tweaks, making it a versatile base for many preferences.
- Distinctive flavor: Featuring the iconic crunch and chocolate-vanilla cream of Oreo cookies paired with smooth, light cream cheese filling, this no bake Oreo cheesecake offers a nostalgic yet elegant taste. The balance of cookie bits folded into the filling enhances every bite, making it a standout dessert for any occasion.
Essential Ingredients for no bake oreo cheesecake
- 24 Oreo cookies, crushed into fine crumbs – form the signature chocolatey crust and provide texture.
- 4 tablespoons (60 grams) unsalted butter, melted – binds the crust crumbs firmly and adds richness.
- 16 to 24 ounces (450 to 680 grams) block-style cream cheese, softened to room temperature – key to creating a smooth, creamy filling.
- 1 to 2 cups (120 to 240 grams) powdered sugar, sifted – sweetens and lightens the cheesecake filling.
- 1 to 2 teaspoons pure vanilla extract – boosts flavor depth and highlights the sweetness.
- 2 cups (480 ml) cold heavy whipping cream – whips up to a stable, airy texture for the filling.
- 16 Oreo cookies, chopped – folded into the filling for crunchy cookie bursts throughout.
- Optional toppings: 6 to 14 mini Oreos, chopped or halved; additional whipped cream; chocolate shavings or fruit compote for decoration.
Special Dietary Options
- Vegan: Replace cream cheese with plant-based vegan cream cheese and swap heavy whipping cream for coconut or soy-based whipped cream alternatives.
- Gluten-free: Use certified gluten-free Oreo-style cookies to maintain that distinctive crunch without gluten.
- Low-calorie: Opt for reduced-fat cream cheese and sweeten with sugar substitutes like erythritol or stevia to reduce caloric content while preserving flavor.
How to Prepare the Perfect no bake oreo cheesecake: Step-by-Step Guide
First Step: Making the Oreo crust
Begin by crushing 24 Oreo cookies into fine crumbs. Use a food processor for the smoothest texture or place cookies in a sealed bag and crush with a rolling pin. Pour melted unsalted butter (4 tablespoons) over the crumbs and stir until evenly moistened. This mixture will form a rich, chocolatey crust that holds the no bake Oreo cheesecake firmly.
Second Step: Setting the crust
Line the bottom of a 9-inch springform pan with parchment paper to prevent sticking. Press the Oreo crust firmly into the bottom of the pan in an even layer, using the back of a spoon or your fingertips. For a cleaner presentation, optionally press the crust about 1 inch up the sides. Place the pan in the refrigerator or freezer to chill while preparing the cheesecake filling. Chilling helps the crust set, making the cake easier to slice later.
Third Step: Preparing the cheesecake filling
In a large mixing bowl, beat the softened cream cheese with an electric mixer until smooth and lump-free. Add powdered sugar (start with 1 cup), and pure vanilla extract, then continue beating until the mixture is light and fluffy. Adding 2 teaspoons of fresh lemon juice at this stage is optional but recommended for brightening the flavor and improving texture.
Fourth Step: Whipping the heavy cream
In a separate bowl chilled in the fridge, whip 2 cups of cold heavy cream with a mixer until stiff peaks form. This step is crucial to giving the no bake Oreo cheesecake its creamy, airy texture without needing gelatin. Do not under-whip or overwhip; stiff peaks will hold shape but still blend smoothly into the cream cheese mixture.
Fifth Step: Combining whipped cream and filling
Gently fold the whipped cream into the cream cheese mixture using a rubber spatula. Folding, not mixing aggressively, keeps the lightness intact. Once incorporated, fold in the 16 chopped Oreo cookies carefully to evenly distribute crunchy bits throughout the filling without deflating it.
Sixth Step: Assembling the cheesecake
Spread the filling over the chilled Oreo crust using a spatula, smoothing the surface evenly. For a decorative touch, pipe whipped cream around the edges if desired and top with remaining mini Oreo pieces, chocolate shavings, or fruit compote for a fresh contrast.
Final Step: Chilling to set
Cover the cheesecake tightly with plastic wrap to prevent drying or absorbing fridge odors. Refrigerate for at least 4 to 5 hours, preferably overnight, to allow it to fully set and develop flavor. The cheesecake will firm up and become easier to slice after this resting period. Before serving, transfer to a serving plate and garnish if not already decorated.
For detailed guidance on no-bake cheesecake basics, check out this How to Make No-Bake Cheesecake resource.

Dietary Substitutions to Customize Your no bake oreo cheesecake
Protein and Main Component Alternatives
- Swap traditional cream cheese with vegan cream cheese or silken tofu to create a dairy-free no bake Oreo cheesecake. These alternatives maintain smoothness while catering to lactose intolerance or vegan diets.
- Use nut-based cream cheeses (almond or cashew) to add a unique, subtle nutty flavor along with additional nutrients such as healthy fats and protein.
- Substitute heavy whipping cream with coconut cream or soy-based whipped cream alternatives, perfect for vegan or dairy-free adjustments without sacrificing creaminess.
Vegetable, Sauce, and Seasoning Modifications
- Enhance the flavor by adding citrus zest (lemon or orange) or a touch of vanilla extract to the filling, providing extra aroma and complexity while preserving the Oreo cheesecake’s classic taste.
- Use gluten-free Oreo-style cookies for the crust and topping to accommodate gluten sensitivities without compromising texture or flavor.
- Experiment with natural sugar alternatives like stevia or erythritol to reduce calories without losing sweetness. This helps create a lighter dessert version suitable for special diets.
- Add optional drizzle toppings like dairy-free chocolate or caramel sauce, providing variety and elegance without adding gluten or dairy when chosen carefully.
Mastering no bake oreo cheesecake: Advanced Tips and Variations
Take your no bake Oreo cheesecake to the next level with these expert tips and creative spins:
| Tips & Variations | Description |
|---|---|
| Pro cooking techniques | Ensure all dairy ingredients are at room temperature before mixing for smooth, lump-free filling. Use a food processor to finely crush Oreos for a uniform crust and topping. Chill bowls and beaters before whipping cream to maximize volume. |
| Flavor variations | Try folding in peanut butter swirls, mini chocolate chips, or fruit preserves (such as raspberry or strawberry) for fun twists. Using flavored Oreos like mint or birthday cake can add a unique touch. |
| Presentation tips | Serve the cheesecake in individual dessert glasses layered with cookie crumbs for an elegant look. Garnish with edible flowers, fresh mint sprigs, or artistic whipped cream piping for a professional finish. |
| Make-ahead options | Prepare the crust and filling a day ahead, refrigerating overnight to streamline serving for parties. Freeze portions for up to two months and thaw overnight in the fridge to enjoy later. |
How to Store no bake oreo cheesecake: Best Practices
Proper storage helps maintain the no bake Oreo cheesecake’s flavor and texture:
Refrigeration
Keep the cheesecake covered with plastic wrap or in an airtight container in the refrigerator. Consume within 3 to 4 days for optimal freshness and to prevent moisture loss.
Freezing
Wrap the cheesecake tightly with plastic wrap and aluminum foil to prevent freezer burn. It can be frozen for up to 2 months. Thaw overnight in the refrigerator before serving to preserve texture and taste.
Reheating
This dessert is best enjoyed chilled and typically does not require reheating. If desired, bring to room temperature for about 15-20 minutes before serving to soften the texture.
Meal prep considerations
Make individual mini cheesecake portions in cupcake liners for convenient grab-and-go treats. Properly sealed, these store well in the fridge and freezer, making them ideal for batch-prep dessert planning.
FAQs: Frequently Asked Questions About no bake oreo cheesecake
What kind of Oreos work best for no-bake Oreo cheesecake?
How can I make sure my no-bake Oreo cheesecake sets properly?
Is it possible to make no-bake Oreo cheesecake in advance?
Can I use whipped topping instead of heavy cream in this recipe?
Do I need a springform pan to make no-bake Oreo cheesecake?
no bake oreo cheesecake
- Total Time: 5 hours
- Yield: 10 to 12 servings
- Diet: Vegetarian
Description
🍰 Indulge in a creamy, no-bake delight perfect for sweet cravings anytime!
🎂 Enjoy hassle-free preparation and a taste of luxury without the oven!
Ingredients
– 24 Oreo cookies for crust
– 4 tablespoons unsalted butter for crust
– 16 to 24 ounces cream cheese for filling
– 1 to 2 cups powdered sugar for filling
– 1 to 2 teaspoons pure vanilla extract for flavor
– 2 cups cold heavy whipping cream for filling
– 16 Oreo cookies for filling
Instructions
1-First Step: Making the Oreo crustBegin by crushing 24 Oreo cookies into fine crumbs. Use a food processor for the smoothest texture or place cookies in a sealed bag and crush with a rolling pin. Pour melted unsalted butter (4 tablespoons) over the crumbs and stir until evenly moistened. This mixture will form a rich, chocolatey crust that holds the no bake Oreo cheesecake firmly.
2-Second Step: Setting the crustLine the bottom of a 9-inch springform pan with parchment paper to prevent sticking. Press the Oreo crust firmly into the bottom of the pan in an even layer, using the back of a spoon or your fingertips. For a cleaner presentation, optionally press the crust about 1 inch up the sides. Place the pan in the refrigerator or freezer to chill while preparing the cheesecake filling. Chilling helps the crust set, making the cake easier to slice later.
3-Third Step: Preparing the cheesecake fillingIn a large mixing bowl, beat the softened cream cheese with an electric mixer until smooth and lump-free. Add powdered sugar (start with 1 cup), and pure vanilla extract, then continue beating until the mixture is light and fluffy. Adding 2 teaspoons of fresh lemon juice at this stage is optional but recommended for brightening the flavor and improving texture.
4-Fourth Step: Whipping the heavy creamIn a separate bowl chilled in the fridge, whip 2 cups of cold heavy cream with a mixer until stiff peaks form. This step is crucial to giving the no bake Oreo cheesecake its creamy, airy texture without needing gelatin. Do not under-whip or overwhip; stiff peaks will hold shape but still blend smoothly into the cream cheese mixture.
5-Fifth Step: Combining whipped cream and fillingGently fold the whipped cream into the cream cheese mixture using a rubber spatula. Folding, not mixing aggressively, keeps the lightness intact. Once incorporated, fold in the 16 chopped Oreo cookies carefully to evenly distribute crunchy bits throughout the filling without deflating it.
6-Sixth Step: Assembling the cheesecakeSpread the filling over the chilled Oreo crust using a spatula, smoothing the surface evenly. For a decorative touch, pipe whipped cream around the edges if desired and top with remaining mini Oreo pieces, chocolate shavings, or fruit compote for a fresh contrast.
7-Final Step: Chilling to setCover the cheesecake tightly with plastic wrap to prevent drying or absorbing fridge odors. Refrigerate for at least 4 to 5 hours, preferably overnight, to allow it to fully set and develop flavor. The cheesecake will firm up and become easier to slice after this resting period. Before serving, transfer to a serving plate and garnish if not already decorated.
Notes
🧀 Use full-fat cream cheese and heavy whipping cream for best results.
🥶 Ensure cream cheese is at room temperature for a smooth filling.
👩🍳 Whip heavy cream to stiff peaks for a firm cheesecake texture.
- Prep Time: 30 minutes
- Refrigeration: 4 hours
- Cook Time: 0 minutes
- Category: Dessert
- Method: No-Bake
- Cuisine: American
Nutrition
- Serving Size: 1 slice
- Calories: ~600 kcal
- Sugar: 35+ grams
- Sodium: Negligible
- Fat: 40+ grams
- Saturated Fat: High
- Unsaturated Fat: Varies
- Trans Fat: 0 g
- Carbohydrates: 50+ grams
- Fiber: Negligible
- Protein: 6 grams
- Cholesterol: Moderate
Keywords: No Bake Oreo Cheesecake, Sweet Dessert, Quick Dessert, No-bake Recipe