
Introduction to Homemade Peach Ice Cream
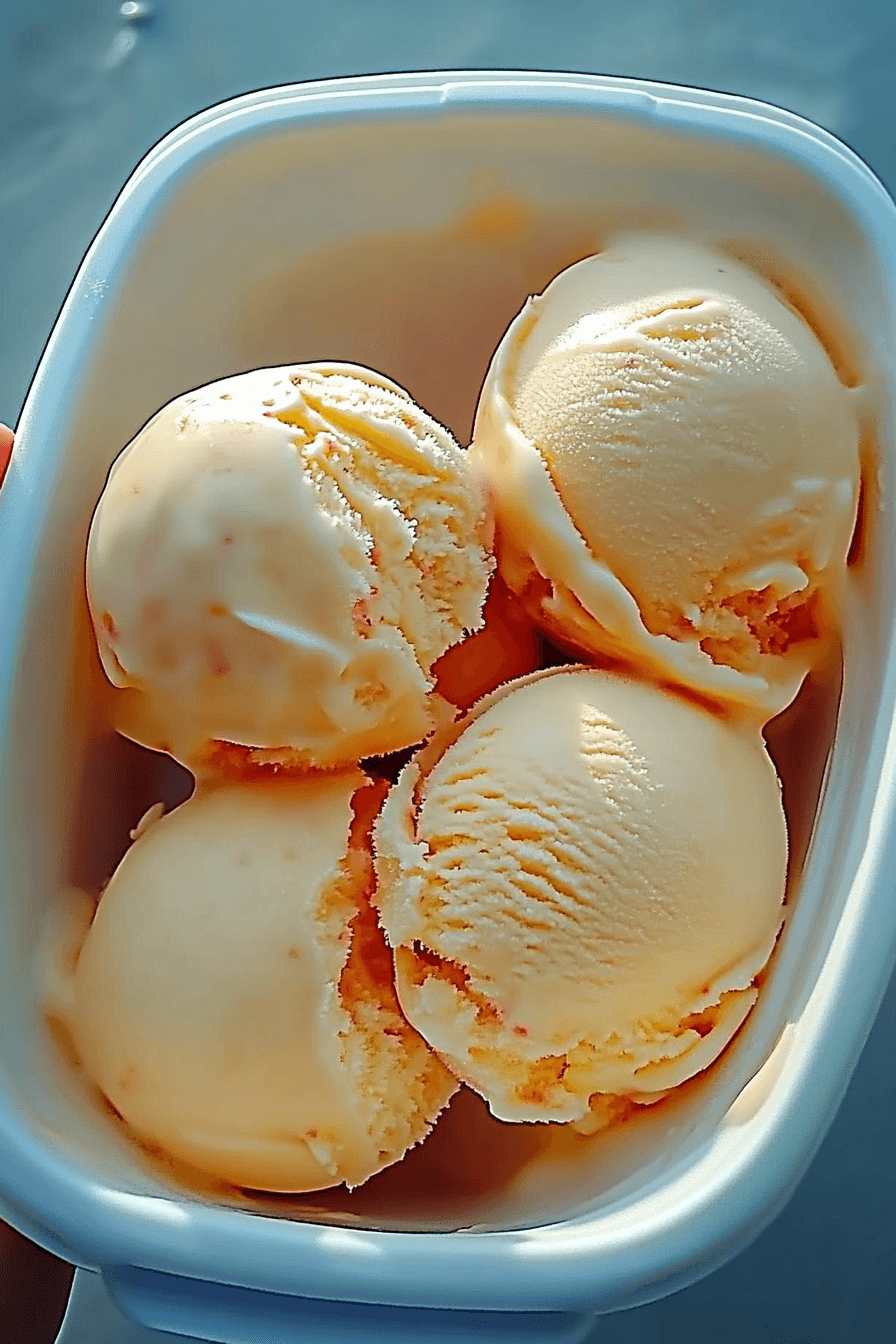
There’s nothing quite like the creamy, fruity goodness of homemade peach ice cream. With its silky texture and refreshingly sweet flavor, it’s a perfect treat for hot summer days or any time you crave something indulgent but wholesome. Using fresh peaches allows you to bring out their natural sweetness and vibrant flavor, while controlling the ingredients ensures a healthier option compared to store-bought alternatives. This recipe is simple, adaptable, and perfect for cooks of all skill levels. Whether you’re a baking enthusiast or a busy parent, homemade peach ice cream is the perfect dessert to share with loved ones around the table.Benefits and Advantages of Homemade Peach Ice Cream
Homemade peach ice cream offers more than just a delicious dessert—it’s packed with benefits that make both the cooking process and the treat itself worthwhile. First and foremost, the recipe uses natural, wholesome ingredients, allowing you to enjoy a healthier treat free from unnecessary additives or preservatives. Adjusting the sugar content or using dairy-free alternatives makes it easy to suit your personal dietary needs. Additionally, the preparation process is straightforward, requiring only a few basic kitchen tools, such as a blender and an ice cream maker. Lastly, for those looking to customize their desserts, this recipe offers endless flexibility—you can experiment with add-ons like crushed nuts, or try it alongside desserts like [Cinnamon Roll French Toast](https://valentinarecipes.com/cinnamon-roll-french-toast-2/) for the ultimate indulgence. By making it yourself, you get to enjoy an ice cream that’s fresher, more flavorful, and tailored just for you.Ingredients Overview
Essential Ingredients for Homemade Peach Ice Cream
- Fresh Peaches: Use 4 medium-sized, ripe peaches, peeled, pitted, and chopped for natural sweetness and flavor.
- Granulated Sugar: 1 cup to enhance the sweetness of the peaches and create a balanced flavor profile.
- Heavy Cream: 2 cups to provide a creamy texture and rich taste.
- Whole Milk: 1 cup to lighten the texture and balance the creaminess.
- Vanilla Extract: 1 teaspoon to amplify the overall flavor, adding a touch of warmth.
- Lemon Juice (optional): 1 tablespoon for brightness and to prevent the peaches from oxidizing.
- Salt (optional): A pinch to intensify the flavors and provide balance.
These ingredients form the foundation of the recipe, ensuring a blend of creamy richness and the natural, fruity sweetness of peaches. For best results, select ripe and juicy peaches. If you’re unsure how to choose the perfect peaches, this guide on selecting the best peaches can help.
Dietary Substitutions to Customize Your Homemade Peach Ice Cream
- Vegan Option: Replace heavy cream with coconut cream and use almond or oat milk instead of whole milk. Swap granulated sugar for organic cane sugar or a plant-based sweetener.
- Gluten-Free Option: Most ice cream recipes are naturally gluten-free, but confirm all ingredients are certified gluten-free, especially sugar and vanilla extract.
- Lower-Calorie Alternative: Substitute heavy cream with fat-free half-and-half and replace whole milk with skim milk. Opt for a sugar substitute like stevia or monk fruit sweetener.
- Keto-Friendly Version: Use heavy cream and unsweetened almond milk, and replace the sugar with erythritol or other keto-friendly sweeteners.
By offering these substitutions, homemade peach ice cream can be enjoyed by a wide variety of diets and preferences, making it a versatile treat for everyone. For more dessert recipes that cater to unique dietary needs, check out our Vegan Mashed Potatoes recipe.
How to Prepare the Perfect Homemade Peach Ice Cream: Step-by-Step Guide
First Step: Prepare the Peaches
Start by peeling and chopping 4 medium-sized peaches. For an easy way to peel, blanch the peaches by dunking them in boiling water for 30 seconds, then transferring them to an ice bath. The skins should slide off effortlessly. Chop the peaches into small chunks, reserving half for blending and leaving the rest for adding texture to the ice cream.
Next, sprinkle the chopped peaches with 1 cup of granulated sugar and add 1 tablespoon of lemon juice (if desired). Let this mixture sit for 30 minutes to macerate. This process will draw out the natural juices, creating a syrupy mixture that enhances the flavor.
Second Step: Blend the Peach Mixture
Add half of the macerated peaches to a blender or food processor. Blend until smooth to create a peach purée. If you prefer a creamy texture, strain the purée to remove any fibrous bits. The remaining peach chunks will be used for topping or mixing into the ice cream base.
Third Step: Combine the Ice Cream Base
In a large mixing bowl, combine the peach purée with 2 cups of heavy cream, 1 cup of whole milk, and 1 teaspoon of vanilla extract. If you’re using vegan or dietary substitutions, add your chosen alternatives here. Whisk the mixture thoroughly until well combined, then add a pinch of salt for balance (optional).
Fourth Step: Churn the Ice Cream
Set up your ice cream maker according to the manufacturer’s instructions. Pour the peach mixture into the ice cream maker and churn for 20-30 minutes, or until the consistency resembles soft-serve ice cream. If you don’t have an ice cream maker, pour the mixture into a freezer-safe dish and freeze, stirring every 30 minutes for up to 4 hours.
Fifth Step: Add Peach Chunks
Once the ice cream has reached a soft-serve texture, fold in the reserved peach chunks. This adds a delightful burst of texture and fruity flavor. Transfer the ice cream to a freezer-safe container with a tight lid.
Sixth Step: Freeze and Enjoy
Place the container in the freezer for at least 2 hours or overnight for a firmer texture. Before serving, let the ice cream sit at room temperature for 5-10 minutes to make scooping easier. For more tips on ice cream science, feel free to read The Science of Ice Cream Making.
Now you’re ready to serve your homemade peach ice cream! Garnish each scoop with additional peach slices or a dollop of whipped cream for presentation.
For a complementary dessert idea, consider pairing this creamy ice cream with our Cinnamon Roll French Toast for a sweet and indulgent treat.
Mastering Homemade Peach Ice Cream: Advanced Tips and Variations
Creating homemade peach ice cream is a joyful and rewarding experience, but a few advanced tips can take your dessert to the next level. Whether you’re a seasoned home cook or trying this recipe for the first time, these tips and variations will help you achieve the creamiest and most flavorful result every time.
Advanced Tips for the Perfect Texture and Flavor
- Chilling the Ingredients: Always ensure your ingredients, especially the heavy cream and milk, are well chilled before beginning the recipe. This helps the ice cream churn more effectively and prevents it from becoming icy.
- Pre-Freezing the Ice Cream Bowl: If you’re using an ice cream maker, make sure the bowl is frozen for at least 24 hours before churning. A properly frozen bowl ensures even churning and a smooth texture.
- Balancing Sweetness: Adjust the sugar based on the ripeness of your peaches. Overly ripe peaches might require less sugar, while less sweet ones may need a slight increase.
- Alcohol for Creaminess: Adding a tablespoon of vodka or peach schnapps to the mixture can improve texture by lowering the freezing point, giving you a softer scoop.
- Avoid Over-Churning: Once the mixture reaches a creamy consistency, stop churning to avoid a grainy texture.
Flavorful Variations to Try
If you’re looking to experiment with unique flavors, here are some variations to inspire you:
- Peach and Basil Ice Cream: Add a handful of chopped fresh basil leaves to the peach mixture for a refreshing herbaceous twist.
- Peach Cobbler Ice Cream: Swirl in pieces of crumbled cinnamon biscuits or graham crackers to mimic the flavors of peach cobbler.
- Vegan Peach Ice Cream: Replace heavy cream and milk with coconut cream and almond milk for a dairy-free version. Sweeten with agave nectar instead of sugar.
- Peach and Berry Blend: Add blended raspberries or blueberries into the ice cream base for a mixed-fruit delight.
- Toasted Almond Topping: Garnish the finished ice cream with chopped, toasted almonds for a satisfying crunch.
Additionally, consider playing with color. A small drop of orange or yellow food coloring can give your ice cream a vibrant peach hue. For more ideas on enhancing desserts, you can explore this unique twist on chocolate desserts that complements light and fruity recipes like this one.
Pro Tip for Achieving Restaurant-Quality Creaminess
For those seeking an even richer texture, try incorporating egg yolks into the recipe. Whisk three to four egg yolks with a portion of the sugar, heat with milk, and create a custard base. This technique not only adds richness but also enhances the overall creaminess of the ice cream.
How to Store Homemade Peach Ice Cream: Best Practices
Preserving the fresh and creamy texture of your homemade peach ice cream is just as important as making it. Proper storage can make a big difference in preventing freezer burn and maintaining the dessert’s delicious flavor.
Preparing for Freezing
Before freezing, transfer your freshly churned ice cream to a freezer-safe, airtight container. Following these simple steps can help maintain its texture:
- Preventing Ice Crystals: Place a piece of plastic wrap directly on the surface of the ice cream before sealing the container. This minimizes exposure to air and prevents ice crystals from forming.
- Use Shallow Containers: Store your ice cream in shallow, wide containers for quicker and more even freezing. Avoid using deep containers as they can cause uneven freezing.
- Storage Temperature: Set your freezer to the coldest setting, typically between -5°F and 0°F, to keep your ice cream firm and fresh.
Serving and Re-Freezing Tips
Once you’re ready to serve your ice cream, follow these tips to maintain its quality:
- Thawing: Allow the ice cream to sit at room temperature for about 5-10 minutes before scooping. This ensures it softens slightly and is easier to serve.
- Avoid Re-Freezing Excess: Only scoop out the portion you plan to eat. Repeated thawing and refreezing can degrade the texture and lead to ice crystal formation.
- Consume Within 2 Weeks: For optimal freshness and flavor, try to consume the homemade peach ice cream within two weeks.
Long-Term Storage Strategy
If you plan to store the ice cream for longer, consider using a heavy-duty container designed for long-term freezing. This will help lock in moisture and keep the texture intact. For further insights on the science behind ice cream storage, refer to this informative article on ice cream making.
For more delicious recipes that are perfect for sharing with family and friends, check out our guide on strawberry tres leches cake. The versatility of this dish complements fruity desserts like peach ice cream, making it an excellent pairing for summer gatherings!
Nutritional Value of Homemade Peach Ice Cream
Homemade peach ice cream is not only a delightful summer treat but also offers a relatively healthy dessert option that you can enjoy guilt-free (in moderation, of course!). Below, we break down the nutritional content of a standard serving of homemade peach ice cream and point out ways to make it even healthier for diet-conscious individuals.
Standard Nutritional Profile (Per 1 Cup Serving):
- Calories: 200-250 (varies based on sugar content and cream-to-milk ratio)
- Total Fat: 12-15g
- Saturated Fat: 7-9g
- Carbohydrates: 22-28g
- Sugar: 18-22g
- Protein: 3-5g
- Fiber: 1-2g (if peach skins are included)
- Potassium: 150-200mg
- Vitamin C: 8-12% of daily recommended intake
Factors Affecting Nutritional Value:
- Dairy Choices: Using heavy cream and whole milk results in richer ice cream but increases fat and calorie content. For a lighter option, consider replacing heavy cream with half-and-half or evaporated milk.
- Sweetener Selection: Granulated sugar is commonly used, but alternatives like honey, agave syrup, or natural stevia can reduce added sugars while maintaining sweetness.
- Peach Integration: Fresh peaches (with skin) provide more fiber, while blending the peaches fully into the mixture offers better consistency.
- Substituting Ingredients: Substituting dairy milk with oat milk or almond milk makes the recipe vegan, and replacing sugar with a sugar substitute makes it diabetic-friendly.
For more ideas on crafting healthy and customizable frozen desserts, you might find our Pineapple Mango Smoothie recipe refreshing and diet-friendly.
Key Health Benefits of Homemade Peach Ice Cream:
- Rich in Natural Vitamins: Fresh peaches contribute Vitamin C and antioxidants.
- Customizable Sweetness: You have full control over sugar levels.
- Dietary Adaptability: It’s easy to swap ingredients to suit dietary needs, such as gluten-free, low-fat, or vegan requirements.
By making thoughtful substitutions, you can craft a version of homemade peach ice cream that fits your lifestyle while retaining its delicious flavor. Pair your creation with other desserts like baked fruits or healthy cookies for a well-rounded indulgence!
FAQs: Frequently Asked Questions About Homemade Peach Ice Cream
Do I need to peel the peaches for homemade peach ice cream?
You can choose to peel the peaches or leave the skins on, depending on your preference. Peeling is easily done by dunking the peaches into boiling water for 30 seconds, then transferring them to an ice water bath to loosen the skins. Leaving the skins on can add extra fiber and slightly alter the texture of your ice cream.
Can I use frozen or canned peaches instead of fresh peaches?
Fresh peaches are ideal for achieving the best flavor, but frozen peaches (unsweetened) can be a convenient substitute. If you use canned peaches, be sure to drain them thoroughly and adjust the sugar in the recipe, as canned peaches are often packed in sugary syrup.
How do I prepare the peaches to avoid icy chunks in the ice cream?
To prevent icy chunks, sprinkle the chopped peaches with sugar and a splash of lemon juice, allowing them to macerate for 20-30 minutes. This process softens the peaches and releases their juices. Once softened, blend the peaches until smooth or leave some small chunks, depending on your texture preference.
Do I need an ice cream maker to make homemade peach ice cream?
While having an ice cream maker helps achieve a creamy consistency, you can still make homemade peach ice cream without one! Simply pour the prepared mixture into a freezer-safe container and stir every 30 minutes during the freezing process to break up ice crystals until the ice cream sets. This method takes longer but works well in a pinch.
What can I do to make vegan or dairy-free homemade peach ice cream?
To make a vegan or dairy-free version, replace heavy cream and whole milk with plant-based alternatives like coconut milk, almond milk, or cashew creamer. Additionally, be sure to use a vegan-approved sweetener and check for cross-contamination in any flavoring extracts you use.
How should I store homemade peach ice cream?
Your peach ice cream is best stored in an airtight, freezer-safe container to avoid unwanted ice crystals. A simple trick is to place plastic wrap directly on the surface of the ice cream before sealing the lid. Homemade peach ice cream will remain fresh for up to one week in the freezer.
For more dessert inspiration, check out our recipe for Frozen Cheesecake, another delightful chilled treat perfect for summer days!
Print
Homemade Peach Ice Cream with Fresh Peaches
- Total Time: 15 minutes
Description
🍑 Treat yourself to the creamy goodness of Homemade Peach Ice Cream made with juicy, fresh peaches – a refreshing way to cool off and indulge in natural sweetness! 🍨
🍦 Packed with vitamins and fresh fruity flavors, this recipe is the perfect summertime dessert that’s both satisfying and easy to make at home! 🍑
Ingredients
Fresh peaches: 4 medium-sized, ripe peaches, peeled, pitted, and chopped
Granulated sugar: 1 cup
Heavy cream: 2 cups
Whole milk: 1 cup
Vanilla extract: 1 teaspoon
Lemon juice (optional): 1 tablespoon
Salt (optional): A pinch
Instructions
1. Start by peeling and chopping 4 medium-sized peaches. To peel easily, blanch the peaches by boiling them for 30 seconds and transferring them into an ice bath. The skins should come off effortlessly.
2. Chop the peeled peaches into small pieces, reserving half for blending and leaving the rest for texture in the ice cream. Sprinkle the chopped peaches with 1 cup of granulated sugar and add a tablespoon of lemon juice (optional). Let the mixture sit for 30 minutes to macerate and release the natural juices.
3. Add half of the macerated peaches to a blender or food processor and blend until smooth to create a purée. Strain the purée if you prefer a smoother texture. Keep the remaining peach chunks for later use.
4. In a large mixing bowl, combine the peach purée with 2 cups of heavy cream, 1 cup of whole milk, and 1 teaspoon of vanilla extract. If using substitutions (vegan or dietary), add them at this stage. Whisk everything together until well combined. Add a pinch of salt if desired for balance.
5. Set up your ice cream maker as per the manufacturer’s instructions. Pour the mixture into the ice cream maker and churn for 20-30 minutes until it reaches a soft-serve consistency. If you do not have an ice cream maker, pour the mixture into a freezer-safe dish and stir every 30 minutes for up to 4 hours to prevent ice crystals.
6. Once the ice cream is churned or stirred to a soft-serve consistency, fold in the reserved peach chunks for added texture and flavor. Transfer the mixture into a freezer-safe container with an airtight lid.
7. Place the container in the freezer and let the ice cream firm up for at least 2 hours or leave it overnight.
8. When ready to serve, let the ice cream sit at room temperature for 5-10 minutes to soften slightly and make scooping easier. Scoop, serve, and enjoy your homemade peach ice cream!
Notes
1. Use fresh, ripe peaches for the most natural sweetness and vibrant flavor.
2. Chill your dairy ingredients and pre-freeze the ice cream maker bowl to achieve a creamier texture.
3. Customize the recipe with dietary substitutions like coconut cream for a vegan option or almond milk for a lower-calorie alternative.
- Prep Time: 15
- Category: Dessert
- Method: Churning
- Cuisine: American