

Why You’ll Love This Chocolate Mousse Recipe
This Chocolate Mousse Recipe is a dreamy dessert that’s perfect for beginners, offering a simple way to create something special without much hassle. With just a few basic steps, you can whip up a batch in about 20 minutes of active time, followed by chilling. It’s an easy chocolate treat that brings joy to family gatherings or quiet evenings.
- Ease of preparation: One of the standout features of this Chocolate Mousse Recipe is how straightforward it is, requiring only basic kitchen tools and minimal steps to get that silky texture. You’ll spend just 20 minutes on the actual mixing and cooking before letting it chill for at least 6 hours, making it ideal for busy parents or students who want a homemade chocolate dessert without spending all day in the kitchen. This approach keeps things light and fun, turning a potentially intimidating chocolate mousse into a quick win for everyday cooks.
- Health benefits: Packed with nutrient-rich ingredients like dark chocolate, this Chocolate Mousse Recipe offers perks such as antioxidants from the 70% cocoa content, which supports heart health and provides an energy boost. Each serving includes protein from eggs and calcium from cream, clocking in at around 375 calories with low sodium and fiber to aid digestion. It’s a balanced treat for diet-conscious individuals, as the natural elements promote wellness while satisfying sweet cravings without overloading on sugar.
- Versatility: This Chocolate Mousse Recipe adapts beautifully to different dietary needs, from vegan swaps to gluten-free versions, making it a flexible favorite for various households. You can tweak it for lighter options or add-ins like nuts, ensuring it fits travelers, seniors, or anyone with restrictions while keeping the chocolate essence intact. Whether you’re serving it solo or as part of a larger meal, its adaptability means it’s always ready for customization.
- Distinctive flavor: What sets this Chocolate Mousse Recipe apart is its rich, velvety taste from high-quality dark chocolate, balanced with light, airy textures that make each bite feel indulgent yet refined. The combination of whipped cream and egg whites creates a smooth chocolate experience that’s not too heavy, with optional flavors like almond extract adding a subtle twist. It’s that perfect blend of simplicity and sophistication that makes this chocolate dessert stand out as a crowd-pleaser.
In short, this Chocolate Mousse Recipe combines ease, nutrition, and taste, perfect for creating memorable moments at home.
Essential Ingredients for Chocolate Mousse Recipe
Selecting the right ingredients is key to mastering this Chocolate Mousse Recipe, ensuring a creamy and delightful result. Below is a detailed list with exact measurements and explanations for each, helping you prepare with confidence.
Main Ingredients
- 3 eggs (approximately 55g/2 oz each) – Provide structure and airiness through whipping, with egg whites creating the light foam essential for the mousse’s texture.
- 125g / 4.5 oz dark cooking chocolate (bittersweet, about 70% cocoa) – Delivers the rich, deep chocolate flavor and smooth melting base; choose high-cocoa for that authentic taste.
- 10g / 0.3 oz unsalted butter – Adds creaminess and helps the chocolate melt evenly, enhancing the overall silky consistency.
- 1/2 cup full-fat cream – Whips up to form stiff peaks, contributing to the mousse’s fluffy and decadent body.
- 3 tablespoons caster sugar (superfine white sugar) – Sweetens the mixture perfectly while dissolving quickly for a smooth finish in the beaten egg whites.
- Optional for flavoring: 1/4 teaspoon almond extract or vanilla extract (to be added during preparation) – Infuses subtle notes that elevate the flavor without overpowering the chocolate.
- Optional for decorations: more whipped cream, chocolate shavings, raspberries, and a small sprig of mint – Add visual appeal and extra taste for serving, making the dessert more festive.
Special Dietary Options
Adapting this Chocolate Mousse Recipe for various preferences keeps it inclusive and enjoyable.
- Vegan: Swap eggs with aquafaba (chickpea liquid) and use a plant-based cream like coconut cream, along with vegan chocolate to maintain that creamy chocolate vibe.
- Gluten-free: This recipe is naturally gluten-free, as all ingredients like chocolate and cream don’t contain gluten just ensure your chocolate is certified gluten-free if needed.
- Low-calorie: Opt for a reduced-sugar alternative in place of caster sugar and use low-fat cream to cut calories, keeping the chocolate mousse light while preserving its appeal.
With terms like silky chocolate treat in mind, this setup makes your Chocolate Mousse Recipe easy to customize.
How to Prepare the Perfect Chocolate Mousse Recipe: Step-by-Step Guide
Whipping up this Chocolate Mousse Recipe is a breeze, with just 20 minutes of hands-on time before chilling for at least 6 hours. This guide breaks it down into simple, actionable steps, perfect for beginners, and includes tips for adapting to dietary needs like vegan swaps. You’ll end up with a light, airy chocolate delight that’s sure to impress, and I’ll keep it fun with practical hints along the way.
First Step: Prepare Your Ingredients
Start by gathering and measuring everything to make the process smooth separate 3 cold eggs into yolks and whites, and mince any additions if needed. Melt 125g of dark chocolate with 10g unsalted butter in short 30-second bursts in the microwave, stirring in between until smooth and cooled to about 95-104°F (35-40°C) this keeps things precise and prevents the mixture from seizing. For dietary tweaks, if you’re going vegan, have aquafaba ready to replace eggs, and chill your mixing bowl in the freezer for 30 minutes to help with whipping cream later.
Second Step: Whip the Cream and Egg Whites
Pour 1/2 cup full-fat cream into the chilled bowl and use an electric mixer to whip it until stiff peaks form, taking about 2-3 minutes don’t overdo it to avoid curdling. In another bowl, beat the 3 egg whites with 3 tablespoons caster sugar until they reach firm peaks, which usually takes 1-2 minutes on medium speed. If adding optional flavor like 1/4 teaspoon almond extract, stir it into the whipped cream at this stage for a subtle boost. This step is key for creating that fluffy texture, and for low-calorie options, you could use a lighter cream alternative while keeping the peaks firm.
Third Step: Mix the Yolks and Chocolate
Whisk the 3 egg yolks until uniform, then gently fold them into the whipped cream using a spatula aim for up to 8 folds to keep some streaks for better integration, which takes about 1 minute. Next, fold in the cooled chocolate-butter mixture in another 8 folds, ensuring it’s well combined without deflating the airiness. For gluten-free adaptations, this recipe is naturally suited, but if you’re customizing for taste, double-check that no extra ingredients sneak in. That even mixing maintains the light structure of the chocolate mousse, making it easy to adapt for different preferences.
Fourth Step: Incorporate the Egg Whites
Gently fold in a quarter of the beaten egg whites into the chocolate mixture to loosen it up, using about 4-5 folds to keep it airy. Then, carefully fold the rest of the egg whites into the mix, aiming for no more than 12 folds total to preserve the mousse’s volume and prevent it from becoming dense. This step is crucial for that signature fluff, and if you’re concerned about eggs, use pasteurized ones here for safety while adapting the process. Once done, the mixture should be light and ready for chilling, perfect for a quick chocolate recipe even for busy schedules.
Fifth Step: Portion and Chill
Divide the mousse into 4 small glasses or pots, and for a polished look, use a piping bag to fill them neatly this takes just a minute and adds a professional touch. Pop the portions in the refrigerator for at least 6 hours or overnight to set properly, allowing the flavors to meld and the texture to firm up. If you’re making a vegan version, note that chilling time might vary slightly with substitutes, so check after 4 hours to ensure it holds shape without over-chilling.
Final Step: Serve and Enjoy
Once chilled, serve the mousse right from the fridge, topping each portion with optional whipped cream, chocolate shavings, raspberries, and a sprig of mint for a beautiful presentation. If it’s been in the fridge longer than two days, give it a quick rewhip to restore its creamy texture before serving, which only takes a few seconds. This Chocolate Mousse Recipe pairs well with simple desserts, and for more ideas, try our chocolate mousse cake to elevate your chocolate treats. Overall, this method turns three basic ingredients into a decadent chocolate mousse that’s ready for any occasion, with adaptations for dietary needs making it versatile for everyone.

Dietary Substitutions to Customize Your Chocolate Mousse Recipe
Protein and Main Component Alternatives
Adapting the protein elements in your Chocolate Mousse Recipe can make it suit different needs, like swapping eggs for safer options. For instance, replace [the] eggs with aquafaba or a commercial egg substitute to keep it light and airy for vegans, while maintaining that classic mousse feel. If you’re looking for variations in chocolate, opt for alternative types based on availability, such as using a different cocoa percentage to adjust richness without altering the core structure.
Vegetable, Sauce, and Seasoning Modifications
For a fresher twist, incorporate add-ins like raspberries or mint as suggested, which align with seasonal picks and add natural flavors. When it comes to seasonings, swap almond extract for other options like vanilla to fit personal tastes or restrictions, keeping the chocolate base smooth. These changes ensure your Chocolate Mousse Recipe remains flexible for sauces or mix-ins, making it easy to tailor for dietary goals while preserving the dessert’s appeal.
Mastering Chocolate Mousse Recipe: Advanced Tips and Variations
Taking your Chocolate Mousse Recipe to the next level involves clever techniques and fun twists that make it even more enjoyable. Here are some expert pointers to ensure success and spark creativity in your kitchen.
Pro Cooking Techniques
Chill the mixing bowl before whipping cream or eggs to achieve stiffer peaks faster, which helps maintain the mousse’s light texture. Sift ingredients if adapting with additions like cocoa powder to avoid lumps, and fold gently with up to 12 strokes to keep air in the mixture. Aim for precise temperatures when melting chocolate to 95-104°F to prevent seizing, ensuring a smooth blend every time.
Flavor Variations
Experiment with seasonings by adding almond or vanilla extract to the whipped cream for a personalized touch that enhances the chocolate profile. Try incorporating extras like raspberries or mint for a fruity note, turning a basic chocolate mousse into a layered delight that suits different tastes.
Presentation Tips
Pipe the mousse into glasses for a professional look that wows your guests, and top with shavings or fresh fruit to add color and texture. Arrange servings on a platter with simple garnishes like mint sprigs to make the dessert visually appealing for special occasions.
Make-Ahead Options
Prepare the mixture in advance and chill for up to two days, then rewhip briefly before serving to handle busy schedules easily. For longer storage, portion it into containers for quick access, making this Chocolate Mousse Recipe a handy option for meal prep or spontaneous treats.
With these ideas, your Chocolate Mousse Recipe becomes a versatile favorite, perfect for experimenting at home.
How to Store Chocolate Mousse Recipe: Best Practices
Storing your Chocolate Mousse Recipe properly keeps it fresh and silky, whether for short-term use or meal prep. Follow these tips to maintain its quality without much fuss.
- Refrigeration: Keep the mousse in an airtight container in the fridge for up to two days to preserve its creamy texture, and rewhip if needed for the best consistency.
- Freezing: Freeze portions in sealed containers for up to a month, thawing slowly in the fridge overnight to avoid separation and keep the chocolate flavor intact.
- Reheating: No reheating needed just let it sit at room temperature for a few minutes before serving to maintain safety and silkiness.
- Meal Prep Considerations: Divide into individual servings for easy grab-and-go options, adapting for dietary tweaks like vegan substitutes to make your chocolate mousse prep even simpler.

FAQs: Frequently Asked Questions About Chocolate Mousse Recipe
What type of chocolate is best for making chocolate mousse?
Can I make chocolate mousse without using raw eggs?
How long should I chill chocolate mousse before serving?
How can I tell when the egg whites are beaten enough for mousse?
Is it safe to eat chocolate mousse made with raw eggs?
Chocolate Mousse Recipe
- Total Time: 6 hours and 20 minutes
- Yield: 4 servings 1x
- Diet: Vegetarian
Description
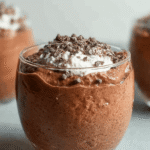
🍫 This decadent dessert features a rich and creamy texture, perfect for a luxurious treat. Made with just three simple ingredients, it’s ideal for beginners and seasoned cooks alike!
🍫 Enjoy the elegant presentation in individual servings, ideal for impressing guests with minimal effort.
Ingredients
3 eggs
125g dark cooking chocolate
10g unsalted butter
1/2 cup full-fat cream
3 tablespoons caster sugar
1/4 teaspoon almond extract or vanilla extract for flavoring
more whipped cream for decorations
chocolate shavings for decorations
raspberries for decorations
small sprig of mint for decorations
Instructions
First Step: Prepare Your Ingredients Start by gathering and measuring everything to make the process smooth separate 3 cold eggs into yolks and whites, and mince any additions if needed. Melt 125g of dark chocolate with 10g unsalted butter in short 30-second bursts in the microwave, stirring in between until smooth and cooled to about 95-104°F (35-40°C) this keeps things precise and prevents the mixture from seizing. For dietary tweaks, if you’re going vegan, have aquafaba ready to replace eggs, and chill your mixing bowl in the freezer for 30 minutes to help with whipping cream later.
Second Step: Whip the Cream and Egg Whites Pour 1/2 cup full-fat cream into the chilled bowl and use an electric mixer to whip it until stiff peaks form, taking about 2-3 minutes don’t overdo it to avoid curdling. In another bowl, beat the 3 egg whites with 3 tablespoons caster sugar until they reach firm peaks, which usually takes 1-2 minutes on medium speed. If adding optional flavor like 1/4 teaspoon almond extract, stir it into the whipped cream at this stage for a subtle boost. This step is key for creating that fluffy texture, and for low-calorie options, you could use a lighter cream alternative while keeping the peaks firm.
Third Step: Mix the Yolks and Chocolate Whisk the 3 egg yolks until uniform, then gently fold them into the whipped cream using a spatula aim for up to 8 folds to keep some streaks for better integration, which takes about 1 minute. Next, fold in the cooled chocolate-butter mixture in another 8 folds, ensuring it’s well combined without deflating the airiness. For gluten-free adaptations, this recipe is naturally suited, but if you’re customizing for taste, double-check that no extra ingredients sneak in. That even mixing maintains the light structure of the chocolate mousse, making it easy to adapt for different preferences.
Fourth Step: Incorporate the Egg Whites Gently fold in a quarter of the beaten egg whites into the chocolate mixture to loosen it up, using about 4-5 folds to keep it airy. Then, carefully fold the rest of the egg whites into the mix, aiming for no more than 12 folds total to preserve the mousse’s volume and prevent it from becoming dense. This step is crucial for that signature fluff, and if you’re concerned about eggs, use pasteurized ones here for safety while adapting the process. Once done, the mixture should be light and ready for chilling, perfect for a quick chocolate recipe even for busy schedules.
Fifth Step: Portion and Chill Divide the mousse into 4 small glasses or pots, and for a polished look, use a piping bag to fill them neatly this takes just a minute and adds a professional touch. Pop the portions in the refrigerator for at least 6 hours or overnight to set properly, allowing the flavors to meld and the texture to firm up. If you’re making a vegan version, note that chilling time might vary slightly with substitutes, so check after 4 hours to ensure it holds shape without over-chilling.
Final Step: Serve and Enjoy Once chilled, serve the mousse right from the fridge, topping each portion with optional whipped cream, chocolate shavings, raspberries, and a sprig of mint for a beautiful presentation. If it’s been in the fridge longer than two days, give it a quick rewhip to restore its creamy texture before serving, which only takes a few seconds. This Chocolate Mousse Recipe pairs well with simple desserts, and for more ideas, try our chocolate mousse cake to elevate your chocolate treats. Overall, this method turns three basic ingredients into a decadent chocolate mousse that’s ready for any occasion, with adaptations for dietary needs making it versatile for everyone.
Notes
🍫 Use bittersweet cooking chocolate for a rich flavor; avoid eating chocolate to ensure smooth melting.
🥄 Sift any powdered ingredients to prevent lumps, though this recipe uses solid chocolate.
❄️ Chill mixing bowls for whipping to achieve stiffer peaks faster.
- Prep Time: 20 minutes
- Chilling: 6 hours
- Cook Time: 0 minutes
- Category: Dessert
- Method: No-Bake
- Cuisine: French
Nutrition
- Serving Size: 1/2 cup
- Calories: 375
- Sugar: 19g
- Sodium: 92mg
- Fat: 26g
- Saturated Fat: 18g
- Unsaturated Fat: N/A
- Trans Fat: N/A
- Carbohydrates: 27g
- Fiber: 1g
- Protein: 7g
- Cholesterol: 171mg
Keywords: Chocolate, Mousse, Simple, Beginners