

Why You’ll Love This Chocolate Covered Oreos
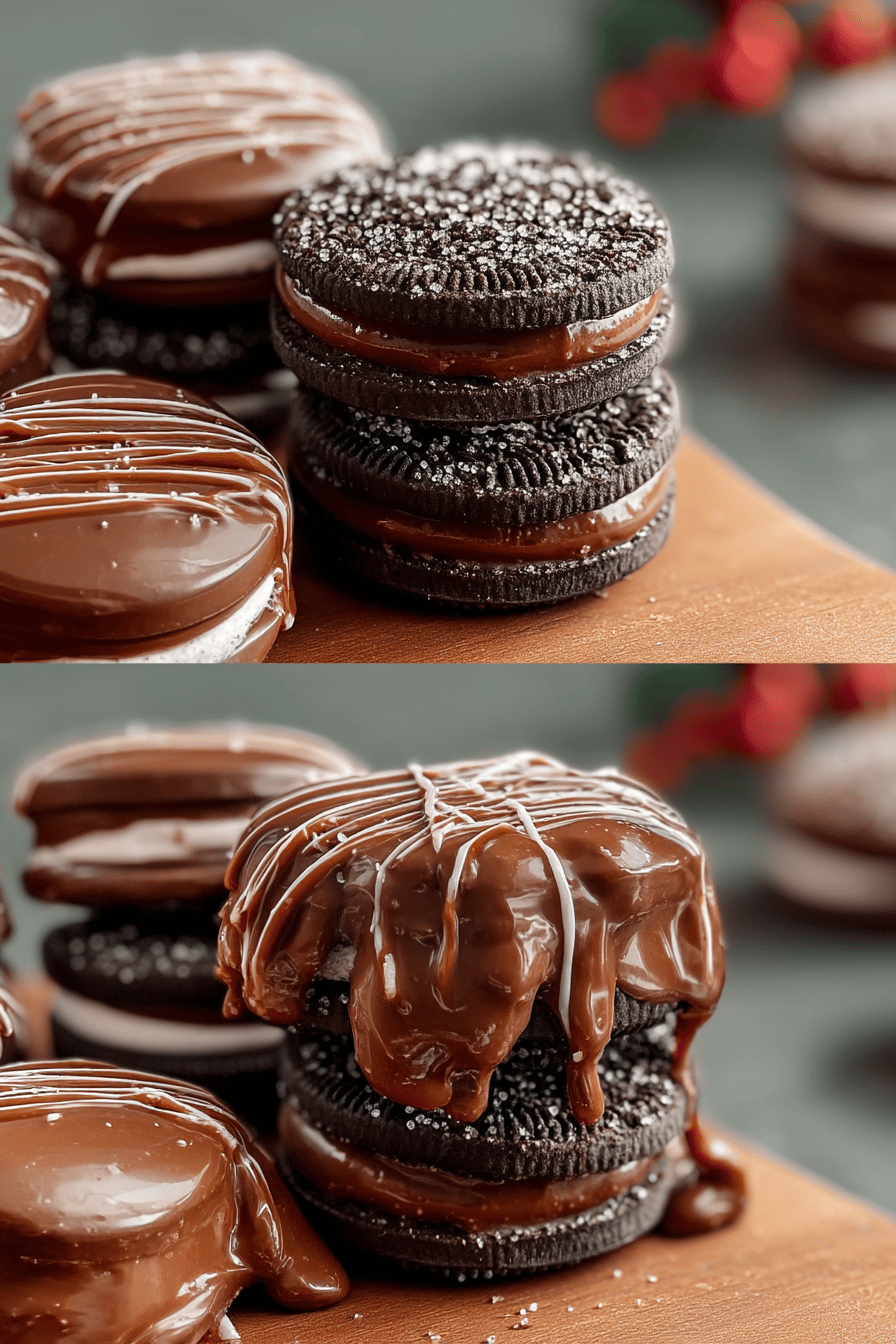
This Chocolate Covered Oreos recipe is a simple treat that brings joy to any occasion, turning ordinary cookies into a decadent delight with minimal effort. It’s perfect for home bakers who want a quick, fun project that impresses everyone, from kids to adults. If you’re looking for an easy Chocolate Covered Oreos option that combines classic flavors with creative twists, you’re in for a real win.
- Ease of preparation: This Chocolate Covered Oreos recipe stands out for its simplicity and quick prep time, taking just about 35 minutes total, including dipping and chilling. You only need basic tools like a microwave or bowl for melting, making it ideal for busy parents, students, or anyone short on time who wants homemade Chocolate Covered Oreos without fuss.
- Health benefits: While Chocolate Covered Oreos are a treat, they offer some nutritional perks, like a small dose of protein and fiber from the cookies, with just 43 calories per piece. The optional toppings such as crushed nuts add healthy fats and nutrients; plus, using dark chocolate varieties can provide antioxidants, making this Chocolate Covered Oreos recipe a smarter choice for occasional indulgences that support wellness.
- Versatility: Chocolate Covered Oreos adapts easily to different dietary needs, letting you swap ingredients for vegan or gluten-free options while keeping the fun intact. Whether you’re scaling it for a party or tweaking flavors, it’s flexible for food enthusiasts, travelers, or anyone exploring Chocolate Covered Oreos variations.
- Distinctive flavor: What makes this Chocolate Covered Oreos recipe truly special is the perfect blend of creamy chocolate and crunchy cookies, creating a standout taste that’s hard to resist. You can customize with toppings like sprinkles or nuts for added crunch, turning basic Chocolate Covered Oreos into a personalized treat that feels indulgent and unique.
Overall, this recipe is about creating memorable moments with little effort, making it a go-to for holidays or everyday fun. It’s that easy Chocolate Covered Oreos delight that keeps everyone coming back for more.
Essential Ingredients for Chocolate Covered Oreos
Getting the ingredients right is key to making delicious Chocolate Covered Oreos that are simple yet satisfying. Here’s a detailed list with precise measurements and explanations for each, so you can whip up this treat with confidence.
Main Ingredients
- 1 package of Oreo cookies (about 36 cookies, though variations may yield around 24 cookies depending on size) – Forms the base of your Chocolate Covered Oreos, providing a crunchy texture that holds up well when dipped.
- 24 ounces of candy melts or chocolate (such as semi-sweet, white, or milk chocolate varieties; alternatively, 16 ounces can be used for a smaller batch) – Melts smoothly to create the glossy coating, adding rich flavor and holding decorations in place for your Chocolate Covered Oreos.
- Sprinkles (optional, about ½ cup, or other decorative toppings like crushed nuts or coconut) – Adds a fun, customizable touch for visual appeal and extra crunch in Chocolate Covered Oreos.
Special Dietary Options
- Vegan: Swap regular Oreos for vegan-friendly versions and use plant-based chocolate melts to keep your Chocolate Covered Oreos free from animal products.
- Gluten-free: Choose gluten-free Oreo alternatives to maintain the structure, ensuring your Chocolate Covered Oreos recipe stays safe for gluten-sensitive eaters.
- Low-calorie: Opt for dark chocolate with higher cocoa content and limit decorations to reduce sugar, making a lighter version of Chocolate Covered Oreos that still tastes great.
How to Prepare the Perfect Chocolate Covered Oreos: Step-by-Step Guide
Creating these Chocolate Covered Oreos is a straightforward process that feels like a fun craft, all done in one go with basic kitchen tools. This guide walks you through the steps with clear instructions, timing, and temperature tips, plus adaptations for different dietary needs. You’ll have fresh Chocolate Covered Oreos ready in no time, perfect for gifting or snacking.
First Step: Prepare Your Ingredients
Gather all your ingredients and set up your workspace this mise en place takes about 15 minutes to get everything ready. Line a baking sheet with parchment or wax paper to prevent sticking, and measure out the 1 package of Oreo cookies and 24 ounces of candy melts or chocolate. For dietary tweaks, if making gluten-free Chocolate Covered Oreos, ensure your Oreos are the gluten-free type, and have plant-based chocolate on hand for vegan options to keep things inclusive from the start.
Second Step: Melt the Chocolate
In a microwave-safe bowl, melt the 24 ounces of candy melts or chocolate using 15-second increments, stirring after each until smooth this should take about 2-5 minutes total, depending on your microwave’s power. Heat at medium temperature (around 50% power) to avoid scorching, and if the chocolate thickens, stir in a teaspoon of coconut oil for smoothness. If you’re adapting for a smaller batch, use just 16 ounces of chocolate; for vegan Chocolate Covered Oreos, confirm your melts are plant-based to maintain the recipe’s flexibility.
Third Step: Dip the Oreos
Using a fork or dipping tool, dip each Oreo from the package into the melted chocolate, fully coating it one at a time this step takes about 10 minutes for a full batch. Gently tap the fork on the bowl’s side to remove excess chocolate, letting it drip back to avoid buildup and ensure an even layer. If making Oreo pops for a fun variation, insert a lollipop stick into the cream center before dipping; for low-calorie preferences, use less chocolate per cookie to lighten up your Chocolate Covered Oreos without losing the appeal.
Fourth Step: Add Decorations and Set
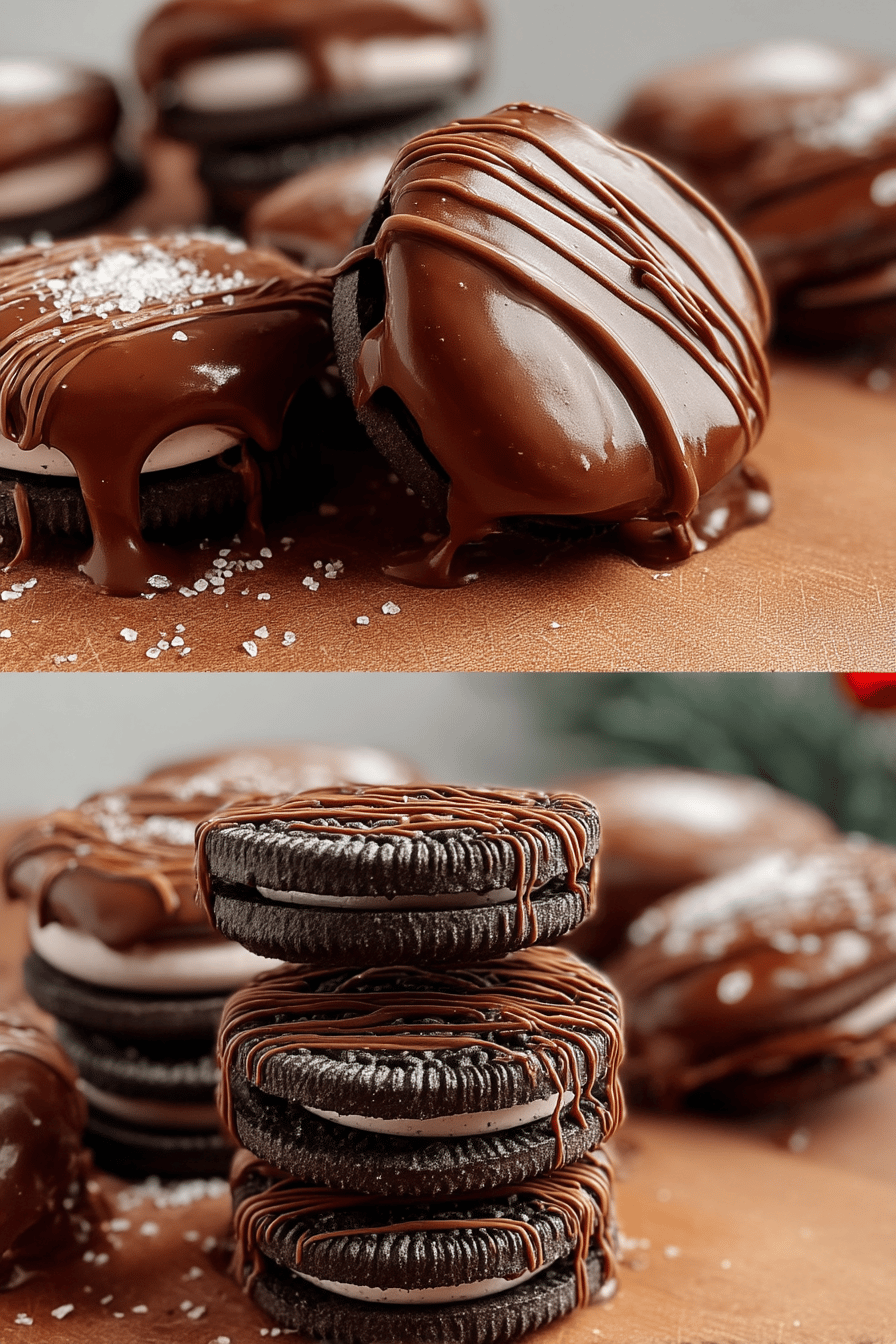
Place the dipped Oreos on the prepared baking sheet and immediately decorate with about ½ cup of sprinkles or other toppings like crushed nuts while the chocolate is still wet this adds variety and only takes a couple of minutes. If you want to drizzle with another type of chocolate, let the first layer set for 5 minutes, then melt and drizzle for a layered effect. For those exploring Chocolate Covered Oreos variations, this is a great spot to add personalized touches, like using crushed coconut for dietary adaptations such as vegan options.
Fifth Step: Let Them Harden
Allow the Chocolate Covered Oreos to sit until completely dry, which can take 15-30 minutes at room temperature or speed up in the fridge for about 15 minutes at 40°F. Once set, they’re ready for serving or storage avoid rushing this to ensure the chocolate firms up properly. If you’re preparing for a crowd, scale the recipe up or down as guests have different needs, like low-calorie versions with minimal toppings to keep it light and enjoyable.
Final Step: Finishing Touches and Serving
Once hardened, transfer the Chocolate Covered Oreos to a plate or container for serving, perhaps with a side of fresh fruit for a balanced treat. This yields about 24-36 pieces, making it great for sharing; add a personal note by packaging them in bags for gifts. Remember, for vegan or gluten-free Chocolate Covered Oreos, double-check all add-ins to keep the final product aligned with preferences, turning this simple recipe into a crowd-pleaser.
This method ensures your Chocolate Covered Oreos turn out shiny and delicious every time, with the whole process wrapping a real 35 minutes of active and passive time. It’s all about that easy, customizable fun that makes baking feel rewarding.

Dietary Substitutions to Customize Your Chocolate Covered Oreos
Protein and Main Component Alternatives
Customizing the main components of Chocolate Covered Oreos can make them fit various needs, like swapping Oreos for a protein-packed alternative if you’re focusing on nutrition. For instance, use gluten-free cookies as the base to maintain the structure while catering to dietary restrictions, ensuring your Chocolate Covered Oreos stay versatile.
You can also experiment with different cookie types for added protein, such as those made with nut flours, which keep the treat hearty and adaptable for ingredient availability.
Vegetable, Sauce, and Seasoning Modifications
When it comes to toppings, swap sprinkles for vegetable-based options like crushed nuts, which add a healthy crunch and seasonal variety to your Chocolate Covered Oreos. For sauces, if you’re drizzling extra chocolate, consider using flavored variations to match preferences, keeping the dish light and exciting.
Seasonings aren’t a big player here, but you can incorporate items like coconut for a tropical twist, making Chocolate Covered Oreos perfect for different tastes or restrictions while preserving that signature charm.
Mastering Chocolate Covered Oreos: Advanced Tips and Variations
Pro Cooking Techniques
To nail your Chocolate Covered Oreos, melt chocolate in 15-second intervals for even heating, stirring in coconut oil if it thickens for a smooth finish. Use a gentle tap on the fork to remove excess, preventing uneven coatings and ensuring pro-level results.
Flavor Variations
Spice up your Chocolate Covered Oreos by trying different chocolates like white or milk for variety, or add crushed nuts and coconut for new taste combos. Experiment with seasonal flavors to make each batch of Chocolate Covered Oreos feel fresh and exciting.
Presentation Tips
Serve your Chocolate Covered Oreos on a decorative platter with toppings like sprinkles for a eye-catching display. Stack them creatively to make the treat pop at gatherings, turning simple Chocolate Covered Oreos into a visual treat.
Make-Ahead Options
Prep the dipping station in advance, so your Chocolate Covered Oreos come together quickly on busy days. Store components separately for up to a day, making it easy to whip up this recipe whenever the mood strikes.
How to Store Chocolate Covered Oreos: Best Practices
Keeping your Chocolate Covered Oreos fresh is simple with the right techniques, helping you enjoy them longer. Here’s how to handle storage for different needs.
- Refrigeration: Store Chocolate Covered Oreos in an airtight container in the fridge for up to 3 weeks to maintain their crispiness and flavor.
- Freezing: Freeze them in freezer-safe bags for up to 3 months as a long-term option, keeping your Chocolate Covered Oreos ready for quick treats.
- Reheating: If needed, let them thaw at room temperature for even results, ensuring Chocolate Covered Oreos stay safe and tasty.
- Meal prep considerations: Prep batches in advance and portion them out, making Chocolate Covered Oreos a handy snack for busy weeks ahead.
| Storage Method | Duration | Tips |
|---|---|---|
| Refrigeration | Up to 3 weeks | Use airtight containers to keep fresh |
| Freezing | Up to 3 months | Thaw slowly for best texture |
FAQs: Frequently Asked Questions About Chocolate Covered Oreos
How long do chocolate covered Oreos stay fresh and how should I store them?
Can I freeze chocolate covered Oreos and how do I thaw them properly?
What types of Oreos work best for making chocolate covered Oreos?
What ingredients and tools do I need to make chocolate covered Oreos at home?
What are some tips to get smooth and evenly coated chocolate covered Oreos?
Chocolate Covered Oreos
- Total Time: 35-50 minutes
- Yield: 24–36 cookies 1x
- Diet: Vegetarian
Description
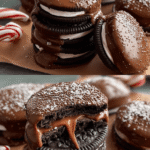
🍪 Enjoy the perfect sweet and crunchy treat with Chocolate Covered Oreos, a simple yet delightful homemade dessert.
🍫 This recipe is easy to make and allows you to customize toppings, creating a fun and versatile snack for all occasions.
Ingredients
1 package of Oreo cookies (about 36 cookies) for base
24 ounces of candy melts or chocolate for coating
Sprinkles (optional, about ½ cup) for decoration
Instructions
First Step: Prepare Your Ingredients Gather all your ingredients and set up your workspace this mise en place takes about 15 minutes to get everything ready. Line a baking sheet with parchment or wax paper to prevent sticking, and measure out the 1 package of Oreo cookies and 24 ounces of candy melts or chocolate. For dietary tweaks, if making gluten-free Chocolate Covered Oreos, ensure your Oreos are the gluten-free type, and have plant-based chocolate on hand for vegan options to keep things inclusive from the start.
Second Step: Melt the Chocolate In a microwave-safe bowl, melt the 24 ounces of candy melts or chocolate using 15-second increments, stirring after each until smooth this should take about 2-5 minutes total, depending on your microwave’s power. Heat at medium temperature (around 50% power) to avoid scorching, and if the chocolate thickens, stir in a teaspoon of coconut oil for smoothness. If you’re adapting for a smaller batch, use just 16 ounces of chocolate; for vegan Chocolate Covered Oreos, confirm your melts are plant-based to maintain the recipe’s flexibility.
Third Step: Dip the Oreos Using a fork or dipping tool, dip each Oreo from the package into the melted chocolate, fully coating it one at a time this step takes about 10 minutes for a full batch. Gently tap the fork on the bowl’s side to remove excess chocolate, letting it drip back to avoid buildup and ensure an even layer. If making Oreo pops for a fun variation, insert a lollipop stick into the cream center before dipping; for low-calorie preferences, use less chocolate per cookie to lighten up your Chocolate Covered Oreos without losing the appeal.
Fourth Step: Add Decorations and Set Place the dipped Oreos on the prepared baking sheet and immediately decorate with about ½ cup of sprinkles or other toppings like crushed nuts while the chocolate is still wet this adds variety and only takes a couple of minutes. If you want to drizzle with another type of chocolate, let the first layer set for 5 minutes, then melt and drizzle for a layered effect. For those exploring Chocolate Covered Oreos variations, this is a great spot to add personalized touches, like using crushed coconut for dietary adaptations such as vegan options.
Fifth Step: Let Them Harden Allow the Chocolate Covered Oreos to sit until completely dry, which can take 15-30 minutes at room temperature or speed up in the fridge for about 15 minutes at 40°F. Once set, they’re ready for serving or storage avoid rushing this to ensure the chocolate firms up properly. If you’re preparing for a crowd, scale the recipe up or down as guests have different needs, like low-calorie versions with minimal toppings to keep it light and enjoyable.
Final Step: Finishing Touches and Serving Once hardened, transfer the Chocolate Covered Oreos to a plate or container for serving, perhaps with a side of fresh fruit for a balanced treat. This yields about 24-36 pieces, making it great for sharing; add a personal note by packaging them in bags for gifts. Remember, for vegan or gluten-free Chocolate Covered Oreos, double-check all add-ins to keep the final product aligned with preferences, turning this simple recipe into a crowd-pleaser.
Notes
🍫 Use high-quality chocolate or candy melts for a shiny, smooth finish with no tempering needed.
🥥 Stir in a teaspoon of coconut oil or vegetable shortening if the chocolate thickens to maintain smoothness.
❄️ Let the dipped Oreos harden at room temperature for about 30 minutes or chill in the fridge for around 15 minutes to speed up drying.
- Prep Time: 15 minutes
- Chilling/Drying Time: 15-30 minutes
- Cook Time: 5 minutes
- Category: Dessert
- Method: Dipping
- Cuisine: American
Nutrition
- Serving Size: 1 cookie
- Calories: 43
- Sugar: 5 g
- Sodium: 10 mg
- Fat: 2 g
- Saturated Fat: 2 g
- Unsaturated Fat: 0 g
- Trans Fat: 1 g
- Carbohydrates: 5 g
- Fiber: 1 g
- Protein: 1 g
- Cholesterol: 0 mg
Keywords: Chocolate Covered Oreos,Easy Homemade Delight,Chocolate Dipped Cookies,Oreos Dessert