
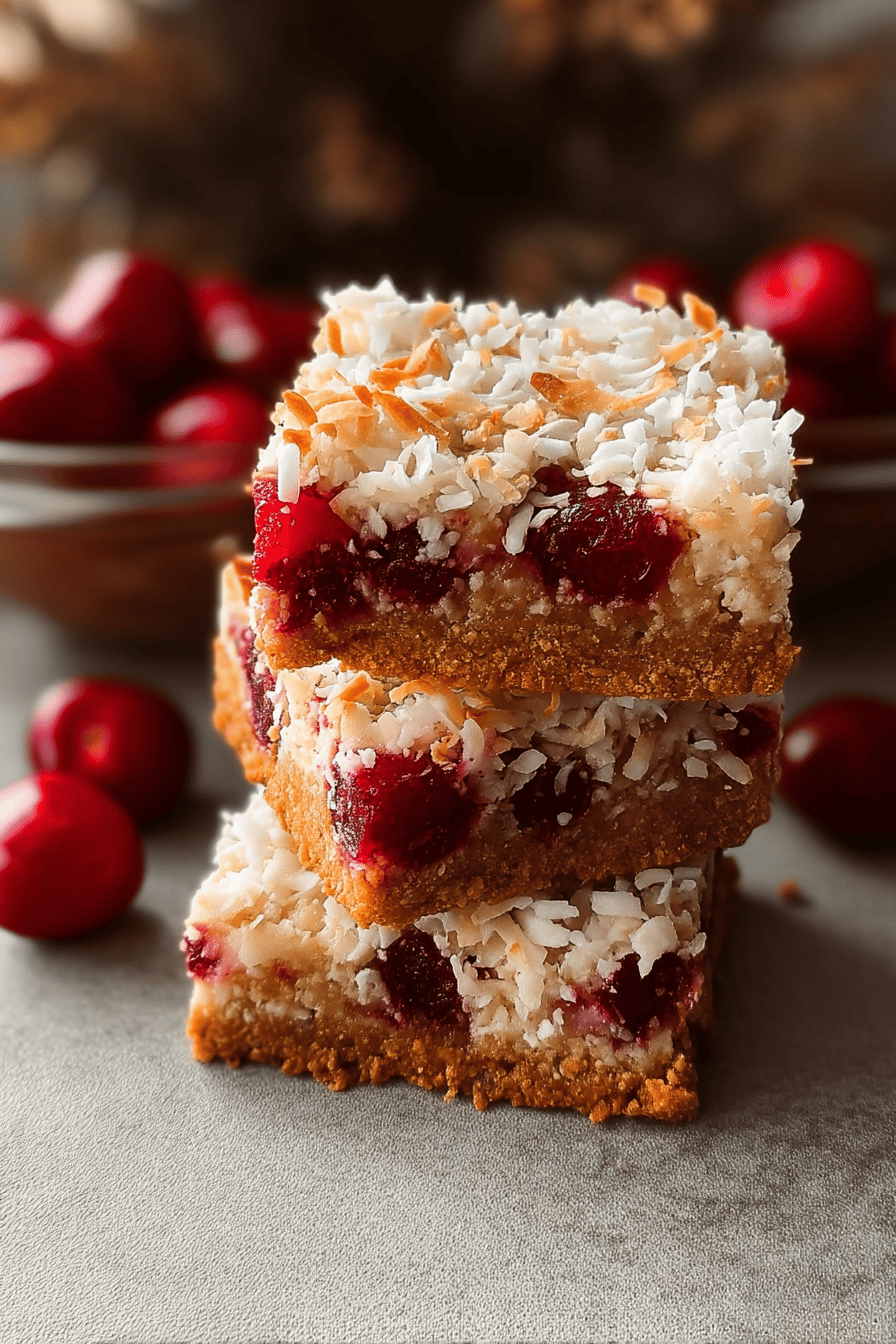
Why You’ll Love This Cherry Coconut Bars
Picture this: a simple bake that brings back warm memories of family gatherings, just like the Cherry Coconut Bars I’ve been making for years. These delightful treats combine sweet cherries with flaky coconut and crunchy nuts, making them a go-to dessert for any occasion. Whether you’re a busy parent rushing through the holidays or a baking enthusiast experimenting in the kitchen, these bars offer something special that keeps everyone coming back for more.
- Ease of preparation: Whipping up Cherry Coconut Bars is straightforward and quick, perfect for beginners or those with limited time. With just a few minutes of mixing and baking, you can have a batch ready without fussing over complex steps. This simplicity means even new bakers can enjoy the process, turning a simple recipe into a fun family activity that saves time on busy days.
- Health benefits: These bars include wholesome elements like unsweetened coconut and walnuts, which add a nutritional boost to your dessert. Cherries bring antioxidants to support overall wellness, as highlighted in a great resource on the health benefits of cherries in baking. Plus, options for lighter versions help diet-conscious folks enjoy a treat without overloading on sugars, making it a smarter choice for everyday snacking.
- Versatility: Cherry Coconut Bars adapt easily to different needs, whether you’re tweaking for gluten-free diets or vegan preferences. This flexibility lets you customize the recipe for family members with various tastes or restrictions, turning a basic dessert into a personalized favorite. It’s one of those recipes that fits right into holiday spreads or casual weeknights, proving how adaptable these bars can be for any crowd.
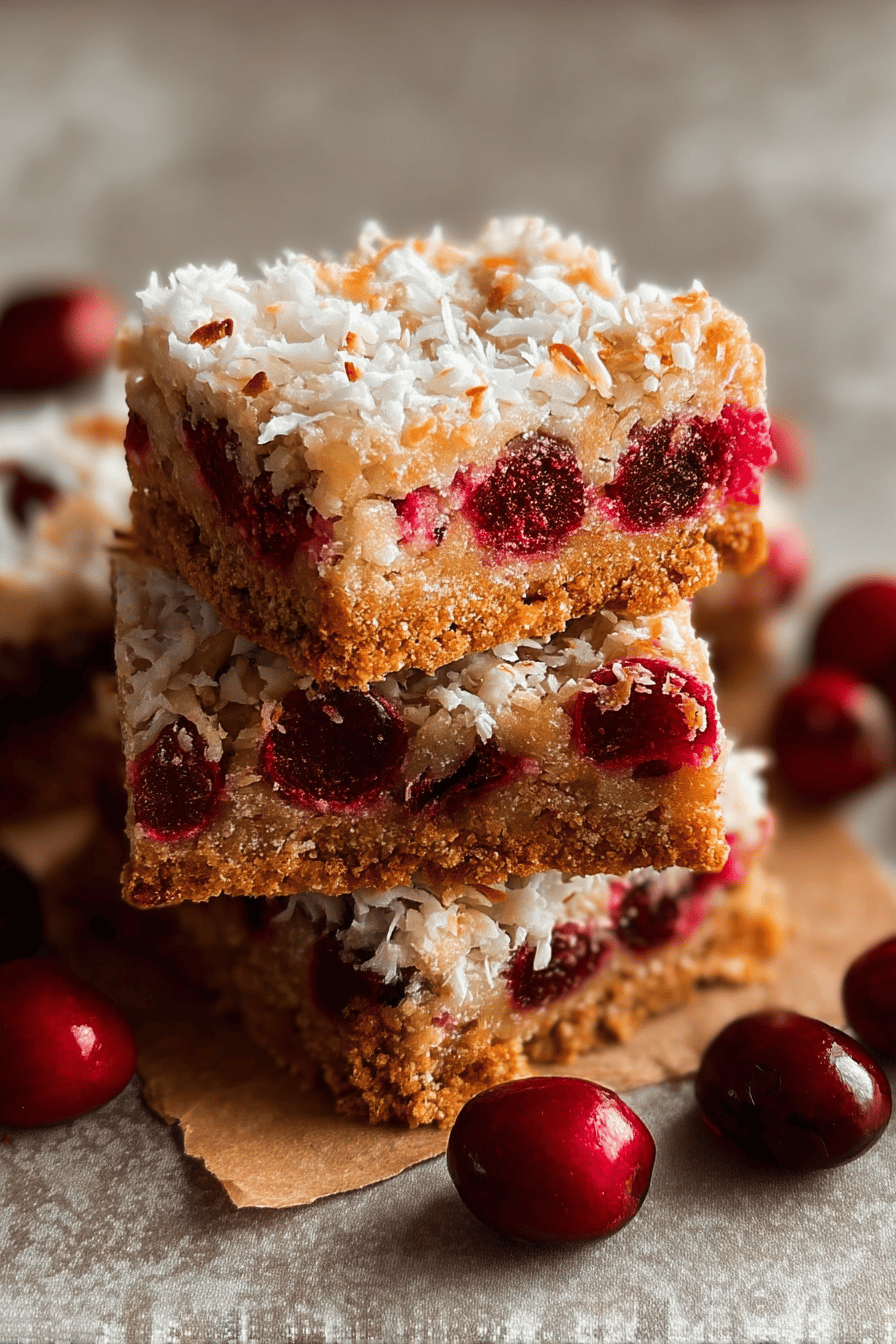
- Distinctive flavor: What sets Cherry Coconut Bars apart is that perfect mix of chewy coconut, tart cherries, and nutty crunch, creating a taste that’s both festive and comforting. I always think of my grandma’s kitchen when I bite into one these bars have that nostalgic charm that makes them stand out from regular sweets. With their rich texture and subtle sweetness, they’re a hit at parties or as a quick pick-me-up, blending flavors that feel just right every time.
This recipe’s charm lies in its balance of ease and delight, making Cherry Coconut Bars a staple for home cooks everywhere. Whether you’re sharing them at a gathering or keeping them for yourself, these bars capture the joy of baking without the hassle.
Essential Ingredients for Cherry Coconut Bars
Gathering the right ingredients is key to making delicious Cherry Coconut Bars that capture that nostalgic homemade feel. Below, I’ll break down the main ingredients with their exact measurements, along with a quick note on what each one does to enhance the recipe. Remember, using fresh, quality items will make your bars even better.
Main Ingredients
- 1 cup sifted flour – This forms the base of the shortbread, providing a sturdy, buttery foundation that holds everything together.
- 1/2 cup butter at room temperature – Adds richness and helps create a tender texture, making the bars melt in your mouth.
- 3 tablespoons icing sugar – Sweetens the base lightly and gives it a smooth finish for that classic shortbread feel.
- 2 eggs, slightly beaten – Bind the topping ingredients, adding structure and a bit of moisture for the chewy layer.
- 1 cup granulated cane sugar – Provides the primary sweetness and helps achieve that golden brown top with a delightful crunch.
- 1/4 cup flour – Thickens the topping mixture, ensuring it sets properly without becoming too runny.
- 1/4 teaspoon salt – Balances the sweetness and enhances all the flavors, making the bars taste even more vibrant.
- 1/2 teaspoon baking powder – Helps the topping rise just a little, giving the bars a light, airy lift.
- 1 teaspoon pure vanilla extract – Infuses a warm, aromatic note that ties the whole dessert together with its comforting scent.
- 1 cup shredded unsweetened coconut – Brings in that signature chewiness and a subtle nutty flavor, keeping things from getting too sweet.
- 1/2 cup chopped maraschino cherries – Adds a burst of tartness and festive color, as noted in discussions about cherry-based treats on sites like our cherry pie bars page, making each bite fun and visually appealing.
- 3/4 cup chopped walnuts – Offers a satisfying crunch and healthy fats, as explored in resources on the benefits of walnuts in recipes.
For variations, you might swap in 1 1/2 cups all-purpose flour or 1 cup graham cracker crumbs for the base, or use 4 cups unsweetened finely shredded coconut and two 14-ounce cans of sweetened condensed milk for a richer topping. These tweaks keep the essence of Cherry Coconut Bars while adding new twists.
Special Dietary Options
- Vegan: Swap the butter for plant-based options like coconut oil, and use flax eggs (1 tablespoon ground flaxseed mixed with 3 tablespoons water per egg) instead of regular eggs to maintain that chewy texture without animal products.
- Gluten-free: Replace the flour with a gluten-free blend, ensuring it’s a 1:1 substitute to keep the base firm and the topping intact for those with sensitivities.
- Low-calorie: Cut back on sugar to three-quarters cup or use a sugar alternative, and opt for reduced-fat coconut to lighten up the recipe while preserving the flavorful coconut cherry combo.
These adjustments make Cherry Coconut Bars accessible for everyone, proving how versatile this dessert can be in any kitchen.
How to Prepare the Perfect Cherry Coconut Bars: Step-by-Step Guide
Ready to dive into baking some Cherry Coconut Bars that will wow your family? This step-by-step guide walks you through the process with ease, drawing from a classic recipe that’s full of nostalgic charm. We’ll cover everything from prepping your ingredients to the final chill, ensuring your bars turn out chewy and delicious every time. Remember, little tweaks can make it suit different dietary needs, like swapping flour for gluten-free options along the way.
First Step: Gather and Prep Your Ingredients
Start by pulling together all the ingredients to make your Cherry Coconut Bars assembly a breeze. Measure out 1 cup sifted flour, 1/2 cup butter at room temperature, and 3 tablespoons icing sugar for the base. For the topping, have ready 2 slightly beaten eggs, 1 cup granulated cane sugar, 1/4 cup flour, 1/4 teaspoon salt, 1/2 teaspoon baking powder, 1 teaspoon pure vanilla extract, 1 cup shredded unsweetened coconut, 1/2 cup chopped maraschino cherries, and 3/4 cup chopped walnuts. This mise en place takes about 10 minutes and helps avoid any last-minute rushes plus, if you’re going vegan, swap in flax eggs here for a seamless adaptation.
Second Step: Prepare the Baking Pan and Preheat the Oven
Preheat your oven to 350º F to get that perfect bake for your Cherry Coconut Bars. Butter a 9 by 9 inch pan and line it with parchment paper for easy removal later this step is crucial for clean cuts. If you’re trying a variation with a different crust, like using graham cracker crumbs, drop the temperature to 325º F. Timing here is about 5 minutes, and this preparation ensures your bars release without sticking, making storage simpler for busy schedules.
Third Step: Make and Bake the Shortbread Base
Mix the 1 cup sifted flour, 1/2 cup room-temperature butter, and 3 tablespoons icing sugar in a bowl until it forms a dough. Spread and pat this mixture evenly into your prepared pan for a solid base. Pop it in the preheated oven and bake for about 15 minutes, or until it’s set and lightly golden. For gluten-free versions, use a gluten-free flour blend to keep the texture just right. This step builds the foundation, taking around 20 minutes total, and sets the stage for that irresistible Cherry Coconut Bars chewiness.
Fourth Step: Prepare and Add the Topping
While the base bakes, stir together the topping: combine 2 slightly beaten eggs, 1 cup granulated cane sugar, 1/4 cup flour, 1/4 teaspoon salt, 1/2 teaspoon baking powder, 1 teaspoon pure vanilla extract, 1 cup shredded unsweetened coconut, 1/2 cup chopped maraschino cherries, and 3/4 cup chopped walnuts in a bowl. Once mixed, spread this over the baked base right out of the oven. For variations, add extras like almond extract if you want more depth. Bake for another 22 to 25 minutes until the top is lightly browned, which takes about 30 minutes including prep time. Adaptations for low-calorie options could mean reducing sugar, keeping the flavors balanced.
Fifth Step: Cool and Chill for the Best Texture
Let the bars cool in the pan for at least 30 minutes to avoid crumbling. Then, refrigerate them for a minimum of 4 hours to firm up, as this chilling time from variations ensures easier slicing and a better texture. I love how this step makes the bars even more shareable perfect for packing in lunches or gifting. If you’re meal prepping, this is where you can adjust for dietary preferences, like using dairy-free butter to maintain freshness.
Final Step: Cut and Serve Your Cherry Coconut Bars
Once chilled, lift the bars from the pan using the parchment paper and cut into squares aim for about 24 to 30 pieces depending on size. Serve them as a festive treat, perhaps with a cup of tea, to enjoy that chewy coconut and cherry goodness. For make-ahead options, these store well, and you can even freeze portions for later, adapting the recipe as needed for different tastes. This whole process, from start to finish, takes around 5 to 6 hours including chilling, but the wait is worth it for these delightful Cherry Coconut Bars.

Dietary Substitutions to Customize Your Cherry Coconut Bars
Protein and Main Component Alternatives
Customizing Cherry Coconut Bars starts with swapping out key proteins or main ingredients to fit your needs, keeping that chewy texture intact. For instance, if walnuts aren’t your thing, try pecans for a similar crunch without changing the overall flavor much they add the same nutty goodness while being easier on allergies. If you’re looking for a protein boost, consider adding seeds like chia or hemp to the topping, which can replace some of the nuts for a nut-free version that’s still hearty and satisfying.
Vegetable, Sauce, and Seasoning Modifications
While Cherry Coconut Bars don’t rely heavily on veggies, you can sneak in alternatives like dried fruits instead of cherries for seasonal twists, such as cranberries during holidays. For sauces, if you want to amp up the moisture, a light fruit puree can stand in for some sugar, creating a fresher take. Seasonings are easy to tweak; swap vanilla extract for almond to add a new depth, or use cinnamon for a warmer vibe, ensuring the bars adapt to various preferences or dietary limits like low-sugar options.
Mastering Cherry Coconut Bars: Advanced Tips and Variations
Pro Cooking Techniques
Taking your Cherry Coconut Bars to the next level means focusing on techniques that enhance texture and flavor. For better results, try double-sifting your flour to make the base extra light and airy, which prevents any density issues. Using a kitchen scale for precise measurements can also help, especially when adapting for variations like a graham cracker crust.
Flavor Variations
Experiment with different seasoning combinations to keep things exciting; adding dark chocolate bits alongside the cherries creates a richer profile that’s perfect for chocolate lovers. You could also mix in extracts like almond for a subtle twist, drawing from other dessert ideas on sites like our chocolate chip cheesecake cookies for inspiration.
Presentation Tips
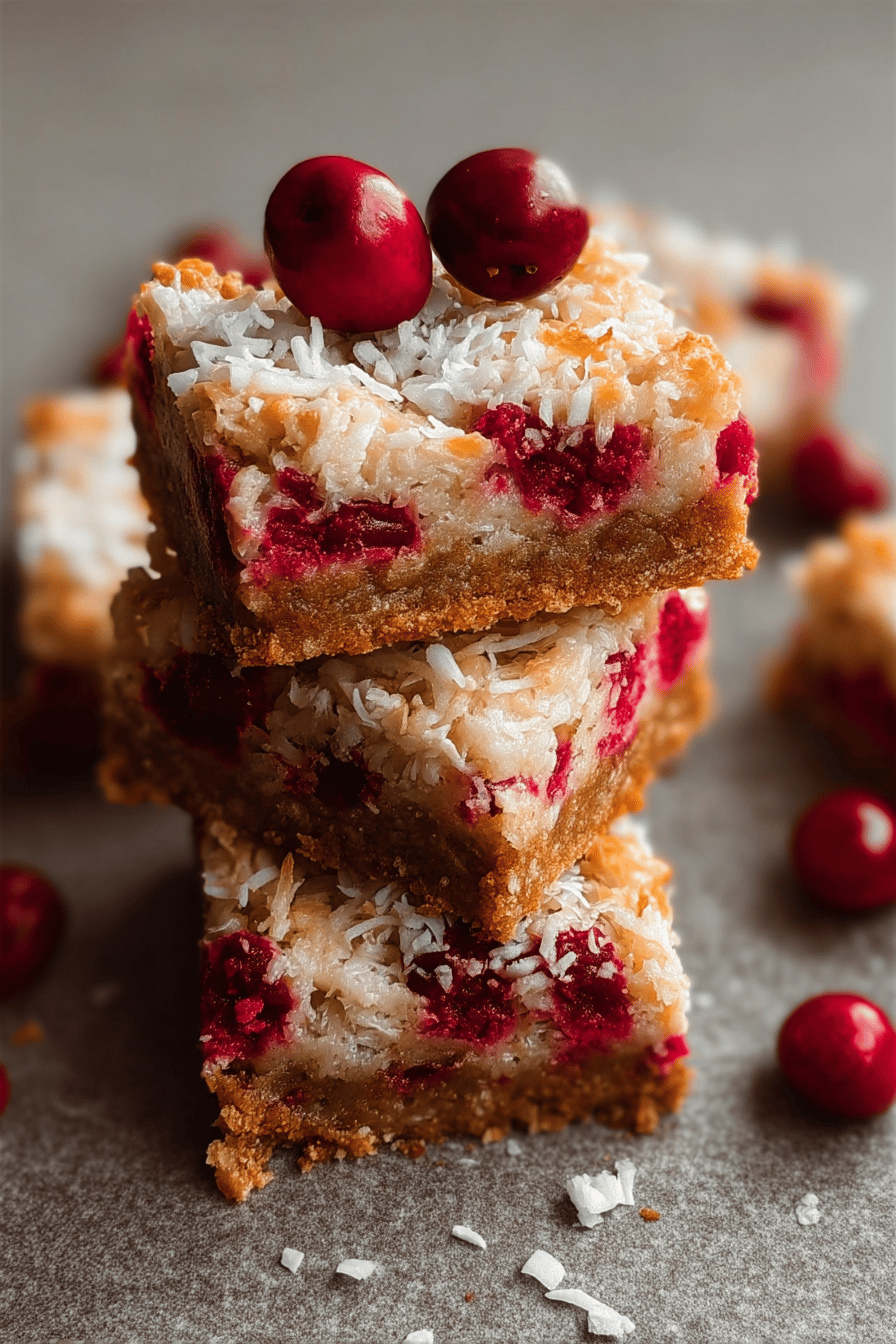
Plating these bars can make them look as good as they taste; arrange them on a festive tray with a dusting of powdered sugar for that snowy effect. Garnishing with extra cherries adds a pop of color, turning your Cherry Coconut Bars into a centerpiece for any gathering.
Make-Ahead Options
For busy schedules, prepare the batter in advance and store it in the fridge for up to a day before baking. This strategy lets you bake fresh batches easily, maintaining that homemade feel without the rush.
How to Store Cherry Coconut Bars: Best Practices
Keeping your Cherry Coconut Bars fresh is simple with the right methods, ensuring they stay chewy and flavorful. Let’s cover the basics so you can enjoy them longer, whether you’re prepping for a crowd or just saving extras.
- Refrigeration: For short-term storage, place the bars in an airtight container and keep them in the fridge for up to a week. This helps maintain their texture, especially after that essential chilling time post-bake.
- Freezing: Wrap individual bars in plastic wrap and store in a freezer-safe bag for long-term options, lasting up to two months. Thaw them in the fridge overnight to preserve the chewy coconut cherry goodness.
- Reheating: Warm bars in the oven at a low temperature for a few minutes to refresh their crunch without losing moisture, making them taste freshly baked.
- Meal Prep Considerations: Cut bars into portions ahead of time for easy grab-and-go snacks, and consider using parchment paper for stacking in containers to avoid sticking during storage.
FAQs: Frequently Asked Questions About Cherry Coconut Bars
How many Cherry Coconut Bars does this recipe usually yield?
What is the total time needed to prepare and bake Cherry Coconut Bars?
Can I add other ingredients to enhance the flavor of Cherry Coconut Bars?
What is the best way to store leftover Cherry Coconut Bars to keep them fresh?
Are Cherry Coconut Bars suitable for special diets, such as gluten-free or vegan?
Cherry Coconut Bars
- Total Time: 5 hours 50 minutes to 6 hours
- Yield: About 30 bars 1x
- Diet: Vegetarian
Description
🍒 Enjoy a nostalgic treat with Cherry Coconut Bars featuring a buttery shortbread base topped with chewy coconut, sweet cherries, and crunchy walnuts.
🌴 These bars offer a festive, colorful dessert that’s perfect for holiday gatherings or anytime you crave a sweet, textured bite.
Ingredients
1 cup sifted flour This forms the base of the shortbread, providing a sturdy, buttery foundation that holds everything together.
1/2 cup butter at room temperature Adds richness and helps create a tender texture, making the bars melt in your mouth.
3 tablespoons icing sugar Sweetens the base lightly and gives it a smooth finish for that classic shortbread feel.
2 eggs, slightly beaten Bind the topping ingredients, adding structure and a bit of moisture for the chewy layer.
1 cup granulated cane sugar Provides the primary sweetness and helps achieve that golden brown top with a delightful crunch.
1/4 cup flour Thickens the topping mixture, ensuring it sets properly without becoming too runny.
1/4 teaspoon salt Balances the sweetness and enhances all the flavors, making the bars taste even more vibrant.
1/2 teaspoon baking powder Helps the topping rise just a little, giving the bars a light, airy lift.
1 teaspoon pure vanilla extract Infuses a warm, aromatic note that ties the whole dessert together with its comforting scent.
1 cup shredded unsweetened coconut Brings in that signature chewiness and a subtle nutty flavor, keeping things from getting too sweet.
1/2 cup chopped maraschino cherries Adds a burst of tartness and festive color, as noted in discussions about cherry-based treats on sites like our cherry pie bars page, making each bite fun and visually appealing.
3/4 cup chopped walnuts Offers a satisfying crunch and healthy fats, as explored in resources on the benefits of walnuts in recipes.
Instructions
First Step: Gather and Prep Your Ingredients Start by pulling together all the ingredients to make your Cherry Coconut Bars assembly a breeze. Measure out 1 cup sifted flour, 1/2 cup butter at room temperature, and 3 tablespoons icing sugar for the base. For the topping, have ready 2 slightly beaten eggs, 1 cup granulated cane sugar, 1/4 cup flour, 1/4 teaspoon salt, 1/2 teaspoon baking powder, 1 teaspoon pure vanilla extract, 1 cup shredded unsweetened coconut, 1/2 cup chopped maraschino cherries, and 3/4 cup chopped walnuts. This mise en place takes about 10 minutes and helps avoid any last-minute rushes plus, if you’re going vegan, swap in flax eggs here for a seamless adaptation.
Second Step: Prepare the Baking Pan and Preheat the Oven Preheat your oven to 350º F to get that perfect bake for your Cherry Coconut Bars. Butter a 9 by 9 inch pan and line it with parchment paper for easy removal later this step is crucial for clean cuts. If you’re trying a variation with a different crust, like using graham cracker crumbs, drop the temperature to 325º F. Timing here is about 5 minutes, and this preparation ensures your bars release without sticking, making storage simpler for busy schedules.
Third Step: Make and Bake the Shortbread Base Mix the 1 cup sifted flour, 1/2 cup room-temperature butter, and 3 tablespoons icing sugar in a bowl until it forms a dough. Spread and pat this mixture evenly into your prepared pan for a solid base. Pop it in the preheated oven and bake for about 15 minutes, or until it’s set and lightly golden. For gluten-free versions, use a gluten-free flour blend to keep the texture just right. This step builds the foundation, taking around 20 minutes total, and sets the stage for that irresistible Cherry Coconut Bars chewiness.
Fourth Step: Prepare and Add the Topping While the base bakes, stir together the topping: combine 2 slightly beaten eggs, 1 cup granulated cane sugar, 1/4 cup flour, 1/4 teaspoon salt, 1/2 teaspoon baking powder, 1 teaspoon pure vanilla extract, 1 cup shredded unsweetened coconut, 1/2 cup chopped maraschino cherries, and 3/4 cup chopped walnuts in a bowl. Once mixed, spread this over the baked base right out of the oven. For variations, add extras like almond extract if you want more depth. Bake for another 22 to 25 minutes until the top is lightly browned, which takes about 30 minutes including prep time. Adaptations for low-calorie options could mean reducing sugar, keeping the flavors balanced.
Fifth Step: Cool and Chill for the Best Texture Let the bars cool in the pan for at least 30 minutes to avoid crumbling. Then, refrigerate them for a minimum of 4 hours to firm up, as this chilling time from variations ensures easier slicing and a better texture. I love how this step makes the bars even more shareable perfect for packing in lunches or gifting. If you’re meal prepping, this is where you can adjust for dietary preferences, like using dairy-free butter to maintain freshness.
Final Step: Cut and Serve Your Cherry Coconut Bars Once chilled, lift the bars from the pan using the parchment paper and cut into squares aim for about 24 to 30 pieces depending on size. Serve them as a festive treat, perhaps with a cup of tea, to enjoy that chewy coconut and cherry goodness. For make-ahead options, these store well, and you can even freeze portions for later, adapting the recipe as needed for different tastes. This whole process, from start to finish, takes around 5 to 6 hours including chilling, but the wait is worth it for these delightful Cherry Coconut Bars.
Notes
🍴 Using unsweetened coconut helps balance the sweetness, and modifying sugar quantities can tailor the bars to your taste.
📜 Lining the pan with parchment makes removing the bars easier and keeps them intact.
🌰 Mix in different nuts, dark chocolate bits, or extracts like almond to customize flavor and texture.
- Prep Time: 15 to 20 minutes
- Cooling and chilling time: 5 hours
- Cook Time: 35 to 40 minutes
- Category: Dessert
- Method: Baking
- Cuisine: American
Nutrition
- Serving Size: 1 bar (approximate)
- Calories: 110 to 383 kcal
- Sugar: 9 to 35 grams
- Sodium: 55 to 200 mg
- Fat: 6 to 21 grams
- Saturated Fat: 2 to 16 grams
- Unsaturated Fat: Not specified
- Trans Fat: Not specified
- Carbohydrates: 14 to 46 grams
- Fiber: 4 grams
- Protein: 1 to 5 grams
- Cholesterol: 20 to 32 mg
Keywords: Cherry, Coconut, Bars, Dessert