
Why You’ll Love This No Churn Ice Cream Recipe
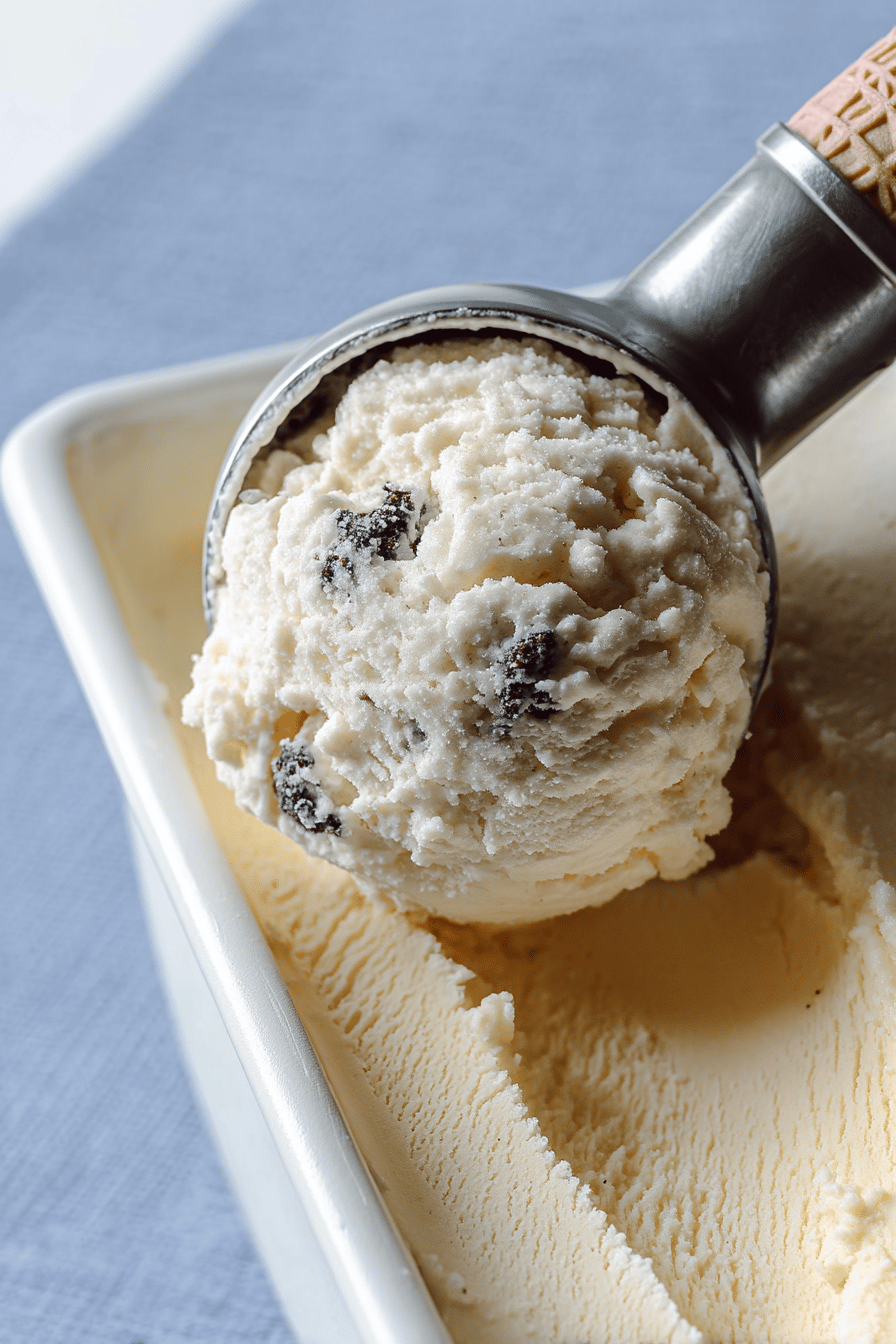
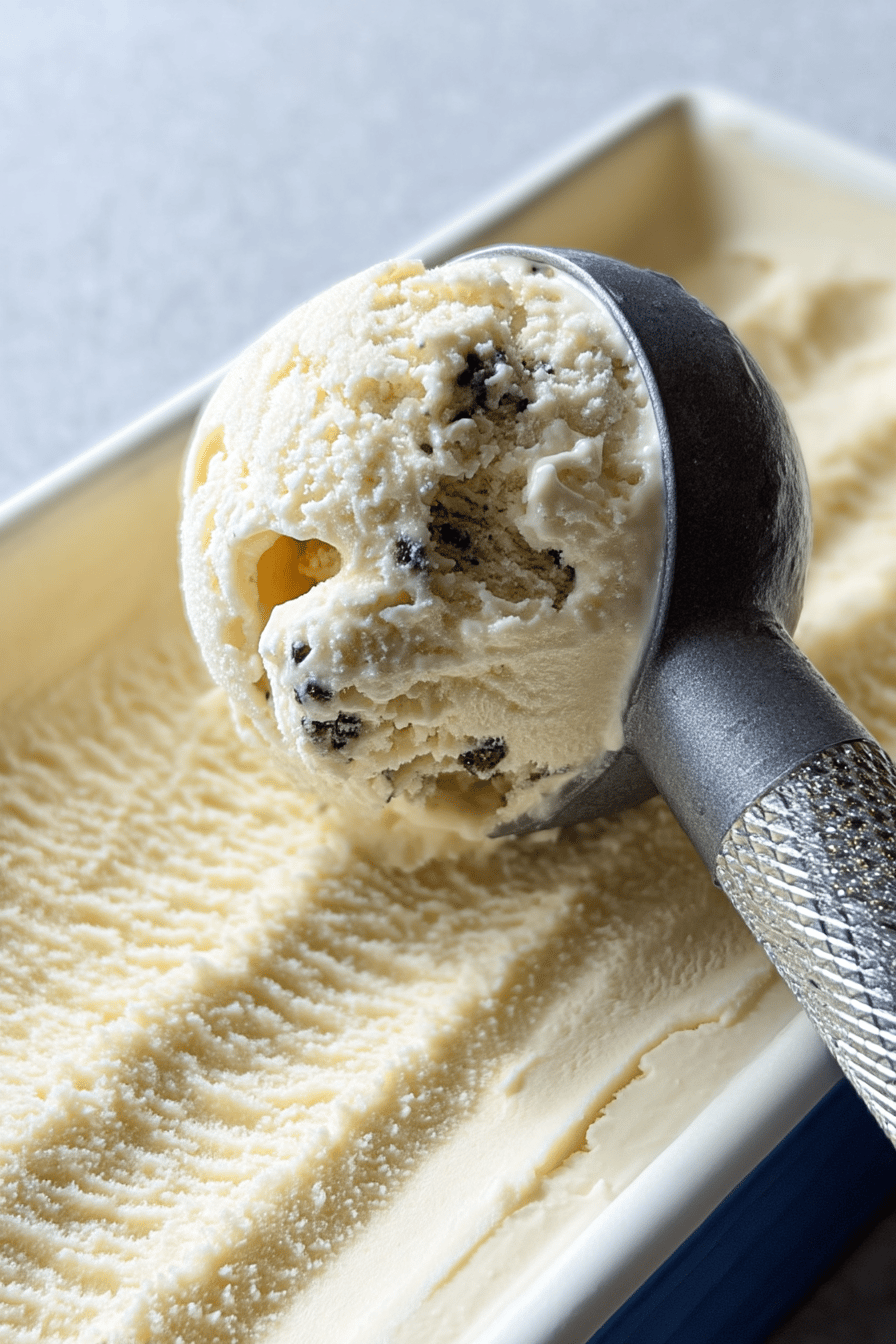
This no churn ice cream recipe is a homemade treat that’s as easy as it is delicious, perfect for anyone craving creamy dessert without the fuss. While it doesn’t require an ice cream maker, it delivers rich, smooth results that rival store-bought options this is why it’s a staple for dessert lovers everywhere.
- Ease of preparation: Whipping up this no churn ice cream takes just 10 minutes of active time before freezing for 4-6 hours, making it a simple solution for spontaneous treats or last-minute gatherings. No special equipment is needed, just basic kitchen tools, so you can enjoy fresh ice cream without the complexity.
- Health benefits: Made with wholesome ingredients like heavy cream and sweetened condensed milk, this recipe offers calcium for bone health and can be customized with add-ins like fruit for vitamins, all while keeping calories manageable at about 250 per serving. It’s a fun way to indulge moderately, fitting into balanced dessert choices for wellness-minded individuals.
- Versatility: Tailor this no churn ice cream to various dietary needs, from vegan swaps to gluten-free versions, allowing for endless variations that cater to preferences. Whether you’re adding nuts, fruits, or extracts, it adapts effortlessly to make your ice cream experience personal and inclusive.
- Distinctive flavor: The creamy base from whipped cream and condensed milk creates a luxurious texture with customizable flavors, like vanilla or berry infusions, that stand out from traditional methods. This no churn approach ensures a velvety finish that’s hard to beat, making every scoop a delightful surprise.
Overall, this no churn ice cream recipe brings joy to dessert time with its straightforward process and adaptable nature!
Essential Ingredients for No Churn Ice Cream Recipe
Creating this no churn ice cream requires simple, everyday ingredients that yield creamy results without an ice cream maker. Below is a detailed list with measurements, emphasizing their roles in achieving that perfect frozen texture.
Main Ingredients
- 2 cups heavy whipping cream – Forms the base for a rich, airy texture, providing the creaminess essential to no churn ice cream.
- 1 can (14 oz) sweetened condensed milk – Adds sweetness and smooth body, helping the mixture freeze without ice crystals in no churn ice cream.
- 1 tablespoon pure vanilla extract – Infuses aromatic flavor, enhancing the overall taste while keeping it simple for no churn ice cream.
- 1/4 teaspoon salt – Balances sweetness and improves mouthfeel, ensuring a well-rounded no churn ice cream recipe.
- Optional add-ins: 1 cup fresh fruit (e.g., strawberries or blueberries) – Incorporates natural flavors and nutrients, customizing your no churn ice cream experience.
- Optional add-ins: 1/2 cup chocolate chips or nuts – Provides texture and variety, making no churn ice cream more exciting and versatile.
- 1 tablespoon lemon juice (for fruit-based flavors) – Adds acidity to brighten flavors and preserve freshness in no churn ice cream.
Special Dietary Options
- Vegan: Replace 2 spirts heavy whipping cream with coconut cream and use a vegan version of sweetened condensed milk for a plant-based no churn ice cream.
- Gluten-free: This recipe is naturally gluten-free, but check add-ins like nuts or chips to ensure they meet gluten-free standards for no churn ice cream.
- Low-calorie: Opt for low-fat condensed milk and reduce add-ins; use Greek yogurt instead of some cream to lighten up your no churn ice cream while maintaining creaminess.
How to Prepare the Perfect No Churn Ice Cream Recipe: Step-by-Step Guide
Mastering this no churn ice cream recipe is straightforward and fun, taking about 10 minutes of hands-on time followed by 4-6 hours of freezing. This guide serves 6-8 and includes tips for adapting to dietary needs, ensuring a velvety treat every time.
First Step: Gather and Prep Ingredients
Start by assembling all ingredients to keep things efficient your mise en place. Chill the 2 cups heavy whipping cream in the fridge, and if using add-ins, chop 1 cup fresh fruit or measure out items like chocolate chips. For vegan adaptations, swap in coconut cream now to prepare for a smooth base in no churn ice cream.
Second Step: Whip the Cream
In a large bowl, use a hand mixer or stand mixer to whip the heavy whipping cream on medium-high speed until stiff peaks form, which takes about 2-3 minutes. This creates the airy foundation; for low-calorie versions, mix in Greek yogurt here to lighten the texture without compromising the no churn ice cream’s creaminess.
Third Step: Mix in Sweetened Condensed Milk and Flavors
Gently fold in the 1 can (14 oz) sweetened condensed milk, 1 tablespoon pure vanilla extract, and 1/4 teaspoon salt until fully incorporated this should take about 1 minute to avoid deflating the whipped cream. If adding flavors like fruit, stir in 1 tablespoon lemon juice for vibrancy, and adapt with vegan milk alternatives if needed for no churn ice cream.
Fourth Step: Add Mix-Ins and Transfer to Pan
Fold in optional add-ins like 1/2 cup chocolate chips or chopped fruit, distributing evenly. Pour the mixture into a loaf pan or freezer-safe container, smoothing the top for even freezing. This step is ideal for customizing use gluten-free add-ins to keep your no churn ice cream inclusive and delicious.
Fifth Step: Freeze the Ice Cream
Cover and freeze the pan for at least 4-6 hours, or overnight for best results; stir once after 2 hours if you prefer a softer texture. For low-calorie tweaks, monitor freezing time to prevent over-hardening in no churn ice cream.
Final Step: Serve with Finishing Touches
Once frozen, scoop into bowls and garnish with fresh fruit or a drizzle of sauce for extra appeal. Serve immediately for the creamiest experience, noting how versatile this no churn ice cream is for desserts or snacks!

Dietary Substitutions to Customize Your No Churn Ice Cream Recipe
Protein and Main Component Alternatives
Suggested alternatives for the base include using Greek yogurt instead of some heavy cream for added protein, or incorporating nut milks for a lighter, nutrient-dense twist in no churn ice cream.
Vegetable, Sauce, and Seasoning Modifications
Add seasonal veggies like spinach for a sneaky green boost, or swap sauces with fruit purees; adjust seasonings like vanilla for personalized flavor profiles in your no churn ice cream recipe.
Mastering No Churn Ice Cream Recipe: Advanced Tips and Variations
Elevate your no churn ice cream with these expert tips and creative ideas to make every batch a success.
Pro Cooking Techniques
Chill your bowl before whipping for better volume, or experiment with infusions like coffee for enhanced flavors in no churn ice cream.
Presentation Tips
Serve in decorative glasses with toppings for a polished look, turning your no churn ice cream into an elegant dessert.
How to Store No Churn Ice Cream Recipe: Best Practices
Store your no churn ice cream properly to keep it fresh and creamy.
- Refrigeration: Use an airtight container for up to 1 week, maintaining texture in no churn ice cream.
- Freezing: Wrap well for long-term storage, ensuring no churn ice cream stays scoopable.
- Reheating: Let it soften at room temperature for serving, preserving quality in no churn ice cream.
- Meal Prep Considerations: Prepare in advance for easy treats, integrating no churn ice cream into your routine.
FAQs: Frequently Asked Questions About No Churn Ice Cream Recipe
How long can I store no churn ice cream in the freezer?
Can I make no churn ice cream without using sweetened condensed milk?
How can I make no churn ice cream dairy-free?
What causes no churn ice cream to become too hard, and how do I scoop it easily?
What mix-ins can I add to no churn ice cream, and when should I add them?

No Churn Ice Cream Recipe
- Total Time: approximately 4 hours 25 minutes
- Yield: about 6 servings
Description
🍦 Delight in homemade ice cream without the fuss of an ice cream maker, perfect for spontaneous dessert cravings!
🍓 Explore endless flavor combinations with this versatile no churn ice cream recipe, designed for all your favorite mix-ins.
Ingredients
– 2 cups heavy whipping cream for a rich, airy texture
– 1 can (14 oz) sweetened condensed milk for sweetness and smooth body
– 1 tablespoon pure vanilla extract for aromatic flavor
– 1/4 teaspoon salt for balancing sweetness
– 1 cup fresh fruit (e.g., strawberries or blueberries) for natural flavors
– 1/2 cup chocolate chips or nuts for texture and variety
– 1 tablespoon lemon juice for fruit-based flavors
Instructions
1-First Step: Gather and Prep Ingredients: Start by assembling all ingredients to keep things efficient your mise en place. Chill the 2 cups heavy whipping cream in the fridge, and if using add-ins, chop 1 cup fresh fruit or measure out items like chocolate chips. For vegan adaptations, swap in coconut cream now to prepare for a smooth base in no churn ice cream.
2-Second Step: Whip the Cream: In a large bowl, use a hand mixer or stand mixer to whip the heavy whipping cream on medium-high speed until stiff peaks form, which takes about 2-3 minutes. This creates the airy foundation; for low-calorie versions, mix in Greek yogurt here to lighten the texture without compromising the no churn ice cream’s creaminess.
3-Third Step: Mix in Sweetened Condensed Milk and Flavors: Gently fold in the 1 can (14 oz) sweetened condensed milk, 1 tablespoon pure vanilla extract, and 1/4 teaspoon salt until fully incorporated this should take about 1 minute to avoid deflating the whipped cream. If adding flavors like fruit, stir in 1 tablespoon lemon juice for vibrancy, and adapt with vegan milk alternatives if needed for no churn ice cream.
4-Fourth Step: Add Mix-Ins and Transfer to Pan: Fold in optional add-ins like 1/2 cup chocolate chips or chopped fruit, distributing evenly. Pour the mixture into a loaf pan or freezer-safe container, smoothing the top for even freezing. This step is ideal for customizing use gluten-free add-ins to keep your no churn ice cream inclusive and delicious.
5-Fifth Step: Freeze the Ice Cream: Cover and freeze the pan for at least 4-6 hours, or overnight for best results; stir once after 2 hours if you prefer a softer texture. For low-calorie tweaks, monitor freezing time to prevent over-hardening in no churn ice cream.
6-Final Step: Serve with Finishing Touches: Once frozen, scoop into bowls and garnish with fresh fruit or a drizzle of sauce for extra appeal. Serve immediately for the creamiest experience, noting how versatile this no churn ice cream is for desserts or snacks!
Notes
🥄 Sweetened condensed milk is key for texture and sweetness; avoid substitutes.
❄️ Always chill your bowl before whipping cream for best results.
✨ Use a metal container for faster freezing and smoother texture.
- Prep Time: 15 minutes
- Chilling/freezing time: at least 4 hours
- Category: Dessert
- Method: No Churn
- Cuisine: American
Nutrition
- Serving Size: about ¾ cup
- Calories: 369
- Sugar: 30g
- Sodium: 79mg
- Fat: 26g
- Saturated Fat: 16g
- Unsaturated Fat: 10g
- Trans Fat: 0g
- Carbohydrates: 30g
- Fiber: 0g
- Protein: 6g
- Cholesterol: 84mg
Keywords: No Churn Ice Cream, Homemade, Easy Ice Cream, No Machine Needed