
Introduction to Loaded Potato Skins
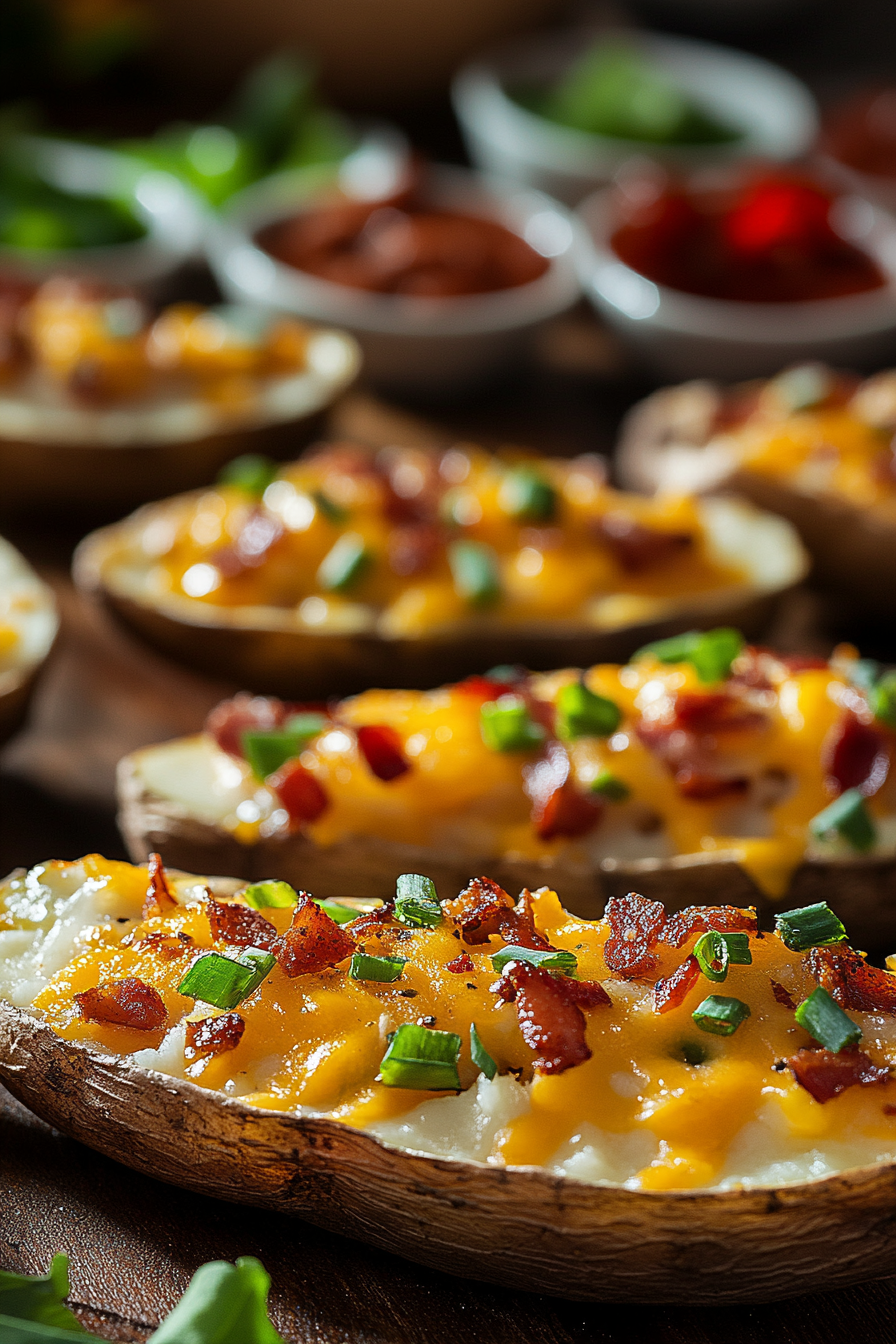
Crispy, golden loaded potato skins are the perfect dish to impress your family and friends. These scrumptious appetizers are known for their delightful blend of textures and flavors. Packed with melted cheese, crispy bacon, and refreshing green onions, these potato skins are simple, healthy, and naturally gluten-free. Perfect for any occasion, they make a great addition to game days and parties. Whether your guests are home cooks or busy parents, this delightful recipe makes cooking fun and enjoyable for everyone. So let’s dive into crafting the ultimate loaded potato skins today!
Benefits and Advantages of Loaded Potato Skins
Loaded potato skins are a popular choice due to their ease of preparation and versatile nature. This simple recipe offers health benefits too, as it’s customizable to fit various dietary needs, such as vegan or low-calorie. Using readily available ingredients, the dish delivers a satisfaction guaranteed with each bite. The crispy, seasoned skins combined with flavorful toppings create a comfort food sensation that’s hard to resist. Furthermore, your guests will appreciate the option to personalize with different fillings, allowing them to fully indulge in this appetizing experience.

Ingredients Overview
Essential Ingredients for Loaded Potato Skins
- Russet Potatoes: 6 medium-sized Russet potatoes, ideal for their sturdy skins and fluffy interiors, allowing a crispy bite.
- Olive Oil: 2 tablespoons olive oil to brush on the potato skins, enhancing their crispiness.
- Salt and Pepper: To taste, for seasoning the potatoes effectively.
- Garlic Powder: 1 teaspoon adds a subtle flavor to the potato skins.
- Cheddar Cheese: 1 cup shredded, providing a creamy, melted touch that is quintessential in potato skins.
- Bacon Bits: 1/2 cup cooked and crumbled, for a savory and crunchy topping.
- Sour Cream: 1/2 cup, adds a creamy tang to contrast the cheese.
- Chives or Green Onions: 1/4 cup chopped, for garnish, adding a fresh onion note to the dish.
For those with dietary needs, you can make the following adjustments:
- Vegan Option: Use vegan cheese and omit bacon or replace with vegan bacon bits.
- Gluten-Free: No changes needed as this recipe naturally avoids gluten.
- Low-Calorie: Opt for reduced-fat cheese and sour cream.
Dietary Substitutions to Customize Your Loaded Potato Skins
Catering to various dietary preferences, these substitutions can be applied:
- Dairy-Free: Swap cheddar cheese with a dairy-free alternative and use a dairy-free sour cream option.
- Vegetarian: Simply leave out the bacon, or replace it with vegetarian bacon strips cooked crispy.
- Low-Sodium: Reduce the amount of added salt and choose low-sodium cheese options.
With these ingredient suggestions and dietary substitutions, you can create loaded potato skins that cater to everyone’s taste.
How to Prepare the Perfect Loaded Potato Skins: Step-by-Step Guide
Creating the perfect batch of loaded potato skins requires attention to detail. Follow this step-by-step guide to ensure a delicious result.
Step 1: Preheat and Prepare
Preheat your oven to 400°F (200°C) to start with a hot environment ideal for baking. Wash and scrub the Russet potatoes thoroughly under cold water, ensuring you remove any dirt. Pat them dry with a towel.
Step 2: Bake the Potatoes
Poke each potato several times with a fork, allowing steam to escape. Rub them with olive oil, sprinkle with salt, and place directly on the oven rack. Bake for about 50-60 minutes until they are easily pierced with a fork. If you prefer using an air fryer, bake at 400°F for around 35-40 minutes.
Step 3: Prepare the Skins
Once baked, allow the potatoes to cool slightly. Cut each potato in half lengthwise and scoop out the flesh, leaving about 1/4-inch thick shell – save the scooped flesh for another recipe like French toast casserole.
Step 4: Season and Bake Again
Place the skins on a baking sheet. Brush with olive oil inside and out, then sprinkle with garlic powder, salt, and pepper. Bake for another 10 minutes on each side until crispy and golden brown.
Step 5: Add Toppings
Remove the crispy skins from the oven. Generously sprinkle each with shredded cheddar cheese and bacon bits. Return to the oven for 5-7 minutes until the cheese has melted thoroughly.
Step 6: Final Touches
Top each potato skin with a dollop of sour cream and finish with a sprinkle of chopped chives or green onions for freshness.
This method ensures a delicious, crispy finish for your loaded potato skins, whether you’re making them for game day or a casual dinner appetizer. Adapt the recipe as needed, and perhaps consider adding jalapenos for a spicy kick!

Mastering Loaded Potato Skins: Advanced Tips and Variations
Once you’ve got the basics down, it’s time to take your loaded potato skins to a whole new level with some advanced tips and creative variations. Whether you’re a home cook looking to impress guests or just want to try something different for yourself, these suggestions will help you achieve perfection in your loaded potato skins.
Advanced Tips for Perfect Loaded Potatoes
- Choosing the Right Potato: Opt for medium-sized Russet potatoes for the crispiest skins. Their thick skin holds up best during baking.
- Ensure Maximum Crispiness: After scooping out the flesh, brush both sides of the skins with olive oil or melted butter. This step is crucial for achieving that perfect golden-brown finish.
- Monitor Your Baking Time: Keep a close eye on the second baking process and ensure you remove the skins when they are just crispy enough to snap but not overly hard.
- Spice It Up: Add a pinch of garlic powder or smoked paprika to your seasoning mix for added flavor depth.
Creative Variations to Try
Once you’ve mastered the technique, why not experiment with different toppings to suit your crowd’s tastes or dietary needs?
- Mexican Style: Top your skins with seasoned black beans, fresh salsa, and a drizzle of sour cream. A sprinkle of cilantro adds a fresh contrast.
- Vegetarian Delight: Ditch the bacon and opt for a medley of bell peppers, sweet corn, and onions sautéed in olive oil. Add shredded vegetarian cheese for creaminess.
- Vegan Option: Use vegan cheese and replace sour cream with a creamy avocado dip. Adding nutritional yeast gives an extra cheesy flavor without dairy.
- BBQ Pulled Pork: Add a spoonful of pulled pork and a drizzle of your favorite BBQ sauce for a smoky twist that pairs perfectly with baked potato skins.
For inspiration on crunchy additions, check out my jalapeno cheese crisps, an excellent addition that provides just the right amount of kick!
How to Store Loaded Potato Skins: Best Practices
Storing your loaded potato skins properly is essential if you want to enjoy them again later. Whether you’ve got leftovers from a big gathering or you’re meal prepping, here are some best practices on how to keep your potato creations fresh and tasty.
Refrigeration Tips
After enjoying your loaded potato skins, ensure they are completely cooled before storing them in the fridge. Place the skins in an airtight container or wrap them firmly with aluminum foil. This method keeps them fresh for up to three days.
Freezing Instructions
Freezing is an excellent option if you anticipate a longer wait before consuming your potato skins. First, allow your loaded potato skins to cool completely. Then, place them on a baking sheet, ensuring they do not touch, and freeze them. Once frozen solid, transfer them into a freezer-safe bag or a tightly sealed container. Properly stored, they can last for about two months in the freezer.
Reheating Techniques
When you’re ready to revisit your loaded potato skins, reheating them properly is crucial for retaining their crispy texture. If you’ve refrigerated your potato skins, preheat your oven to 350°F (175°C) and bake for about 10-15 minutes until they’re heated through. For frozen potato skins, preheat the oven to the same temperature but extend the baking time to 20-25 minutes. You can also use an air fryer to bring back that crispiness much quicker. Simply air fry refrigerated skins at 350°F (175°C) for 5-7 minutes, adjusting for frozen ones.
For more storage solutions for your favorite dishes, check my red enchilada sauce recipe to complement your meal plans.
Remember, enjoying leftovers does not mean compromising on taste or satisfaction. Proper storage and reheating ensure that your loaded potato skins remain as delicious as the day they were made.

Nutritional Value of Loaded Potato Skins
Loaded potato skins can be a delicious treat that satisfies cravings while also offering certain nutritional benefits. Understanding their nutritional content helps you balance indulgence with health goals. Each serving of loaded potato skins provides a mix of macronutrients and vitamins, making them a versatile addition to your diet.
Macronutrients in Loaded Potato Skins
One serving, typically comprising a medium-size potato skin filled with toppings, contains approximately:
- Calories: About 150-200 per skin, depending on toppings
- Protein: 7-10 grams, primarily from cheese and bacon
- Fat: 10-15 grams, influenced by the type and amount of cheese and butter or oil used
- Carbohydrates: 20-25 grams, primarily from the potato itself
It’s essential to choose toppings wisely to ensure a balanced meal and meet dietary preferences. For instance, substituting full-fat cheese with a low-fat option can reduce overall fat and calorie content.
Vitamins and Minerals
Loaded potato skins also offer various vitamins and minerals that contribute positively to your health:
| Nutrient | Benefits |
|---|---|
| Vitamin C | Supports immune function and skin health |
| Potassium | Aids in maintaining proper heart and muscle function |
| Fiber | Promotes digestive health and increases satiety |
| Calcium | Strengthens bones and teeth |
These nutrients are primarily derived from the potatoes and cheese. To enhance your intake, consider adding nutrient-dense toppings such as broccoli or using fortified products when available.
Optimizing Your Health with Loaded Potato Skins
By choosing healthier toppings and smarter cooking methods, such as air frying instead of deep frying, you can maximize the nutritional benefits while enjoying the flavors of loaded potato skins. Make thoughtful choices to keep this popular dish within your dietary plan. For more detailed caloric information, you can visit Eat This Much to plan accordingly.
FAQs: Frequently Asked Questions About Loaded Potato Skins
Can you eat the skin of a loaded potato?
Yes, you can certainly eat the skin of a loaded potato. Potato skins are not only edible but also rich in nutrients such as fiber, which aids digestion and promotes fullness. Ensure they’re thoroughly cleaned and baked to achieve the ideal, crispy texture before enjoying them with your favorite toppings.
Are loaded potato skins good for you?
Loaded potato skins can be a healthy part of your diet when enjoyed in moderation. They offer a decent amount of protein, vitamins, and minerals. By choosing nutrient-rich toppings and cooking methods that retain nutritional quality, you can enjoy this dish as a balanced snack or appetizer. Learn more about the nutritional breakdown of loaded potato skins through resources like Carb Manager.
What type of potatoes are best for making loaded potato skins?
Russet potatoes are the best choice for making loaded potato skins due to their higher starch content, which creates the desired crispy texture when baked. They have a thick skin and fluffy interior, making them ideal for scooping and filling with toppings.
How do you store leftover loaded potato skins?
To store leftover loaded potato skins, allow them to cool completely, then place them in an airtight container. They can be refrigerated for up to 3-4 days. When reheating, use an oven or air fryer to return the skins to their original crispness. Avoid microwaving, as it may result in a soggy texture. Additionally, loaded potato skins can be frozen for longer storage—just thaw them in the fridge before reheating for the best results.
Print
Loaded Potato Skins Recipe Easy
- Total Time: 2 hours
Description
🔥 Crispy, cheesy, and loaded with flavor—these Loaded Potato Skins are the ultimate crowd-pleaser for game days and parties! 🥔✨
🧀 With golden-baked potato shells, melty cheddar, crispy bacon, and a dollop of sour cream, every bite is pure comfort you don’t want to miss! 😍🥓
Ingredients
Russet potatoes
Olive oil
Butter
Cheddar cheese
Bacon
Sour cream
Chives or green onions
Salt
Black pepper
Garlic powder
Instructions
1. Preheat oven to 400°F (200°C).
2. Wash and dry russet potatoes thoroughly.
3. Pierce potatoes with a fork a few times.
4. Place potatoes on a baking sheet and bake for about 50-60 minutes until tender.
5. Remove potatoes from oven and let them cool slightly.
6. Cut each potato in half lengthwise.
7. Scoop out the inside, leaving a thin layer of potato attached to the skin.
8. Brush both sides of the potato skins with olive oil or melted butter.
9. Season with salt, pepper, and garlic powder.
10. Place potato skins back on the baking sheet, skin side down.
11. Bake for another 10-15 minutes until crispy.
12. Remove from oven and sprinkle shredded cheddar cheese inside each skin.
13. Add crumbled cooked bacon on top of the cheese.
14. Return to oven and bake for another 5-7 minutes until cheese is melted.
15. Remove from oven and let cool for a minute.
16. Top with sour cream and chopped chives or green onions.
17. Serve warm with optional dipping sauces like ranch dressing.
Notes
Brush the potato skins with oil or melted butter before baking them the second time to achieve a crispy, golden texture.
Use freshly grated cheddar cheese instead of pre-shredded for better melting and flavor.
Save the scooped-out potato flesh for mashed potatoes or other dishes to reduce waste and make the most of your ingredients.
- Prep Time: 30
- Cook Time: 90
- Category: Appetizer
- Method: Baked
- Cuisine: American