

Introduction to Homemade Cinnamon Rolls
Imagine waking up to the irresistible aroma of homemade cinnamon rolls, a treat that guarantees to make your mornings delightful and special. These soft and gooey delights are not only simple to make but also cater to various dietary preferences, including vegan and gluten-free options. Whether you’re a busy parent needing a quick morning fix or a baking enthusiast eager to try something new, homemade cinnamon rolls are a delicious choice for anyone who loves a comforting and flavorful breakfast treat.
Benefits and Advantages of Homemade Cinnamon Rolls
Creating homemade cinnamon rolls offers numerous benefits that make them a preferred choice over store-bought alternatives. Firstly, they are incredibly easy to prepare, which makes them ideal for home cooks and busy individuals who might not have hours to spend in the kitchen. Moreover, with options to customize recipes according to dietary needs — such as using gluten-free flour or vegan ingredients — these rolls can be enjoyed by everyone. Additionally, they provide a healthier alternative by allowing control over ingredient quality and sugar levels. Therefore, these homemade goodies stand out for their simplicity and adaptability.

Ingredients Overview
Essential Ingredients for Homemade Cinnamon Rolls
Creating the perfect homemade cinnamon rolls requires a careful selection of ingredients that work in harmony to deliver the soft, gooey goodness that everyone loves. Here’s a comprehensive list of what you need:
- Flour: 3 1/2 cups of all-purpose flour (or bread flour for a chewier texture) gives structure to the dough.
- Sugar: 1/4 cup of granulated sugar adds subtle sweetness to the dough.
- Yeast: 2 1/4 teaspoons of active dry or instant yeast is crucial for the dough to rise.
- Salt: A pinch balances the flavors perfectly.
- Milk: 1 cup of warm milk (around 110°F) helps to activate the yeast.
- Butter: 1/3 cup of unsalted butter, melted, enriches the dough.
- Egg: 1 large egg for adding richness and body.
- For the Filling: a mixture of 1/2 cup of softened butter, 1 cup brown sugar, and 2 1/2 tablespoons cinnamon.
- For the Icing: Blend together 4 ounces cream cheese, 1/4 cup butter, 1 1/2 cups powdered sugar, and 1/2 teaspoon vanilla extract for a creamy glaze.
By understanding the role of each ingredient, you can ensure your homemade cinnamon rolls will be a delightful treat. Whether you’re a busy parent preparing treats for the family or a diet-conscious individual modifying ingredients, there are ample options to suit your needs.
Dietary Substitutions to Customize Your Homemade Cinnamon Rolls
Catering to dietary preferences doesn’t mean compromising on flavor. Here are some thoughtful substitutions to make your homemade cinnamon rolls adaptable for everyone:
- Vegan Option: Use almond milk or soy milk instead of regular milk, substitute dairy-free margarine for butter, and use a flaxseed egg (1 tablespoon ground flaxseed mixed with 3 tablespoons water) in place of a regular egg.
- Gluten-Free Option: Opt for a high-quality gluten-free flour blend to replace all-purpose flour. Remember to check other ingredients for gluten presence.
- Low-Calorie Option: Replace sugar with a calorie-free sweetener like Stevia, and use low-fat cream cheese for the icing.
Feel free to adapt these ingredients based on what you have in your pantry. With these substitutions, homemade cinnamon rolls can be both accessible and delightful for all.
How to Prepare the Perfect Homemade Cinnamon Rolls: Step-by-Step Guide
Embarking on the journey of making homemade cinnamon rolls is both exciting and rewarding. Let’s dive into this step-by-step guide to achieve perfection:
First Step: Prepare the Dough
Start by activating your yeast. In a bowl, mix the warm milk and yeast together with a spoon and let it sit for about 5 minutes. This activates the yeast, which should become frothy. In a large mixing bowl, combine flour, sugar, and salt. Then add the activated yeast mixture, melted butter, and the egg. Use a dough hook on a mixer or your hands to knead the dough until it becomes smooth and elastic, about 7-10 minutes.
Second Step: Allow the Dough to Rise
Once kneaded, place the dough into a lightly greased bowl, cover it with a damp cloth, and let it rise in a warm place until it doubles in size. This typically takes about 1 to 2 hours. During this time, you can prepare your filling.
Third Step: Prepare the Filling
Mix softened butter, brown sugar, and cinnamon in a bowl until it forms a paste-like consistency. Set this aside to use once the dough has risen.
Fourth Step: Roll Out the Dough
After the dough has risen, punch it down to release the air and roll it out on a floured surface. You should aim for a rectangle about 18×12 inches in size. Evenly spread the cinnamon-sugar filling across the rolled-out dough, ensuring the edges are covered too.
Fifth Step: Shape the Rolls
Roll the dough tightly from one end to the other, forming a log shape. Using a sharp knife or dental floss, cut the log into 12 even pieces. Arrange these pieces onto a greased baking dish.
Sixth Step: Let the Rolls Rise Again
Cover the baking dish with a cloth and let the rolls rise for another 30 minutes to 1 hour in a warm environment, so they’re fluffy and well-risen.
Seventh Step: Bake the Rolls
Preheat your oven to 350°F (175°C). Once the rolls have risen, bake them in the preheated oven for 25 to 30 minutes, or until they turn a beautiful golden brown.
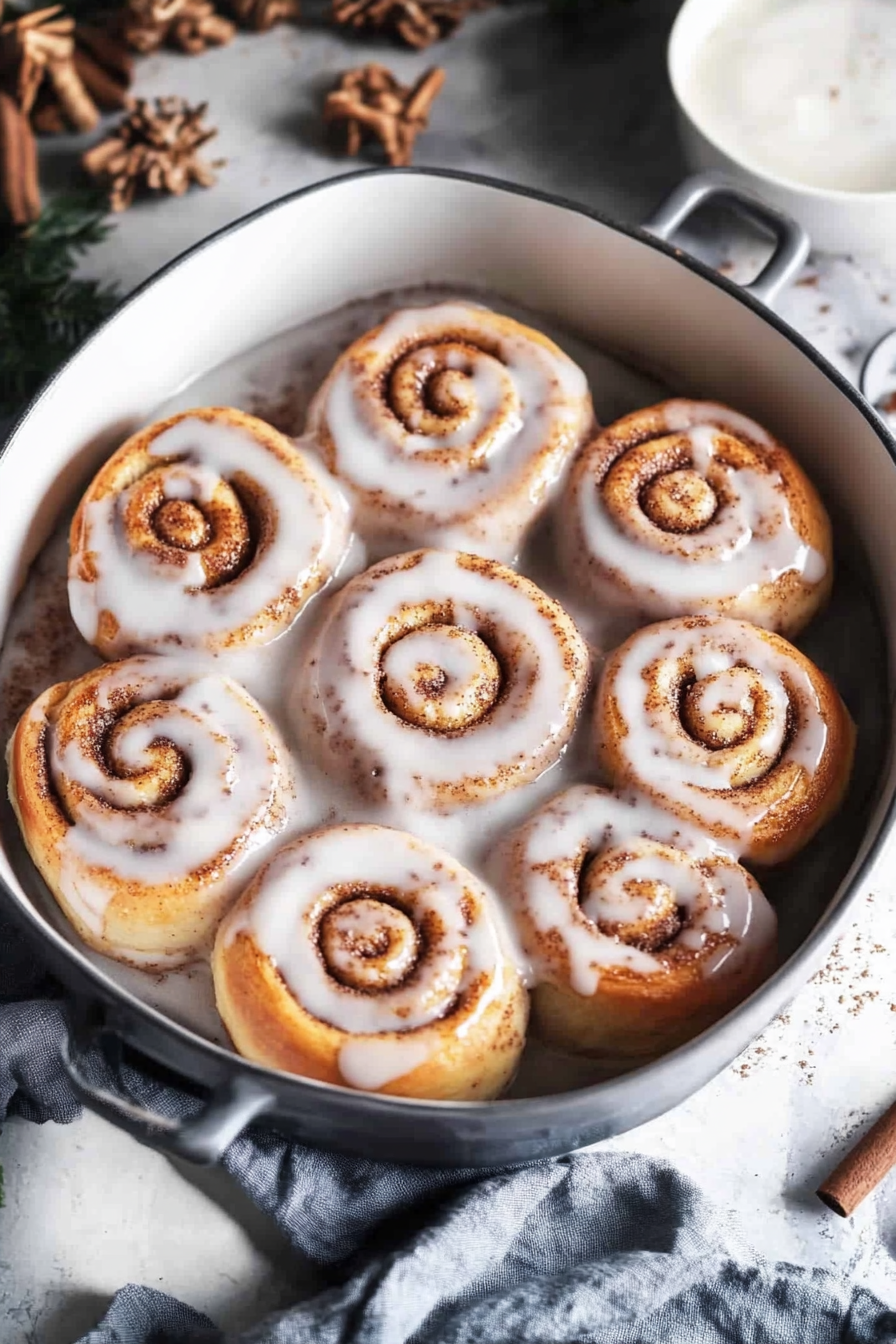
Eighth Step: Add the Icing
Once baked, allow the rolls to cool slightly before spreading your prepared cream cheese icing over them. If you don’t have time to make your own icing from scratch, consider using a ready-made option for convenience.
This guide ensures you make perfectly soft and gooey homemade cinnamon rolls every time. For additional recipes, you might find homemade churros just as delightful!
Mastering Homemade Cinnamon Rolls: Advanced Tips and Variations
Crafting the perfect homemade cinnamon rolls requires more than just a recipe—it’s about technique and personal flair. Let’s dive into a few advanced tips and exciting variations to make your cinnamon rolls extra special.
Advanced Tips for Homemade Cinnamon Rolls
Firstly, use the highest quality ingredients you can find. Premium butter, fresh spices, and organic flour can make a significant difference in taste and texture.
- Kneading the Dough: Kneading properly is essential for developing the gluten structure, resulting in a soft, airy texture. Aim to knead the dough for about 8-10 minutes.
- Checking the Dough Rise: Ensure the dough rises in a warm, humid environment. Aim for a space between 75 to 85 degrees Fahrenheit and keep the dough covered to prevent dryness.
- Incorporating Flavors: Before rolling out the dough, try adding a hint of nutmeg or cardamom to the filling for a nuanced spice profile.
Delicious Variations to Try
Experiment with fillings beyond the traditional cinnamon and sugar mix. Here are a few ideas to spice up your cinnamon rolls:
- Maple Pecan: Incorporate chopped pecans and drizzle with maple syrup for a woodsy, sweet addition.
- Apple Cinnamon: Mix small apple chunks in the filling for a deliciously fruity twist. This variation is perfect for fall treats.
- Chocolate Hazelnut: Upgrade your rolls with a smear of chocolate-hazelnut spread to complement the cinnamon.
Diversifying your cinnamon roll routine makes for a delightful culinary adventure. Embrace the tasty creativity and discover a new treat every time you bake.
How to Store Homemade Cinnamon Rolls: Best Practices
Homemade cinnamon rolls are best enjoyed fresh from the oven, yet proper storage keeps them soft and gooey for later enjoyment as well.
Refrigeration and Short-Term Storage
For storing cinnamon rolls over short periods, consider refrigeration:
- Refrigerator Method: Place covered cinnamon rolls in the fridge. Use airtight containers to retain moisture, ensuring they’re consumed within five days.
- A Quick Reheat: Warm refrigerated rolls in a preheated oven at 350°F for about 10 minutes to refresh softness.
Freezing for Longer Storage
Freezing is excellent for long-term storage while maintaining their delectable freshness:
- Freeze Before Baking: After shaping the rolls, you can freeze them. Thaw overnight in the refrigerator before the final rise and baking process.
- Post-Bake Freezing: Once cooled, wrap each roll in plastic wrap and place the batch into a freezer bag. Thaw and reheat as needed.
Properly stored, your cinnamon rolls can last up to three months in the freezer. Remember to frost them after reheating to maintain that gooey allure.
In conclusion, following these storage techniques, your homemade cinnamon rolls will remain irresistibly soft and delicious, ready to savor anytime. For more delicious baking inspiration, check out our other creations like homemade churros.

Nutritional Value of Homemade Cinnamon Rolls
When it comes to enjoying homemade cinnamon rolls, savoring a delicious treat shouldn’t be at the expense of your nutritional goals. Understanding the nutritional value of these delectable rolls can help you enjoy them wisely. Here’s a detailed breakdown of the nutritional aspects of homemade cinnamon rolls:
Calories and Macronutrients
- Calories: On average, a single homemade cinnamon roll contains approximately 350-500 calories. The calorie count can vary based on the size and amount of icing used.
- Carbohydrates: Cinnamon rolls are rich in carbohydrates, providing around 45-60 grams per serving, primarily due to the flour and sugar in the dough and filling.
- Fat: The rolls typically contain 15-20 grams of fat, including both unsaturated and saturated fats from butter and cream cheese.
- Protein: Each roll offers around 5-7 grams of protein, mainly from the flour and dairy products like milk and butter.
Sugar Content
Homemade cinnamon rolls have a notable sugar content, largely due to the added brown sugar in the filling and the powdered sugar in the icing. On average, a roll may contain 20-30 grams of sugar, so consider moderation if you’re monitoring sugar intake.
Vitamins and Minerals
- Calcium: The milk and butter in the recipe contribute to calcium intake, which is essential for strong bones and teeth.
- Iron: The enriched flour provides a source of iron, helping to support healthy blood and energy levels.
- Vitamin A: Butter and cream cheese offer a modest amount of vitamin A, crucial for immune function and eyesight.
Balancing your enjoyment of homemade cinnamon rolls with an overall nutritious diet ensures that you can relish these delightful treats while maintaining health-conscious eating habits. For a more detailed breakdown, explore this analysis of cinnamon buns.
For those interested in other comforting recipes, consider trying out our delicious marry me chicken pasta recipe for a delightful dinner experience.
FAQs: Frequently Asked Questions About Homemade Cinnamon Rolls
What type of milk is best for making homemade cinnamon rolls?
The best milk to use for homemade cinnamon rolls is whole milk, as it provides the necessary fat content to create a rich, tender dough. However, you can substitute with 2% milk or a plant-based milk alternative like almond milk for a lighter option.
How do I prevent my yeast from dying during the dough preparation process?
To prevent yeast from dying, ensure that the milk and butter mixture is warmed to about 110°F (43°C); this is crucial for activating the yeast. If the liquid is too hot, it can kill the yeast. Additionally, check the expiration date on your yeast package to ensure its effectiveness.
Why do my cinnamon rolls sometimes turn out dense and not fluffy?
Dense cinnamon rolls might result from insufficient rising time or over-kneading the dough. Allowing the dough to rise in a warm place until it doubles in size will help develop the needed yeast activity. Additionally, knead the dough just enough to form a smooth texture without overworking it.
Can I make homemade cinnamon rolls ahead of time, such as overnight?
Yes, you can prepare the dough ahead of time and refrigerate it overnight. After shaping the cinnamon rolls, cover and store them in the refrigerator to slow down the yeast activity. In the morning, let the rolls come to room temperature and rise again until doubled in size before baking.
If you’re exploring more recipes, you might find the strawberry shortcake cheesecake equally delightful!
Print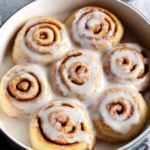
Homemade Cinnamon Rolls: Soft & Gooey
- Total Time: 2 hours 30 minutes
Description
🍁 Treat yourself to the warm, gooey delight of homemade cinnamon rolls—soft, fluffy, and packed with rich cinnamon flavor! 🍁
🎉 Made with simple ingredients and topped with luscious cream cheese icing, these irresistible rolls are perfect for any special morning! 🎉
Ingredients
Flour
Sugar
Yeast
Salt
Milk
Butter
Egg
Brown sugar
Cinnamon
Cream cheese
Powdered sugar
Vanilla
Instructions
1. Warm the milk and butter to 110°F to activate the yeast.
2. In a mixing bowl, combine flour, sugar, yeast, and salt.
3. Add the warm milk mixture and an egg to the dry ingredients, then mix until combined.
4. Knead the dough until smooth and elastic.
5. Place the dough in a greased bowl, cover, and let it rise in a warm place until doubled in size (about 1-2 hours).
6. Roll out the dough into a large rectangle on a floured surface.
7. Spread softened butter over the dough.
8. Sprinkle brown sugar and cinnamon evenly over the buttered dough.
9. Roll up the dough tightly from the long side to form a log.
10. Use dental floss or a sharp knife to cut the log into 12 rolls.
11. Arrange the rolls in a greased baking dish.
12. Cover and let the rolls rise again until puffy.
13. Preheat the oven to 350°F.
14. Bake the cinnamon rolls for 25-30 minutes or until golden brown.
15. While the rolls bake, prepare the icing by mixing cream cheese, butter, powdered sugar, and vanilla.
16. Spread the icing over the warm rolls.
17. Serve fresh and warm for the best taste.
18. Optionally, prepare the dough ahead and refrigerate overnight for baking the next day.
Notes
Let the dough rise in a warm place until it doubles in size for fluffy and soft cinnamon rolls.
Use dental floss to cut the rolled dough cleanly without squishing the rolls.
Frost the rolls while they are still warm so the icing melts slightly for a gooey finish.
- Prep Time: 120
- Cook Time: 30
- Category: Dessert
- Method: Baking
- Cuisine: Sweden