
Introduction to Homemade Banana Pudding Cheesecake Recipe
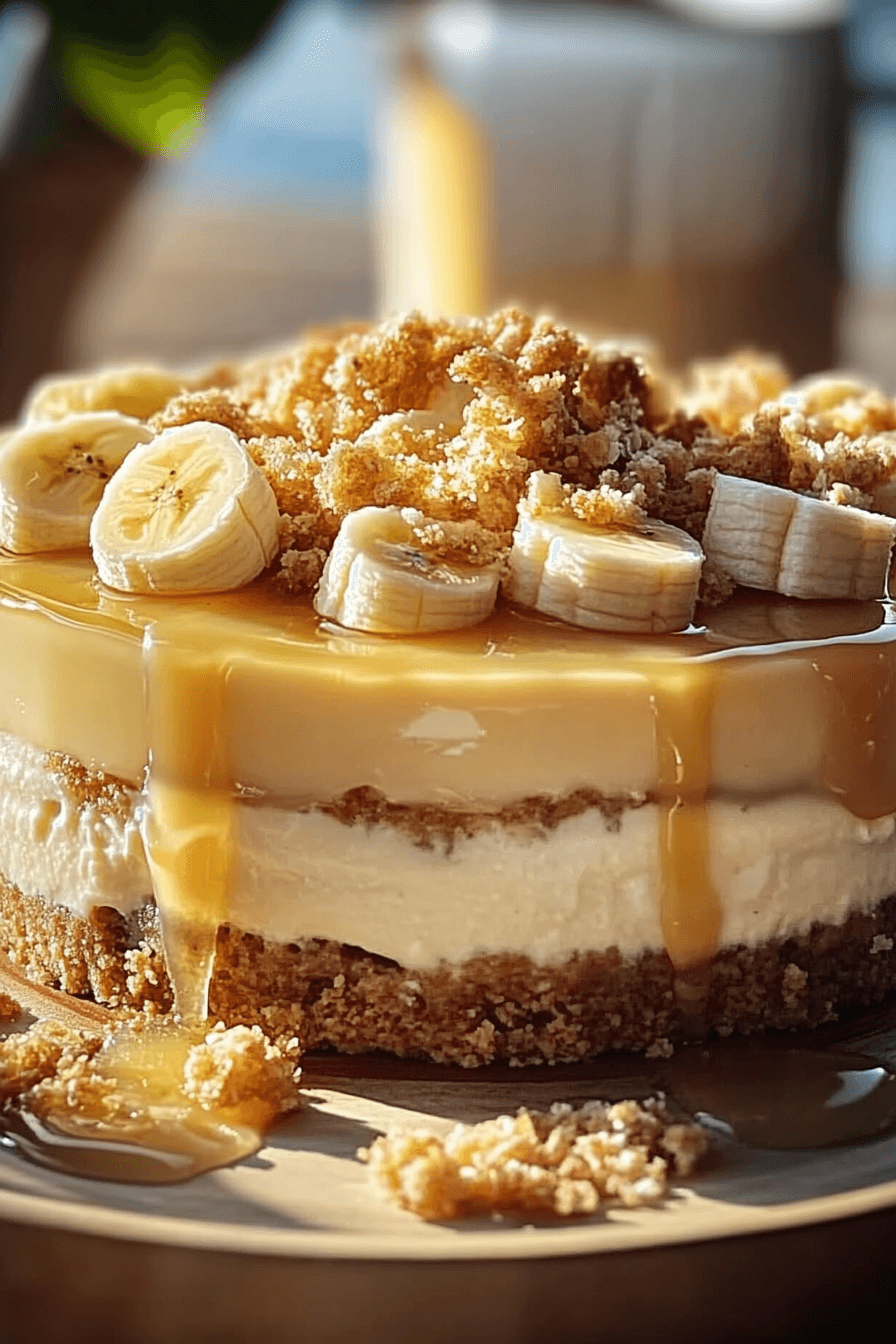
If you’re on the lookout for a dessert that brings together the creamy richness of cheesecake with the nostalgic flavors of banana pudding, then this homemade banana pudding cheesecake recipe is a must-try. Perfect for special gatherings or a sweet weekend indulgence, this recipe is straightforward and yields a divine treat that balances velvety cream cheese, ripe bananas, and a buttery vanilla wafer crust. Whether you’re whipping it up for family or impressing guests, this dessert promises a slice of perfection. Let’s dive into the simple yet rewarding process of creating this iconic dessert!
Benefits and Advantages of Homemade Banana Pudding Cheesecake Recipe
There are plenty of reasons why the homemade banana pudding cheesecake recipe is a stellar choice for dessert enthusiasts. One of its main advantages is the balance between simplicity and sophistication. This recipe is beginner-friendly, making it great for novice home cooks or busy parents seeking a wow-worthy dessert without a steep learning curve. Additionally, the combination of bananas and cream cheese provides a natural sweetness, reducing the amount of added sugar compared to traditional cheesecakes. For food lovers chasing nostalgia, the use of Nilla Wafers as the crust connects to the comforting essence of classic banana pudding.
Another benefit of this recipe is its versatility. With dietary adaptations available, such as vegan or gluten-free substitutions, anyone can enjoy this dessert. Furthermore, the creamy texture and harmonious blend of banana and vanilla make this cheesecake a standout option on any dessert table. Whether served during holidays, birthdays, or casual gatherings, it’s guaranteed to leave an impression that lingers long after the last bite.
Ingredients Overview
Essential Ingredients for Homemade Banana Pudding Cheesecake Recipe
- Nilla Wafer Crust:
- 3 cups of Nilla Wafers (crushed into fine crumbs)
- 1/4 cup granulated sugar
- 5 tablespoons unsalted butter (melted)
- Optional: Use honey graham crackers or Chessman cookies as alternatives for the crust.
- Cheesecake Filling:
- 32 ounces of full-fat cream cheese (softened at room temperature)
- 1 cup mashed ripe bananas (about 2–3 bananas)
- 1 cup granulated sugar
- 2 teaspoons pure vanilla extract
- 3.4 oz box of instant banana cream pudding mix (or substitute with vanilla pudding mix)
- 3 large eggs (room temperature)
- 1/2 cup sour cream (or substitute with plain Greek yogurt for a healthier option)
- Toppings:
- Whipped cream or whipped topping
- Freshly sliced bananas
- Additional crushed Nilla Wafers for garnish
Dietary Substitutions to Customize Your Homemade Banana Pudding Cheesecake Recipe
- For a Gluten-Free Option: Use gluten-free vanilla wafer cookies or swap the crust with crushed nuts like pecans or almonds.
- Vegan Adaptation: Replace cream cheese with a vegan alternative, such as cashew-based cream cheese, and use plant-based sour cream. Substitute eggs with flaxseed eggs (1 tablespoon ground flaxseed mixed with 2.5 tablespoons water per egg).
- Low-Calorie Version: Substitute full-fat cream cheese with Neufchâtel cheese or a low-fat version. Use sugar replacements like stevia or monk fruit sweetener in the filling.
- Dairy-Free Option: Use dairy-free cream cheese and sour cream alternatives along with almond or oat-based whipped cream for the topping.
- Alternative Crust Options:
- For a nutty flavor, use crushed pecans or walnuts mixed with melted coconut oil and a dash of maple syrup.
For those looking to try another delightful dessert, check out an exciting twist in our Strawberry Tres Leches Cake recipe, perfect for any occasion.
How to Prepare the Perfect Homemade Banana Pudding Cheesecake Recipe: Step-by-Step Guide
Preparing the Crust
- Preheat Your Oven: Set your oven to 325°F and line the bottom of a 9-inch springform pan with parchment paper.
- Crush Nilla Wafers: Use a food processor or blender to crush 3 cups of Nilla Wafers into fine crumbs.
- Combine Ingredients: In a mixing bowl, combine the wafer crumbs, 1/4 cup granulated sugar, and 5 tablespoons melted unsalted butter. Mix until the crumbs are well-coated and moist.
- Press the Crust: Firmly press the mixture into the bottom of the prepared pan, creating an even layer. Optionally, extend the crust slightly up the sides for a decorative edge.
- Bake the Crust: Place the pan in the oven and bake for about 8–10 minutes. Remove and let it cool while preparing the filling.
Making the Cheesecake Filling
- Prepare Ingredients: Ensure all your ingredients (cream cheese, eggs, bananas, etc.) are at room temperature. This helps create a smoother filling.
- Beat Cream Cheese: In a large mixing bowl, beat 32 ounces of cream cheese with an electric mixer on low speed until it is smooth and creamy.
- Add Bananas: Mash 1 cup of ripe bananas and fold them into the cream cheese mixture until fully incorporated.
- Incorporate Other Ingredients: Add granulated sugar, sour cream, instant banana pudding mix, and vanilla extract into the mixture. Beat on low speed until the ingredients are combined evenly.
- Add Eggs: One at a time, beat in the eggs, mixing just until combined. Overmixing at this stage can introduce air into the batter, causing cracks during baking.
Baking the Cheesecake
- Prepare a Water Bath: Wrap the bottom and sides of the springform pan in aluminum foil to prevent leaks. Place the pan in a larger baking dish, then fill the dish with hot water up to halfway up the sides of the springform pan.
- Bake: Place the cheesecake in the preheated oven and bake at 325°F for about 1 hour to 1 hour and 10 minutes. The center should be slightly jiggly but will firm up as it cools.
- Cool Gradually: Turn off the oven and crack the door open, allowing the cheesecake to cool inside for 1 hour. This prevents sudden temperature changes that can lead to cracks.
Topping and Serving
- Add Toppings: After the cheesecake is completely cooled and chilled for at least 6 hours (or overnight), spread whipped cream over the top and decorate with sliced bananas and crushed Nilla Wafers.
- Serve: Use a sharp knife dipped in hot water to slice cleanly. Serve your Homemade Banana Pudding Cheesecake chilled and watch it disappear off the plates!
If you’re curious about more cheesecake ideas, don’t miss our Strawberry Crunch Cheesecake recipe for a fruity alternative!
For an in-depth look at the history of banana pudding, consider reading How Banana Pudding Became a Southern Icon.
Mastering Homemade Banana Pudding Cheesecake Recipe: Advanced Tips and Variations
Creating a perfect homemade banana pudding cheesecake recipe goes beyond simply following a set of instructions. Small tweaks and expert tips can make a significant difference. Below are some advanced strategies and creative variations to elevate your cheesecake game, ensuring that each slice is nothing short of spectacular.
Expert Tips for Smooth and Crack-Free Cheesecake
- Room Temperature Ingredients: Always ensure your cream cheese, eggs, and sour cream (or Greek yogurt) are at room temperature before mixing. This leads to a smoother filling, free from lumps.
- Avoid Overmixing: Use a low mixing speed when combining ingredients. Overmixing can introduce excess air into the batter, which causes cracks during baking.
- Master the Water Bath: Prevent cracks by baking your cheesecake in a water bath. Wrap your springform pan tightly in aluminum foil to keep water out, and place it in a roasting pan filled with hot water.
- Slow Cooling: Sudden temperature changes can cause cracks. Once baking is done, leave your cheesecake in the turned-off oven with the door slightly ajar for an hour before refrigerating.
- Choose Ripe Bananas: For the best flavor, use bananas that are very ripe. If needed, you can roast them for a more intense banana taste.
Creative Variations for Your Cheesecake
Adding a twist to your homemade banana pudding cheesecake recipe can make it an even more delightful experience. Here are some variations worth trying:
- Caramel-Banana Cheesecake: Drizzle caramel sauce over the cheesecake before serving and add candied pecans for a crunchy topping.
- Chocolate Banana Cheesecake: Add a layer of melted chocolate ganache on top of the cheesecake for a decadent combination.
- Peanut Butter Swirl Cheesecake: Introduce swirls of creamy peanut butter into the filling for a classic flavor pairing.
- No-Bake Version: Skip the baking process altogether. Combine a no-bake vanilla cheesecake base with layers of pudding and fresh banana slices for a quicker option.
- Tropical Twist: Add a splash of coconut cream to the filling and garnish with toasted coconut flakes for a tropical vibe.
If you’re looking for other unique dessert recipes, check out how to make a Strawberry Shortcake Crunch Cheesecake, which is another crowd-pleaser.
Mastering these tips and trying out variations will ensure your homemade banana pudding cheesecake recipe becomes a memorable treat for every occasion!
How to Store Homemade Banana Pudding Cheesecake Recipe: Best Practices
Your cheesecake’s flavor and texture can be preserved with the right storage methods. Whether you’ve baked it for a party or as a make-ahead dessert, here are some effective ways to store your homemade banana pudding cheesecake recipe, ensuring it stays fresh and delicious.
Refrigeration Tips
- Airtight Storage: Always store the cheesecake in an airtight container or wrap it tightly with plastic wrap. This prevents it from absorbing other odors in the refrigerator.
- Storage Duration: The cheesecake can be refrigerated for up to 3-4 days. For best results, consume it within the first two days.
- Banana Slices: If you’ve topped the cheesecake with fresh bananas, ensure they’re covered with whipped cream to prevent browning.
Freezing for Long-Term Storage
- Pre-Slice for Convenience: Slice the cheesecake into individual portions before freezing. Wrap each slice tightly in plastic wrap, followed by aluminum foil.
- Use Freezer-Safe Containers: Place the wrapped slices in a freezer-safe container to prevent freezer burn.
- Freezing Duration: The cheesecake can be frozen for up to 2 months. Thaw slices overnight in the refrigerator before serving.
Reheating or Serving Tips
- No Reheating Needed: Cheesecake is best served chilled. Simply remove it from the refrigerator or freezer and let it sit at room temperature for about 10 minutes before slicing.
- Fresh Garnishes: If you’re adding banana slices or whipped cream, do so just before serving to maintain their freshness.
For inspiration on other desserts with creamy textures, take a look at our delicious recipe for Vegan Caramelized Onion Mashed Potatoes. It pairs beautifully with this cheesecake for a savory contrast.
By following these storage tips, your homemade banana pudding cheesecake recipe will stay as delightful as the day it was made, ready to be enjoyed whenever the craving strikes!
Nutritional Value of Homemade Banana Pudding Cheesecake Recipe
Indulging in a slice of homemade banana pudding cheesecake can be a delightful treat, but it’s also important to be informed about its nutritional profile. While this dessert is rich in flavor and texture, it’s equally packed with ingredients that contribute to its calorie and nutrient content. Here’s a detailed breakdown of what you can expect in a standard serving (assuming an average slice serves 12 people):
| Nutrient | Per Serving |
|---|---|
| Calories | 360-420 kcal |
| Total Fat | 23–27 g (35-42% DV) |
| Saturated Fat | 13–16 g (65-80% DV) |
| Cholesterol | 80–100 mg (27-33% DV) |
| Sodium | 230–300 mg (10-15% DV) |
| Total Carbohydrates | 32–36 g (10-12% DV) |
| Dietary Fiber | 1–2 g (4-8% DV) |
| Sugars | 22–26 g |
| Protein | 5–7 g |
| Vitamin D | 5–7% DV |
| Calcium | 8–10% DV |
| Iron | 3–5% DV |
| Potassium | 4–6% DV |
Customizing for Dietary Preferences
For those who prefer a healthier or diet-conscious approach, consider using low-fat cream cheese, sugar substitutes like stevia or erythritol, and a gluten-free crust made from almond flour. Additionally, for a version that’s mindful of sugar levels, opt for unsweetened whipped cream toppings or none at all. While these adjustments might alter the final taste slightly, they can significantly reduce the calorie and fat content without compromising the experience.
As a rich dessert, banana pudding cheesecake should be enjoyed in moderation. Pair it with lighter meals during the day to maintain a balanced diet. For another light and fruity option, consider trying our Pineapple Mango Smoothie recipe!
FAQs: Frequently Asked Questions About Homemade Banana Pudding Cheesecake Recipe
How long does it take to bake a homemade banana pudding cheesecake?
The cheesecake typically requires 1 hour and 30 minutes to 1 hour and 45 minutes to bake, depending on your oven and the specific recipe. After baking, it’s crucial to let it cool completely and refrigerate it for several hours or ideally overnight to achieve the perfect consistency.
What type of crust is best for a banana pudding cheesecake?
A crust made from fine Nilla Wafer crumbs is highly recommended as it beautifully complements the banana pudding flavor. Alternatively, honey graham crackers or Chessman cookies can provide a similar texture and taste twist. Make sure to press the crust mixture firmly into a springform pan for an even base.
How do I prevent the cheesecake from cracking?
Cracking can be prevented by using a water bath, which keeps the oven moist and ensures even baking. To prepare, wrap the springform pan tightly in aluminum foil and place it in a larger pan filled with about an inch of hot water. Additionally, mix the ingredients on low speed to minimize incorporating air, and allow the cheesecake to cool gradually by leaving it in the oven with the door slightly open after baking.
How long can I store leftover banana pudding cheesecake in the refrigerator?
Leftover banana pudding cheesecake can be stored in an airtight container in the refrigerator for up to 3-4 days. To keep it fresh, ensure that the banana slices used in the topping are fully covered with whipped cream or pudding to prevent browning. If freezing, wrap it tightly with plastic wrap and foil to maintain its texture.
Can this recipe be made gluten-free or vegan?
Absolutely! For a gluten-free version, use gluten-free cookie crumbs for the crust and ensure all other ingredients, like pudding mix, are certified gluten-free. For a vegan cheesecake, substitute cream cheese and sour cream with vegan alternatives, use plant-based pudding mix, and replace eggs with flaxseed gel or another egg substitute. Try it out and remember to adjust the flavors to taste!
Looking for more baking inspiration? Check out our fruity and decadent Strawberry Tres Leches Cake.
Print
Homemade Banana Pudding Cheesecake Recipe: A Decadent Dessert
- Total Time: 1 hour 25 minutes
Description
🍌 Indulge in the creamy goodness of this Homemade Banana Pudding Cheesecake, a perfect fusion of rich flavors and smooth textures that will satisfy your sweet tooth! 🍰
🎉 Surprise your loved ones with this decadent dessert, a show-stopping treat that’s easy to make and guarantees smiles all around! 😍
Ingredients
Nilla Wafers (3 cups, crushed into fine crumbs)
Granulated sugar (1/4 cup for crust)
Unsalted butter (5 tablespoons, melted)
Full-fat cream cheese (32 ounces, softened)
Mashed ripe bananas (1 cup, about 2–3 bananas)
Granulated sugar (1 cup for filling)
Pure vanilla extract (2 teaspoons)
Instant banana cream pudding mix (3.4 oz box, or substitute with vanilla pudding mix)
Large eggs (3, room temperature)
Sour cream (1/2 cup, or substitute with plain Greek yogurt)
Whipped cream or whipped topping (for topping)
Freshly sliced bananas (for topping)
Additional crushed Nilla Wafers (for garnish)
Instructions
1. Preheat Your Oven: Set your oven to 325°F and line the bottom of a 9-inch springform pan with parchment paper.
2. Crush Nilla Wafers: Use a food processor or blender to turn 3 cups of Nilla Wafers into fine crumbs.
3. Combine Crust Ingredients: Mix wafer crumbs, 1/4 cup granulated sugar, and 5 tablespoons melted unsalted butter in a bowl until well-coated.
4. Press the Crust: Firmly press the mixture into the bottom of the pan, evenly spreading it, and bake for 8–10 minutes. Let it cool.
5. Prepare Cheesecake Ingredients: Ensure all ingredients (cream cheese, bananas, eggs, etc.) are at room temperature for smooth consistency.
6. Beat Cream Cheese: Beat 32 ounces of cream cheese on low speed until creamy and lump-free.
7. Add Mashed Bananas: Mash 1 cup (2–3 ripe bananas) and fold into the cream cheese mixture until fully incorporated.
8. Mix Other Ingredients: Add sugar, sour cream, instant banana pudding mix, and vanilla extract to the mixture and beat on low speed.
9. Add Eggs: Incorporate eggs one at a time, mixing gently to avoid overmixing.
10. Wrap Pan for Water Bath: Wrap the bottom and sides of the springform pan with aluminum foil to prevent leaks.
11. Prepare Water Bath: Place the pan in a larger baking dish and pour hot water into the dish, halfway up the sides of the pan.
12. Bake the Cheesecake: Bake at 325°F for 1 hour to 1 hour and 10 minutes, ensuring the center is slightly jiggly.
13. Cool Gradually: Turn off the oven, crack the door, and let the cheesecake cool inside for 1 hour to avoid cracks.
14. Refrigerate: Let the cheesecake chill completely in the refrigerator for at least 6 hours or overnight.
15. Whip Toppings: Spread whipped cream over the top and garnish with fresh banana slices and crushed Nilla Wafers.
16. Slice and Serve: Use a knife dipped in hot water for clean slices and serve the cheesecake chilled.
Notes
1. Use ripe bananas to maximize flavor in your cheesecake filling and ensure a naturally sweet taste.
2. Always incorporate a water bath during baking to ensure a creamy texture and prevent cracks on the cheesecake.
3. Customize the recipe with dietary substitutions like gluten-free crust or vegan-friendly ingredients to suit everyone’s preferences.
- Prep Time: 25
- Cook Time: 60
- Category: Dessert
- Method: Baking
- Cuisine: American