

Benefits and Advantages of christmas cake pops
Christmas cake pops are a delightful and festive treat, perfect for holiday celebrations. One major advantage is their simplicity: they require minimal baking skills and little time to prepare, making them ideal for both beginners and experienced bakers. Their bite-sized form allows for portion control, offering a lighter way to enjoy cake compared to traditional slices. Additionally, these cake pops can be customized with various ingredients such as whole grain cake mixes or natural sweeteners to improve nutritional value.
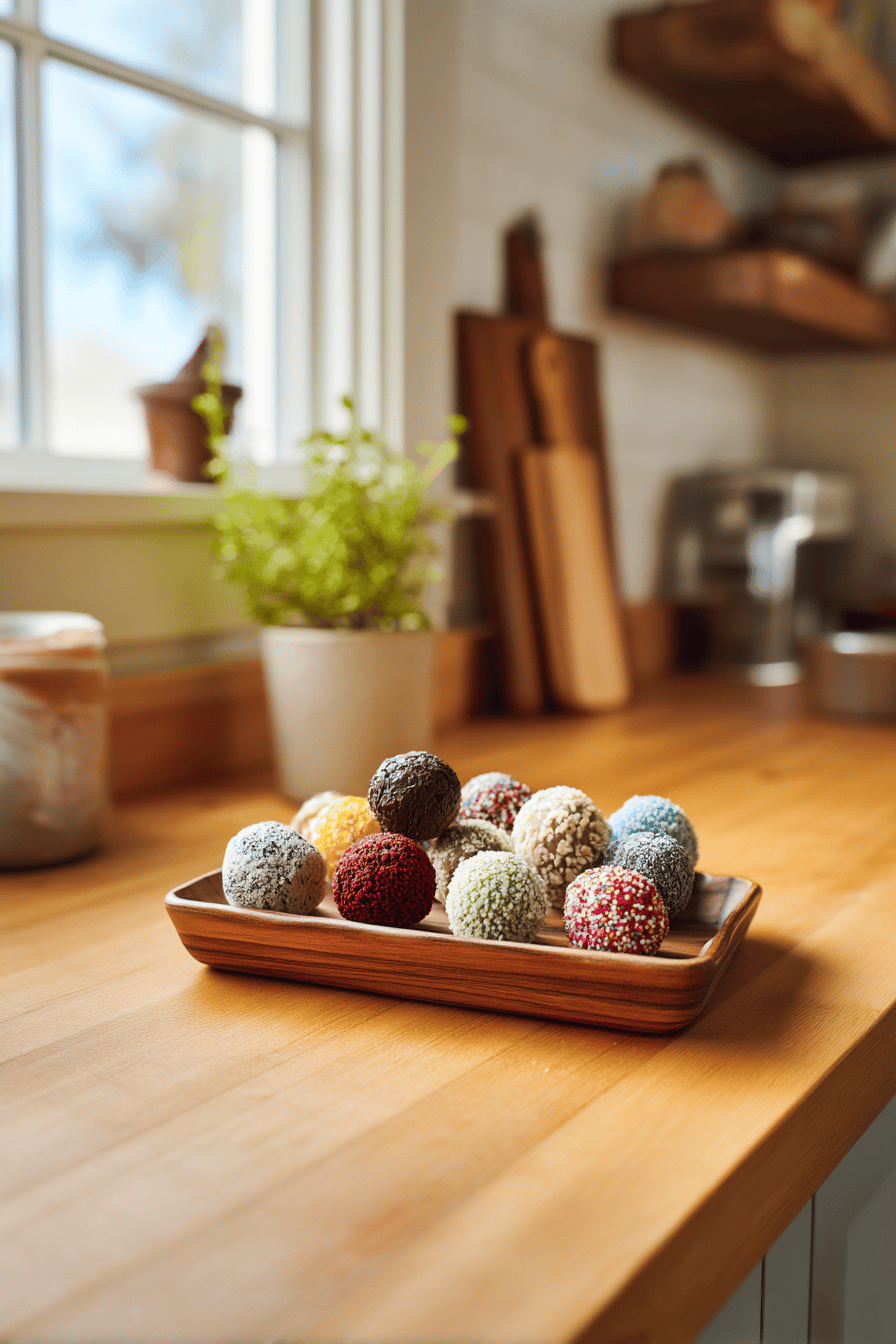
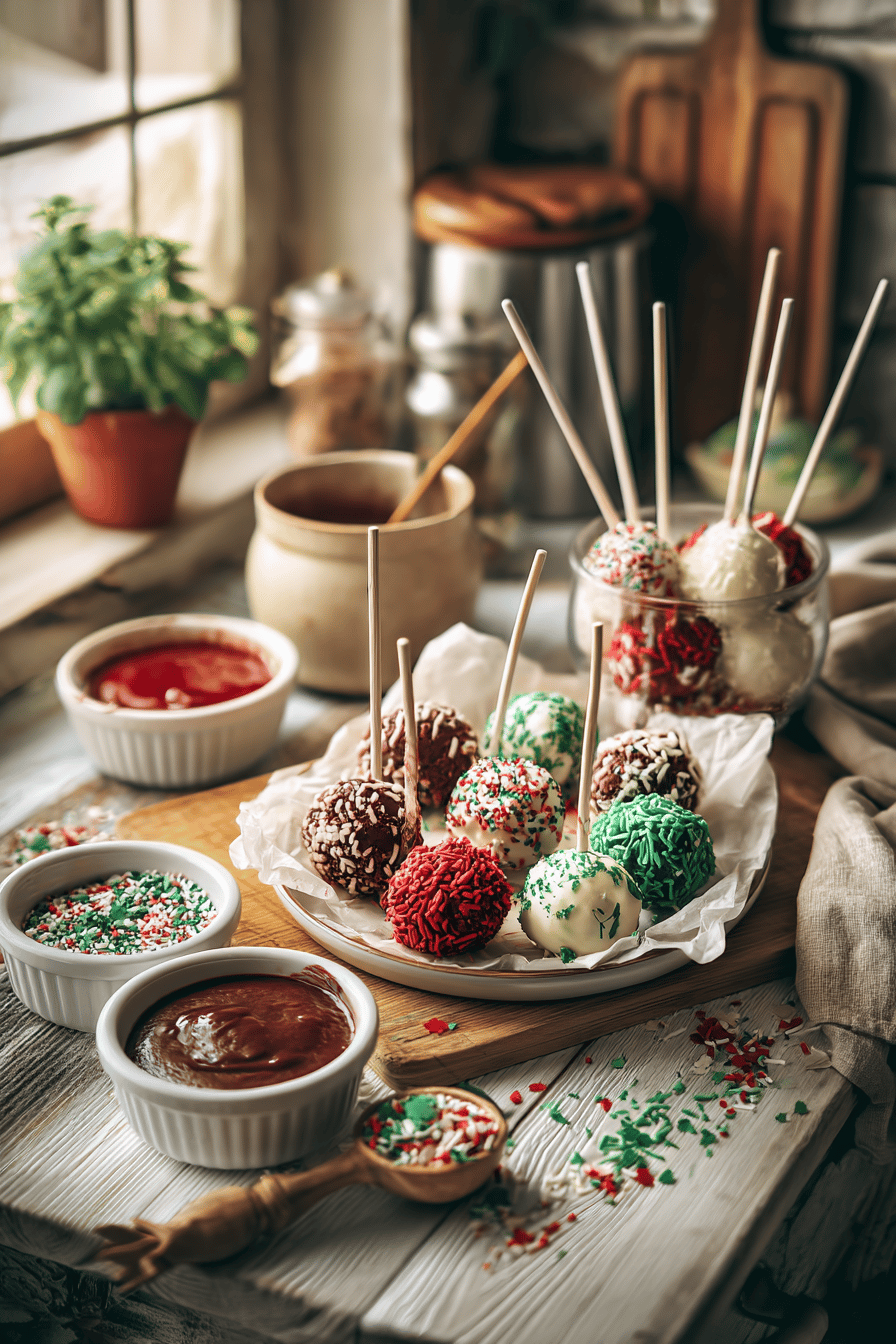
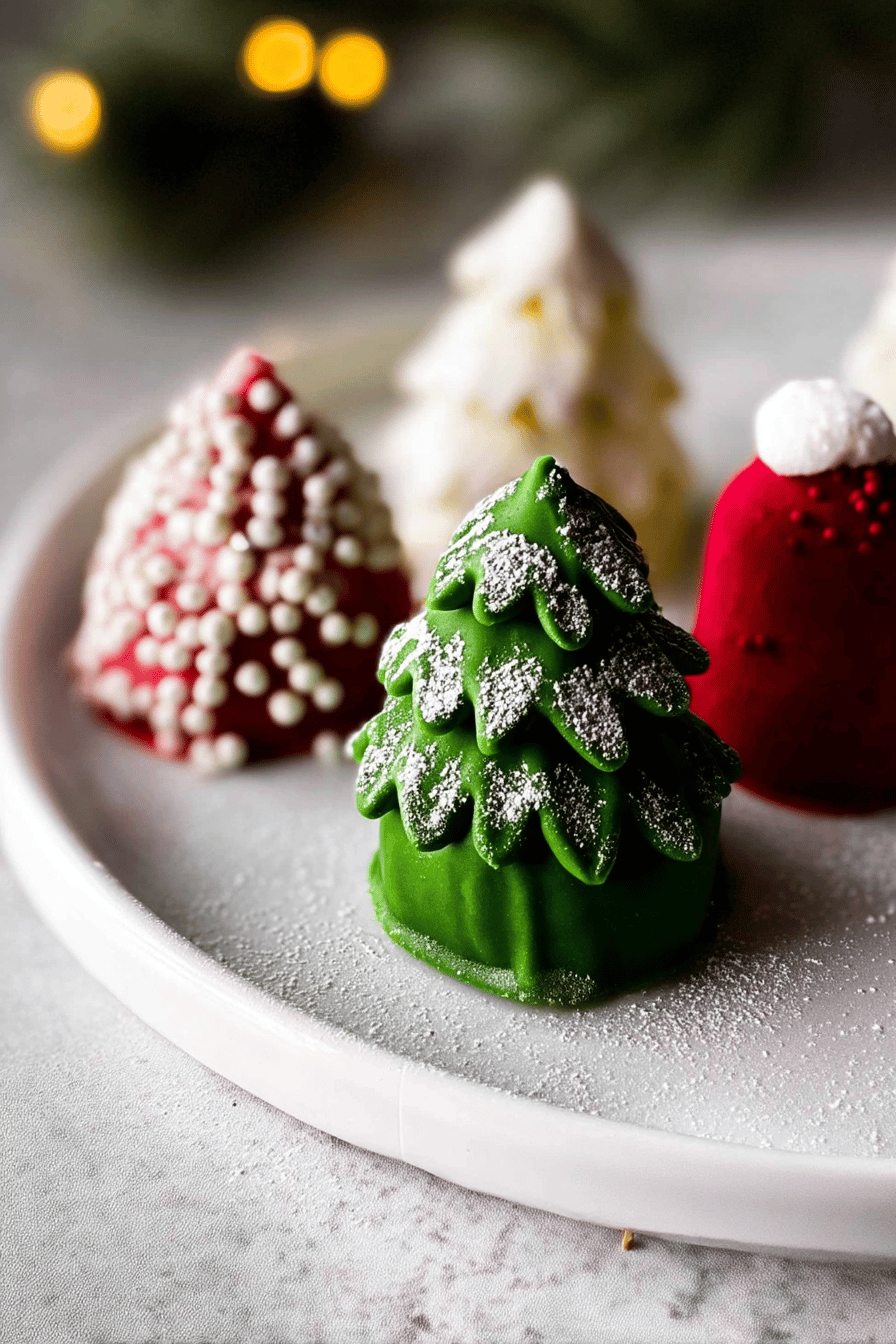
Their visual appeal shines with vibrant red, green, and white candy coatings, along with Christmas-themed sprinkles and decorations, making them perfect for parties and gift-giving. This versatility extends to accommodating dietary needs, offering vegan or gluten-free options through simple ingredient swaps. The festive theme combined with ease of customization and preparation makes christmas cake pops an enjoyable and practical seasonal treat.
Essential Ingredients for christmas cake pops
- 1 box (16.5 oz) super moist yellow cake mix, or cake mix flavor of choice (red velvet, chocolate, vanilla)
- Ingredients required for cake mix preparation (typically water, vegetable oil, eggs)
- 1/3 cup cream cheese frosting or buttercream frosting for alternative flavor
- 8 oz white candy melts
- 8 oz red candy melts
- 8 oz green candy melts
- Christmas sprinkles or festive decorative toppings
- Lollipop sticks or cake pop sticks
- Optional: coconut oil to thin candy melts if needed
- Optional: additional colored candy melts for intricate decorating
The cake mix provides the base flavor and moist texture. Frosting acts as a binder, allowing the crumbled cake to hold its shape. Candy melts offer colorful, festive coatings that set firmly and look appealing. Decorative sprinkles and toppings add the Christmas spirit with visual flair. Optional ingredients help customize texture and decoration precision, ideal for various dietary and aesthetic preferences.
Dietary Substitutions to Customize Your christmas cake pops
Christmas cake pops adapt well to different dietary requirements through simple substitutions. For gluten-free versions, use gluten-free cake mixes and ensure candy melts and decorations are free of gluten. Vegan cake pops can be made by choosing egg substitutes such as flax eggs or applesauce in the cake and frosting, and vegan candy melts or dairy-free white chocolate as coating.
Those seeking reduced sugar options may replace traditional frosting with low-sugar or sugar-free alternatives, and select sugar-free candy melts when available. Nut allergies can be addressed by excluding nut-based ingredients and choosing nut-free decorations. Additionally, cake pops can be flavored with natural extracts like peppermint or orange to introduce variety while keeping the recipe suitable for dietary preferences. These modifications maintain the shape, taste, and festive appeal of the cake pops.
How to Prepare the Perfect christmas cake pops: Step-by-Step Guide
- Prepare and bake the cake: Follow packaging instructions for your chosen cake mix, baking in a greased 9×13-inch pan at around 350°F until a toothpick comes out clean. Allow to cool completely.
- Crumble the cooled cake: Remove from pan and discard dry edges. Crumble finely into a large bowl with a fork or hands to avoid graininess.
- Mix in the frosting: Combine 1/3 cup of cream cheese or buttercream frosting with the crumbled cake until pliable and uniform. Chill mixture for 10-30 minutes to firm up.
- Shape the cake balls: Use a cookie scoop or tablespoon to form 24-36 even balls about the size of a ping pong ball. Place on parchment-lined trays.
- Insert sticks: Dip each stick tip lightly in melted candy melts for adhesion, then insert halfway into each cake ball gently.
- Freeze the shaped pops: Chill for 10-15 minutes until firm to hold shape during coating.
- Melt candy melts: Heat candy melts separately in microwave-safe bowls, stirring every 30 seconds to prevent burning. Add coconut oil if needed for smooth coating consistency.
- Dip and coat: Fully dip each cake pop in melted candy, letting excess drip off. Place upright in styrofoam or holders to set.
- Decorate: While coating is wet, add festive sprinkles, crushed candy canes, or use additional colored candy melts to pipe out intricate designs once base coating dries.
- Dry and serve: Allow coatings and decorations to harden completely before serving or storing.
Using a cookie scoop ensures uniform pops, and chilling steps prevent crumbling and help hold their form, producing neat and tasty treats perfect for celebrations.
For additional tips on making cake pops, see How to make cake pops. For guidance on melting coatings smoothly, visit Tips for melting candy melts.
Advanced Tips and Variations
To create perfect Christmas cake pops, it’s essential to work with fully cooled cake to avoid sogginess. Using a stand mixer with a paddle attachment can make mixing the frosting and cake crumbs easier and more consistent. Experiment with flavors like cinnamon, nutmeg, or peppermint extract in the cake or frosting to add festive notes.
For coating options, try white chocolate mixed with crushed candy canes for added flavor and color, or colored candy melts to match holiday themes. Rolling cake pops in crushed nuts, shredded coconut, or festive sprinkles before the coating hardens adds texture and a fun look. Store cake pops individually wrapped in airtight containers to help keep them fresh longer.
For vegan or gluten-free versions, adding binding agents such as psyllium husk or arrowroot powder can improve texture. For an adult twist, incorporate a splash of liqueur like rum or brandy into the cake batter or frosting for depth of flavor. These variations ensure your Christmas cake pops please a wide audience and keep the festive spirit intact.
How to Store christmas cake pops: Best Practices
Refrigeration is the best way to keep Christmas cake pops fresh and prevent the coating from melting or softening. Arrange the pops in a single layer on a tray or plate, cover loosely with plastic wrap, or place in an airtight container. For extended storage, freeze the pops by first placing them on a parchment-lined tray until solid, then transfer into airtight freezer bags or containers to avoid freezer burn.
When ready to eat, thaw the frozen pops in the refrigerator for several hours or overnight. Avoid thawing at room temperature to preserve shape and texture. If warming is needed, microwave in short 10-15 second bursts to gently warm without melting them. Proper storage maintains taste, texture, and appearance for days or weeks.
Nutritional Value of christmas cake pops
| Nutrient | Per Cake Pop (approximate) |
|---|---|
| Calories | 183 – 207 kcal |
| Carbohydrates | 28 – 46 g |
| Protein | 1 g |
| Total Fat | 2 – 7 g |
| Saturated Fat | 1 – 4 g |
| Sugar | 20 – 28 g |
| Sodium | 171 – 230 mg |
| Fiber | 0 – 1 g |
Christmas cake pops provide a satisfying balance of carbohydrates and fats, mostly depending on the cake and frosting used. Moderation is key, as sugar content is notable due to frosting and coatings. Incorporating whole grain or lower sugar alternatives can improve nutritional value slightly. Adding nuts or alternative flours can increase protein and fiber, making these treats better suited for balanced diets.
FAQs: Frequently Asked Questions About christmas cake pops
Can I make Christmas cake pops a day or two before my event?
Yes, you can prepare Christmas cake pops in advance to save time. After shaping the cake balls and inserting the sticks, refrigerate them for up to two days before dipping them in chocolate or candy melts. If you want to prepare even earlier, freeze the cake pops for up to one month, making sure to wrap them individually with plastic wrap and store them in an airtight container. Thaw frozen pops overnight in the fridge before decorating or serving.
How do I stop cake pops from falling off the sticks?
To keep cake pops securely on the sticks, chill the shaped cake balls thoroughly before inserting the sticks. For extra adhesion, dip the end of each stick in melted chocolate or candy coating before pushing it into the cake ball. After dipping, stand the pops upright in a foam block or a sturdy container to allow the coating to set evenly and firmly hold the cake in place.
What’s the best way to get a smooth, glossy finish on Christmas cake pops?
Use high-quality candy melts or chocolate with added oil content for a thin, smooth coating. Melt the candy melts in short 30-second intervals in the microwave, stirring well between each to avoid overheating. Adding a small amount of coconut oil can help thin the coating, making it easier to dip and resulting in a smooth, even surface. Tap off excess coating gently to prevent cracking.
Can I use different frostings or flavors to mix up my Christmas cake pops?
Absolutely, experimenting with frosting flavors can add variety to your cake pops. Popular options include cream cheese, chocolate, or peppermint-flavored frostings, which blend well with the cake crumbs to create unique tastes. Mix in your chosen frosting gradually to achieve a consistent texture that holds together when shaped.
How should I store Christmas cake pops to keep them fresh longer?
Store cake pops in an airtight container at room temperature for up to 1-2 weeks. For longer storage, place them in the refrigerator for up to 3 weeks or freeze them for up to one month. When freezing, separate cake pops with wax or parchment paper and wrap tightly in plastic wrap. Allow frozen pops to thaw slowly overnight in the refrigerator before serving to maintain their shape and flavor.

Christmas Cake Pops Recipe: Fun and Easy Holiday Treats for Kids and Parties
- Total Time: 1 hour 40 minutes
- Yield: 24–36 cake pops 1x
- Diet: Vegetarian
Description
🎄 Enjoy these delightful Christmas Cake Pops, perfect for adding holiday cheer to any gathering with their festive appearance and delicious taste.
🎉 Easy to make and customize, they’re ideal for parties, kids’ activities, or as thoughtful homemade gifts.
Ingredients
1 box (16.5 oz) super moist yellow cake mix
Ingredients for cake mix (water, vegetable oil, eggs)
1/3 cup cream cheese frosting
8 oz white candy melts
8 oz red candy melts
8 oz green candy melts
Christmas sprinkles
Lollipop sticks or cake pop sticks
Optional: coconut oil, additional colored candy melts
Instructions
1. Prepare and bake the cake according to package instructions in a greased 9×13-inch pan. Cool completely.
2. Crumble cooled cake finely into a large bowl. Mix in cream cheese frosting until well combined.
3. Refrigerate or freeze mixture for 10-30 minutes to firm up, then form into 24-36 balls.
4. Insert lollipop sticks into each cake ball. Use melted candy melts on stick tips to help adhere.
5. Freeze cake pops for 10-15 minutes until firm.
6. Melt white, red, and green candy melts in separate bowls. Thin with coconut oil if needed.
7. Dip each cake pop into melted candy, let excess drip off. Decorate while wet.
8. Allow pops to dry completely before serving or storing.
Notes
📜 Use parchment paper for easy cleanup.
❄️ Chill cake mixture and balls for better shaping and handling.
🌟 Decorate with sprinkles before coating hardens for best adhesion.
- Prep Time: 15-20 minutes
- Chilling and decorating time: 35-50 minutes
- Cook Time: 25-40 minutes
- Category: Dessert
- Method: No-Bake
- Cuisine: American
Nutrition
- Serving Size: 1 cake pop
- Calories: 195
- Sugar: 24g
- Sodium: 200mg
- Fat: 4g
- Saturated Fat: 2g
- Unsaturated Fat: 1g
- Trans Fat: 0g
- Carbohydrates: 38g
- Fiber: 0g
- Protein: 1g
- Cholesterol: 15mg
Keywords: Christmas, Cake Pops, Holiday Treats, Kids Parties