
Introduction to Cheesy Garlic Breadsticks
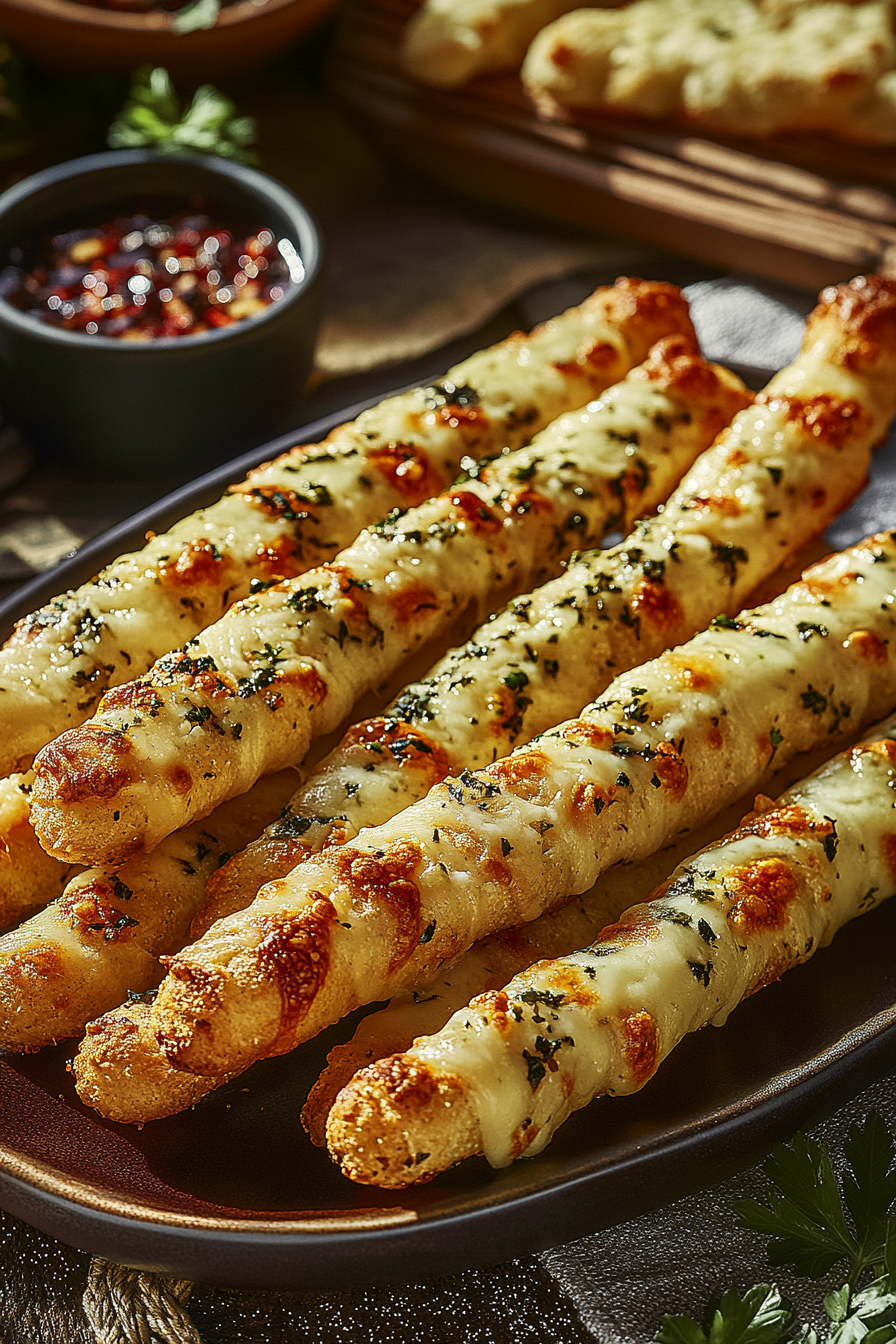
Cheesy Garlic Breadsticks are a culinary delight that combines the inviting flavors of melted cheese, aromatic garlic, and warm bread, making them ridiculously easy to prepare at home. Perfect for busy parents, home cooks, and anyone craving a quick snack, these breadsticks are a versatile addition to any meal. Whether using homemade or store-bought pizza dough, you can create a delectable treat that’s even better than takeout. These mouthwatering breadsticks are not only a hit with food enthusiasts but also cater to dietary needs, including vegan and gluten-free options, ensuring everyone can enjoy this simple yet delicious recipe.
Benefits and Advantages of Cheesy Garlic Breadsticks
Cheesy Garlic Breadsticks are a fantastic addition to any meal, offering numerous benefits. They are incredibly simple to make, requiring minimal ingredients and effort, which makes them ideal for busy individuals and beginners in the kitchen. Moreover, they can be tailored to suit various dietary preferences, such as using gluten-free or whole wheat dough, making them a healthy choice for diet-conscious individuals. Additionally, their rich flavor and texture, enhanced by herbs and cheeses, make them a delightful snack or side dish. Perfect for gatherings or casual meals, these breadsticks bring joy and convenience to your dining experience.

Ingredients Overview
Essential Ingredients for Cheesy Garlic Breadsticks
- Pizza Dough: 1 pound of homemade or store-bought dough. It’s the base and brings that classic pizzeria taste.
- Mozzarella Cheese: 1 cup shredded for the gooey texture and delicious flavor.
- Parmesan Cheese: 1/2 cup grated to add a sharp, tangy taste.
- Butter: 3 tablespoons, melted, to give the breadsticks that rich, buttery goodness.
- Garlic Powder: 1 teaspoon for a hint of pungent garlic taste.
- Italian Seasoning: 1 teaspoon for a mix of herbs that enhance the flavor profile.
- Fresh Garlic: 2 cloves minced, for an extra burst of garlic flavor.
- Parsley: Fresh parsley, chopped, for garnish and added freshness.
Each ingredient plays a pivotal role in creating those irresistible cheesy garlic breadsticks. For vegan or dairy-free options, consider using vegan cheese alternatives. For gluten-free breadsticks, opt for gluten-free pizza dough readily available in many stores.
Dietary Substitutions to Customize Your Cheesy Garlic Breadsticks
Customizing your cheesy garlic breadsticks to fit your dietary needs is a breeze. Here are some suggestions:
- Vegan/Dairy-Free Option: Replace mozzarella and Parmesan with dairy-free cheese, available in most grocery stores.
- Gluten-Free Option: Use a gluten-free pizza dough, ensuring it aligns with your taste preference.
- Low-Calorie Option: Opt for part-skim mozzarella and low-fat butter as healthier alternatives.
- Herb Variations: Swap Italian seasoning with herbs like rosemary or thyme for a different flavor twist.
Adapting these substitutions helps maintain the deliciousness of the breadsticks while satisfying various dietary preferences. Feel free to experiment with these and make the recipe your own.
How to Prepare the Perfect Cheesy Garlic Breadsticks: Step-by-Step Guide
Creating the perfect cheesy garlic breadsticks is a straightforward process. Follow these easy steps to enjoy a warm, cheesy delight at home:
- First Step: Preheat your oven to 425°F (220°C). Line a baking sheet with parchment paper or sprinkle with cornmeal for extra crispiness.
- Second Step: Roll out the pizza dough on a lightly floured surface. Use a rolling pin to shape it into a rectangle or square that fits your baking sheet.
- Third Step: In a small bowl, combine melted butter, minced garlic, and garlic powder. Brush this mixture generously over the rolled-out dough.
- Fourth Step: Sprinkle mozzarella and Parmesan cheeses evenly over the dough. Add a dash of Italian seasoning on top for enhanced flavor.
- Fifth Step: Use a pizza cutter or sharp knife to cut the dough into strips, approximately 1 inch wide. The strips should be ready for baking.
- Sixth Step: Transfer the cut strips to the prepared baking sheet. Ensure they are slightly apart to prevent sticking.
- Seventh Step: Bake in the preheated oven for 10-15 minutes or until the breadsticks are golden brown and cheese is bubbly.
- Eighth Step: Once baked, remove from the oven and brush with any remaining garlic butter mixture for an extra touch of flavor.
- Ninth Step: Sprinkle fresh chopped parsley over the top for a burst of color and aroma.
- Tenth Step: Serve immediately with marinara or pizza sauce for dipping. These breadsticks are perfect alongside a cozy mushroom soup or creamy garlic chicken.
Enjoy the delightful combination of garlic and cheese, and don’t hesitate to adapt steps or ingredients to align with your preferences or dietary considerations. Whether for a quick snack or a side dish for dinner, these cheesy garlic breadsticks are sure to impress!

Mastering Cheesy Garlic Breadsticks: Advanced Tips and Variations
Mastering the art of making cheesy garlic breadsticks can transform a simple recipe into your own culinary masterpiece. By understanding a few key techniques and exploring delicious variations, you can amaze your friends and family with these irresistible treats.
Advanced Tips for Perfect Breadsticks
- Perfecting the Dough: Whether you choose homemade or store-bought pizza dough, ensure it’s at room temperature before shaping. This makes it easier to work with.
- Herbs and Garlic: Infuse your dough with more flavor by mixing in dried herbs or fresh cilantro. Additionally, fresh garlic can provide a punchier flavor compared to garlic powder.
- Baking for Crispiness: Sprinkle cornmeal on your baking sheet to ensure a crispy bottom, reminiscent of authentic Italian breadsticks.
- Brushing Technique: Generously apply melted garlic butter before adding cheese for a rich taste that impresses your taste buds.
Delightful Variations to Try
Adding unique spins to your cheesy garlic breadsticks can turn an everyday dish into something extraordinary. Here are some variations to explore:
- Cheese Variety: Experiment with different types of cheese like cheddar, gouda, or even a blue cheese for a bold flavor.
- Spicy Kick: Add a sprinkle of red pepper flakes or chopped jalapeños before baking for a spicy version.
- Herb Infusion: Incorporate rosemary or thyme into the dough for a fresh twist, elevating the herbal aroma.
- Stuffed Crust: Create a stuffed crust version by wrapping your favorite fillings, such as sun-dried tomatoes or cooked bacon, around the dough before baking.
How to Store Cheesy Garlic Breadsticks: Best Practices
After enjoying your homemade cheesy garlic breadsticks, you might be wondering how to store any leftovers to maintain their deliciousness. Proper storage ensures they taste just as delightful when reheated.
Refrigeration Tips
To store breadsticks in the refrigerator, let them cool completely first. Place them in an airtight container or wrap them tightly in foiling. They can last in the fridge for up to 3 days.
Freezing Guidelines
- Pre-Baking: Shape your dough and apply toppings as usual, then lay them on a baking sheet and freeze until solid. Transfer the frozen breadsticks into a freezer-safe bag. They’re ready to bake when needed.
- Post-Baking: Allow cooked breadsticks to cool completely. Individually wrap them in plastic wrap, then foil, and freeze. Reheat when ready to enjoy.
Reheating Best Practices
When reheating, avoid the microwave as it might make them soggy. Instead, use an oven set at 375°F until warmed through, which revives their crunchy exterior. Your stored breadsticks can deliver that fresh-from-the-oven flavor, ensuring no waste and maximum enjoyment.

Nutritional Value of Cheesy Garlic Breadsticks
Understanding the nutritional content of cheesy garlic breadsticks can help you make informed decisions about your diet. Here’s a breakdown of the main nutrients typically found in a serving of these delectable treats. Given the variety of ingredients, especially if you opt for different cheese types or dough bases, nutritional values can vary.
| Nutrient | Amount per Serving |
|---|---|
| Calories | 200-250 kcal |
| Protein | 6-10 grams |
| Carbohydrates | 20-25 grams |
| Fat | 10-12 grams |
| Fiber | 1-2 grams |
| Sodium | 350-400 mg |
The calories in cheesy garlic breadsticks primarily come from carbohydrates and fats. Opting for whole wheat pizza dough can increase fiber content, aiding digestion and providing a more filling snack. Additionally, selecting a low-fat cheese or reducing the quantity can help decrease the overall fat content.
For those monitoring their sodium intake, keep in mind that ingredients like cheese and garlic powder contribute to the sodium levels. It’s possible to reduce this by choosing low-sodium cheese and seasoning options. Despite these considerations, cheesy garlic breadsticks remain an enticing choice for a quick snack or side dish, striking a balance between taste and nutritional needs.
FAQs: Frequently Asked Questions About Cheesy Garlic Breadsticks
Are you curious about making cheesy garlic breadsticks at home? Here are some common questions that might help:
- What type of cheese is best for cheesy garlic breadsticks?
Mozzarella is popular due to its meltability, but you can experiment with cheddar, provolone, or even a mix for varied flavors. - Can I use store-bought pizza dough to make cheesy garlic breadsticks?
Absolutely! Store-bought pizza dough is a convenient option that works well. It’s a great time-saver and perfect for busy parents or working professionals. - How long does it take for the dough to rise when making cheesy garlic breadsticks?
If you’re using homemade dough, it typically takes 1-2 hours in a warm, draft-free environment. Store-bought dough often comes ready to bake. - What dipping sauces pair well with cheesy garlic breadsticks?
Classic marinara sauce and garlic butter are favorites. However, feel free to get creative with ranch dressing or spicy salsa for a different twist. - Can I make cheesy garlic breadsticks in advance and freeze them?
Yes, you can prepare them ahead and freeze them. Just wrap the breadsticks tightly in foil and store them in a freezer bag. Reheat directly from frozen for convenience.
By exploring these frequently asked questions, you can tackle the nuances of preparing cheesy garlic breadsticks, whether you’re a seasoned home cook or just experimenting with new recipes. Feel free to add your touches to make this recipe uniquely yours!
Print
Cheesy Garlic Breadsticks That Are Easy to Make
- Total Time: 25 minutes
Description
🧄🧀 Crispy on the outside, soft and cheesy on the inside—these homemade Cheesy Garlic Breadsticks are the perfect snack, side, or appetizer ready in just 20 minutes! 🍕🔥
🥖✨ Made with simple ingredients like pizza dough, garlic butter, and melty cheese, they’re easy to customize and taste even better than takeout—dip them in marinara for the ultimate treat! 🍅🧡
Ingredients
Pizza dough (homemade or store-bought)
Butter, melted
Garlic, minced or garlic powder
Mozzarella cheese, shredded
Parmesan cheese, grated
Italian seasoning
Salt
Cornmeal (optional, for extra crispiness)
Marinara sauce or pizza sauce (for dipping)
Instructions
1. Preheat the oven to 425°F (220°C).
2. Roll out the pizza dough into a rectangle or circle on a lightly floured surface.
3. Transfer the rolled-out dough to a greased or parchment-lined baking sheet.
4. In a small bowl, mix melted butter with minced garlic and Italian seasoning.
5. Brush the garlic butter mixture evenly over the surface of the dough.
6. Sprinkle shredded mozzarella and grated Parmesan cheese evenly on top.
7. Optionally, add more herbs or seasonings like garlic powder for extra flavor.
8. Use a pizza cutter or knife to lightly score the dough into strips for easy serving.
9. Bake in the preheated oven for 10-15 minutes or until the cheese is melted and bubbly.
10. Remove from the oven and let cool for a few minutes.
11. Cut along the scored lines into breadsticks.
12. Serve warm with marinara or pizza sauce for dipping.
13. Store leftovers in an airtight container in the refrigerator.
14. Reheat leftover breadsticks in the oven or air fryer for a crispy texture.
15. For extra crispiness, sprinkle cornmeal on the baking sheet before placing the dough.
16. To make ahead, assemble the breadsticks and freeze before baking.
17. Enjoy as an appetizer, side dish, or snack!
Notes
Brushing the dough with garlic butter before adding cheese gives the breadsticks a rich and flavorful taste.
Cutting the dough into strips before baking makes serving easier and helps each piece bake evenly.
Sprinkling cornmeal on the baking sheet adds a slight crunch to the bottom of the breadsticks.
- Prep Time: 10
- Cook Time: 15
- Category: Appetizer
- Method: Baking
- Cuisine: Italian